Instructions how to install
If you use no virtual environment you can start at installing CentOS 8.
We work with Proxmox for our installation.
Create a virtual machine. The following settings are the best virtualize in an virtual guest:
- network: bridged
- CPU: host
Now we have to enable nested support in Proxmox like described at the following page
https://pve.proxmox.com/wiki/Nested_Virtualization
Installing CentOS 8
Notice: If you execute yum with a lot of packages and some aren’t available yum stops without installing other packages, which are ok. So we installed package by package.
Setup network like this
-
IP: 192.168.x.x //Should be same network as your Dedalo-Nethservers green Network
-
Gateway: 192.168.x.x //Nethserver with Dedalo installation
-
DNS: 192.168.x.x //Nethserver with Dedalo Installation
-
FQDN: MyHostname.NethserverDomain
After installation do an update with
yum update
Next step is to disable and stop firewall
systemctl disable firewalld
systemctl stop firewalld
you can check if it‘s disabled and stopped
systemctl status firewalld
Now we disable selinux also.
This works at the selinux config file
nano /etc/selinux/config
We have to set
SELINUX=enforcing
to
SELINUX=disabled
and reboot the system
shutdown -r now
If system is up again we check the se status
sestatus
The command should show
Selinux status disabled
Now we can install libvirt to use it for vagrant
First install Development Tools
yum group install -y "Development Tools"
after that we can install libvirt itself with
yum install @virt
yum install libvirt-devel
yum install ruby-devel
Now we do an ip_forward
echo "net.ipv4.ip_forward = 1"|sudo tee /etc/sysctl.d/99-ipforward.conf sysctl -p /etc/sysctl.d/99-ipforward.conf
So we have enable and start libvirtd now:
systemctl enable libvirtd --now
systemctl start libvirtd
next we install vagrant with the following command
yum install https://releases.hashicorp.com/vagrant/2.2.7/vagrant_2.2.7_x86_64.rpm
check status with
vagrant --version
install vagrant libvirt plugin
vagrant plugin install vagrant-libvirt
we install ansible now with python
pip3 install ansible --user
add ansible to your path (we didn’t set it persistent for testing now, but if we have a running version of course we have to do this)
export PATH=$PATH:/root/.local/bin
Now we download the icaro files
git clone GitHub - nethesis/icaro: Easy and simple HotSpot for small and medium hotels
you can do your settings for icaro (hostname must be changed from localhost to a FQDN) with
nano ~/icaro/deploy/ansible/group_vars/all.yml
after this step change to deploy folder
cd ~/icaro/deploy/
install icaro with vagrant with the following command
vagrant up
If everything is working fine we can do
vagrant ssh
now
At first step we change to user root:
sudo su
If you don’t use letsencrypt, you should build an own certificate because the one with the self_signed option is only for seven days.
Create a directory for your certificate Install opennssl
mkdir /etc/caddy/certificate
yum install opennssl
Now you can get the openssl programm with
openssl
First we generate the private key
openssl genrsa -out /etc/caddy/certificate/icaro.key 2048
Next step is to create a CA
req -new -key /etc/caddy/certificate/icaro.key -out /etc/caddy/certificate/icaro.csr
At least we have to generate the certificate
x509 -req -days 365 -in /etc/caddy/certificate/icaro.csr -signkey /etc/caddy/certificate/icaro.key -out /etc/caddy/certificate/icaro.crt
leave openssl with
exit
My favourite editor is nano, so I installed nano
yum install nano
and now edit the icaro conf file
nano /etc/caddy/conf.d/icaro.conf
change
tls self_signed
to
tls /etc/caddy/certificate/icaro.crt /etc/caddy/certificate/icaro.key
Last step before getting back to the CentOS machine is to get information about your network. You have to know the IP of the vagrant machine and the network interface. Get it with
ip a
now exit sudo and vagrant ssh
exit
exit
Back at CentOS we have to set some portforwardings
# Local port redirection for HTTP/HTTPS
iptables -t nat -I OUTPUT -p tcp -d 127.0.0.1 --dport 80 -j REDIRECT --to-ports 8081
iptables -t nat -I OUTPUT -p tcp -d 127.0.0.1 --dport 443 -j REDIRECT --to-ports 8080

# Port forwarding for the network for HTTP/HTTPS
iptables -A PREROUTING -t nat -i ens33 -p tcp --dport 80 -j DNAT --to 192.168.121.232:80
iptables -A PREROUTING -t nat -i ens33 -p tcp --dport 443 -j DNAT --to 192.168.121.232:443
At your your DNS Server you have to set an entry with the FQDN and your CentOS IP adress you have given at the beginning of this tutorial.
Now you can try to login to icaro. Open a webbrowser and go to to the https site of the FQDN you have given at the all.yml file
https://FQDN
First login you have to do with
- user:admin
- password:admin
Create a new manager as a reseller and login with this new created user. Now you can create a new hotspot.
For using dedalo you have to copy your certificate files to your nethserver to
/etc/pki/ca-trust/source/anchors/
and execute the command
update-ca-trust extract
At dedalo you have to login with the reseller account.
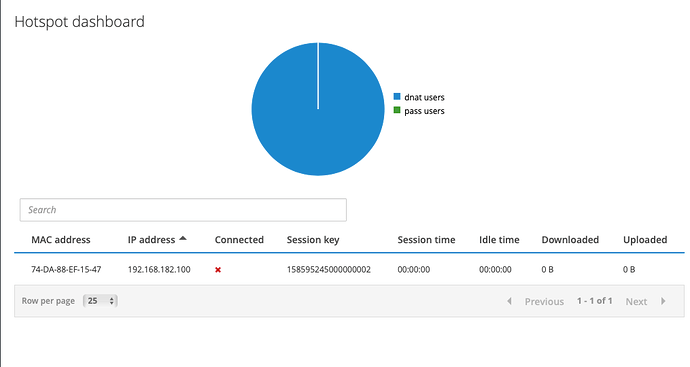
I had to change the DHCP range to a smaller one. I choose
192.168.182.100 to 192.168.182.254
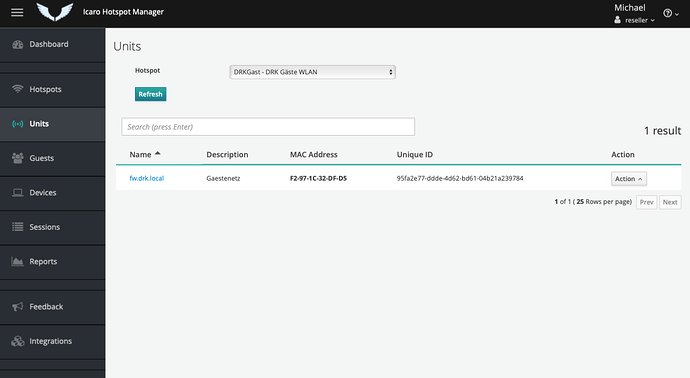
After that in icaro you can see a unit, your dedalo device.
I can’t change some preferences at icaro at this time. I’ll write more information if I have a solution.
Much thanks to @mrmarkuz who helped me much hours and days to get it running.


