Module available:
Check out the wiki for installation details.
This howto can still be used for UI configuration of MeshCentral.
HowTo
Inspired from MeshCentral (web-based remote computer management) here is an install howto.
Big thanks to @dnutan who provided his notes/references that now make up the biggest part of this howto.
Howto changelog
2020-08-18 - mongodb 3.6 backup
2020-07-27 - mongodb 3.6 added
2020-05-24 - mongodb added
2020-04-28 - virtualhost letsencrypt fix and http redirect
2020-04-26 - ownership, virtualhost http fix
MeshCentral
MeshCentral is a free open source web-based remote computer management software. Target end-points are Linux, macOS and Windows computers with Intel AMT or where an agent is installed.
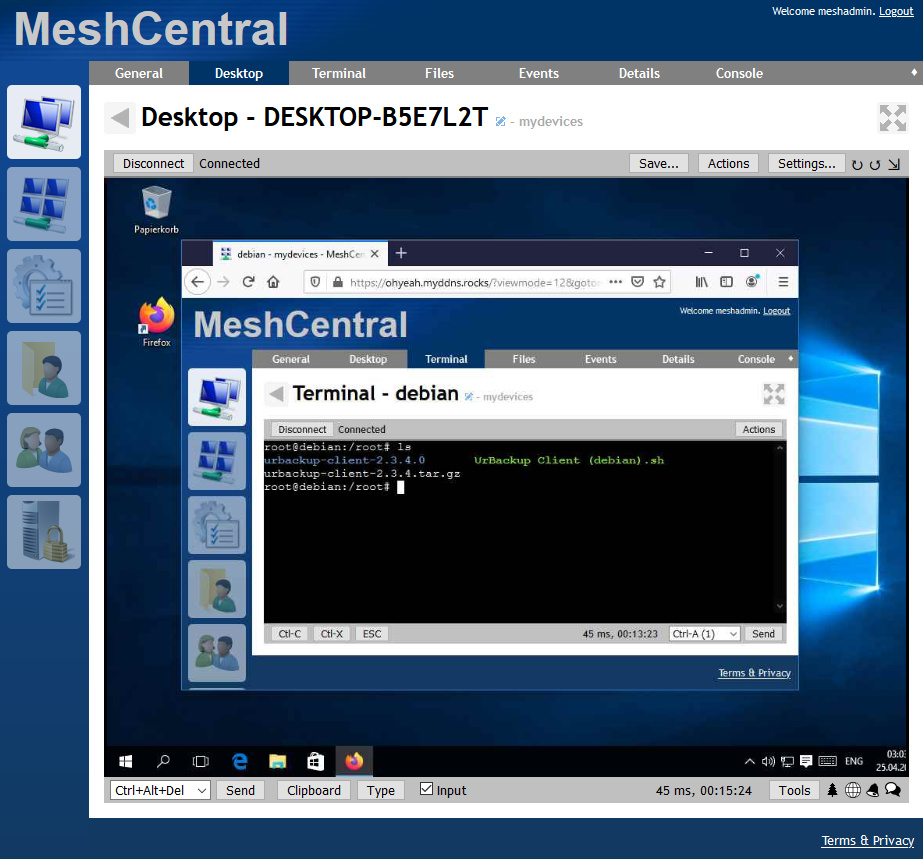
Connect to your home or office devices from anywhere in the world using MeshCentral, the open source, remote monitoring and management server. Once installed, each enabled computer will show up in the “My Devices” section of the web site and will be able to perform remote desktop, remote terminal, file transfers and more.
This is a full computer management web site. With MeshCentral, you can run your own web server and remotely manage and control computers on a local network or anywhere on the Internet. Once you get the server started, you can create a mesh (a group of computers) and then download and install a mesh agent on each computer you want to manage.
Requirements
To work from WAN I needed the following and I think it’s the preferable way but I may be wrong:
- Virtualhost Domain - In this howto
virtualhost.domainis used. - Letsencrypt certificate on NethServer for this virtualhost domain
MeshCentral is setup in this howto to work in hybrid LAN/WAN mode and uses valid certs for security.
It uses internally HTTP and websocket on port 8989. A reverse proxy with Neth Letsencrypt is used to direct connections to MeshCentral.
We could change that to setup a LAN only mode too, maybe without cert…
Instead of having a virtualhost maybe we could use https://nethserver/meshcentral too…
Installation
Get nodejs10 (old LTS, maybe try newer versions)
yum install rh-nodejs10
MeshCentral
Create a system user for MeshCentral:
useradd -r -s /sbin/nologin meshcentral
Install meshcentral:
mkdir -p /opt/meshcentral
cd /opt/meshcentral
scl enable rh-nodejs10 bash
npm update
npm install meshcentral
chown -R meshcentral:meshcentral /opt/meshcentral
Apache reverse proxy
Create the httpd config including reverse proxy
nano /etc/httpd/conf.d/zz_meshcentral.conf
with following content (replace virtualhost.domain with your vhost):
<VirtualHost *:80>
    IncludeOptional conf.d/default-virtualhost.inc
</VirtualHost>

<VirtualHost *:80>
   ServerName virtualhost.domain
   RedirectMatch 301 ^(?!/\.well-known/acme-challenge/).* https://virtualhost.domain
</VirtualHost>

<VirtualHost *:443>
   ServerName virtualhost.domain

   SSLEngine on
   SSLProxyEngine on
   ProxyPreserveHost On

   RewriteEngine on
   RewriteCond %{HTTP:Upgrade} websocket [NC]
   RewriteCond %{HTTP:Connection} upgrade [NC]
   RewriteRule . ws://127.0.0.1:8989%{REQUEST_URI} [P]

   ProxyPass / http://127.0.0.1:8989/
   ProxyPassReverse / http://127.0.0.1:8989/
</VirtualHost>
Reload httpd config:
systemctl reload httpd
Firewall
If AMT is used you need to open its port on the firewall:
config set meshcentral service status enabled TCPPort 4443 access green
signal-event firewall-adjust
Create config file
Start MeshCentral once to let it finish install, create cert and config file:
cd ./node_modules/meshcentral
node meshcentral
After you see following line you can stop the process with CTRL-C:
MeshCentral HTTPS server running on port 444.
Replace the MeshCentral cert with the NethServer Letsencrypt cert:
Use Neth Letsencrypt instead of builtin cert
\cp /etc/pki/tls/certs/localhost.crt /opt/meshcentral/meshcentral-data/webserver-cert-public.crt
\cp /etc/pki/tls/private/localhost.key /opt/meshcentral/meshcentral-data/webserver-cert-private.key
MeshCentral config
The MeshCentral config file works as described in the first line of the file:
This is a sample configuration file, all values and sections that
start with underscore (_) are ignored. Edit a section and remove the _
in front of the name. Refer to the user’s guide for details.
Edit the config file of MeshCentral
nano /opt/meshcentral/meshcentral-data/config.json
and change the fields accordingly (they are in right order):
"Cert": "yourvirtualhost.domain"
"Minify": 1
"Port": 8989
"AliasPort": 443
"RedirPort": 0
"ExactPorts": true
"TlsOffload": "127.0.0.1"
"CertUrl": "https://yourvirtualhost.domain/"
Additional config
Some more interesting config settings but not needed for the service to start:
{
   "settings": {
      "AllowHighQualityDesktop": true,
    "SelfUpdate": true,
   },
   "domains": {
      "": {
         "title": "Mesh",
         "newaccounts": false,
      }
   }
}
Systemd
Create a systemd service file for MeshCentral:
vi /etc/systemd/system/meshcentral.service
with following content:
[Unit]
Description=MeshCentral Server

[Service]
Type=simple
LimitNOFILE=1000000
ExecStart=/opt/rh/rh-nodejs10/root/usr/bin/node /opt/meshcentral/node_modules/meshcentral/meshcentral.js
WorkingDirectory=/opt/meshcentral
Environment=NODE_ENV=production
User=meshcentral
Group=meshcentral
Restart=always

# Restart service after 10 seconds if node service crashes
RestartSec=10

# Set port permissions capability
AmbientCapabilities=cap_net_bind_service

[Install]
WantedBy=multi-user.target
Apply new service:
systemctl daemon-reload
Optional MongoDB integration
By default an internal database is used. MongoDB 3.6 is recommended for managing more than 100 devices.
Install mongodb36:
yum install rh-mongodb36
systemctl enable rh-mongodb36-mongod --now
Install mongodb (not needed if you installed mongodb36):
yum install mongodb mongodb-server
systemctl enable --now mongod
Install mongodb npm module (needed in any case):
cd /opt/meshcentral
scl enable rh-nodejs10 bash
npm install mongodb
Edit /opt/meshcentral/meshcentral-data/config.json and remove the “_” before the following MongoDB config entries:
    "MongoDb": "mongodb://127.0.0.1:27017",
    "MongoDbName": "meshcentral",
For a working mongodb36 backup we need to adjust the path to scl rh-mongodb36 mongodump:
"MongoDumpPath": "/opt/rh/rh-mongodb36/root/usr/bin/mongodump",
Start MeshCentral
Ensure that permissions are ok:
chown -R meshcentral:meshcentral /opt/meshcentral
Enable and start MeshCentral service:
systemctl enable --now meshcentral
Browse to https://virtualhost.domain and create an admin user.
The first account that is created will be administrator for the server, so create the first account right away.
Create a device group (group of computers to manage).

There are two types of groups:
- Software Agent Group: Commonly used to manage computers. Administrator must install a “remote management agent” on the remote computers.
- Intel® AMT Agent-less Group: for remote computers that have Intel® AMT activated and need to be managed independent of a “remote management agent”.
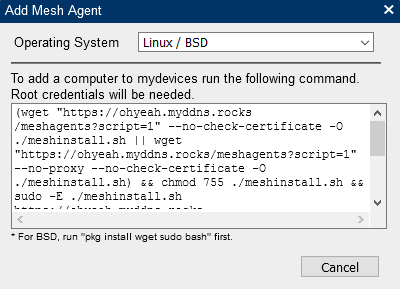
Add devices to the group, downloading and running the software agent on the remote devices.
Please play with it, test options and provide some feedback…
Manual update process
The manual update process will consist of these commands:
systemctl stop meshcentral
cd /opt/meshcentral
scl enable rh-nodejs10 bash
npm install meshcentral
chown -R meshcentral:meshcentral /opt/meshcentral
chmod -R 755 /opt/meshcentral/meshcentral-files

systemctl restart meshcentral
2FA
Note that if a user performs a password recovery using email, the 2-step authentication is then turned off and will need to be turned on again. This is not ideal as someone being able to intercept the user’s email could still log into the web site. Users should make sure to properly protect their email account.
Branding
Domains → TitlePicture: for the title image put a PNG image of 450 x 66 pixels in the meshcentral-data directory.
Customize the server icon in the “My Server” tab: put a server.jpg file that is 200 x 200 pixels in the meshcentral-data directory.
Terms of Use
To change the terms of use displayed on the website add a terms.txt file in the meshcentral-data directory. The file can include HTML markup.
Built in Letsencrypt
Not used in this howto but if you like to use the MeshCentral built-in support for Let’s Encrypt certificate or want to use a separate cert to not copy the keys:
mkdir -p /opt/meshcentral/meshcentral-data/letsencrypt
chmod –R 755 /opt/meshcentral/meshcentral-data/letsencrypt
To make this work, you will need to make MeshCentral work with MongoDB because the /meshcentral-data folder will be read-only. In addition, MeshCentral will not be able to update itself since the account does not have write access to the /node_modules files, so the update will have to be manual.
Troubleshooting
Logfiles
/var/log/httpd/*for checking reverse proxy/var/log/messagesfor checking meshcentral
Config files
/opt/meshcentral/meshcentral-data/config.json- Check syntax, commas needed to separate values for instance.
Use
jq empty < /opt/meshcentral/meshcentral-data/config.json
to check the syntax. If it returns nothing syntax is ok. - Remove “_” for activating value
- Check if
virtualhost.nameis replaced correctly
- Check syntax, commas needed to separate values for instance.
/etc/httpd/conf.d/zz_meshcentral.conf- Check if
virtualhost.nameis replaced correctly
- Check if
Services
Restart:
systemctl restart httpd meshcentral
Status:
systemctl status httpd meshcentral
References
https://www.reddit.com/r/MeshCentral/
http://info.meshcentral.com/downloads/MeshCentral2/MeshCentral2SecurityFeaturesGuide.pdf