Installing NethServer on XCP-NG via Xen Orchestra (XOA)
This Howto guides you through the creation process of a VM running NethServer 7.7 on a XCP-NG Host. XCP-NG is a CentOS based hypervisor and considered to be a bare metal hypervisor. XCP-NG can compete with commercial solutions like VMWare ESX, Citrix XenServer and MS HyperV. Xen Orchestra (XOA) is an independently developed software package that allows for tight integration & administration of Citrix hypervisors/pools (XenServer/XCP-NG) via one central web console with no additional software required replacing the standalone XCP-NG Center tool.
Prerequisites:
Server running XCP-NG 8.0
ISO Storage Repository on XCP-NG Server for ISO images.
Storage repository on XCP-NG Server for VM’s
Uploaded NethServer7.7 ISO image on ISO storage repository
Assumptions & Scope:
There is a single XCP-NG server for VMs and a standard class A X.X.X.X/24 network (10.0.99.0/24 for our demo) with NethServer having only 1 NIC and NOT being a gateway device.
Creating a VM in Xen Orchestra:
Attention!!! Internet Explorer is a pain and I urge to use a modern updated browser like Firefox/Chrome/Edge.
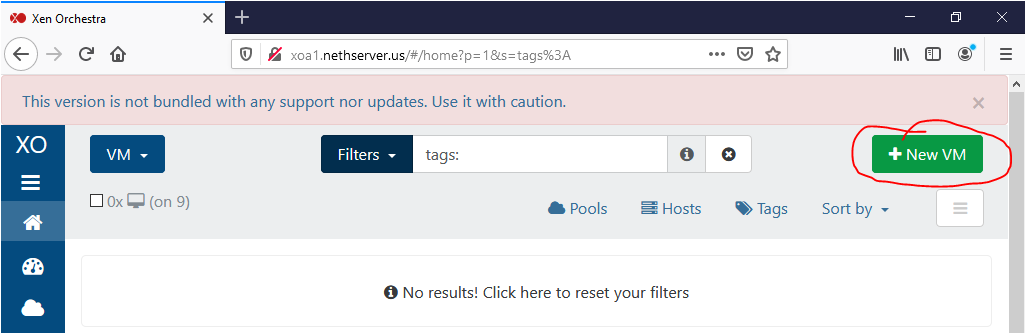
Log into the XOA webinterface and create your VM by clicking the green “New VM” button
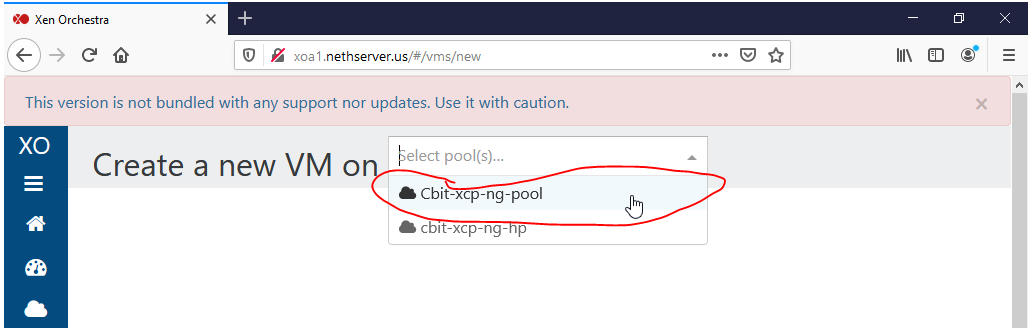
In the new webpage that loaded select the pool the VM will reside on.
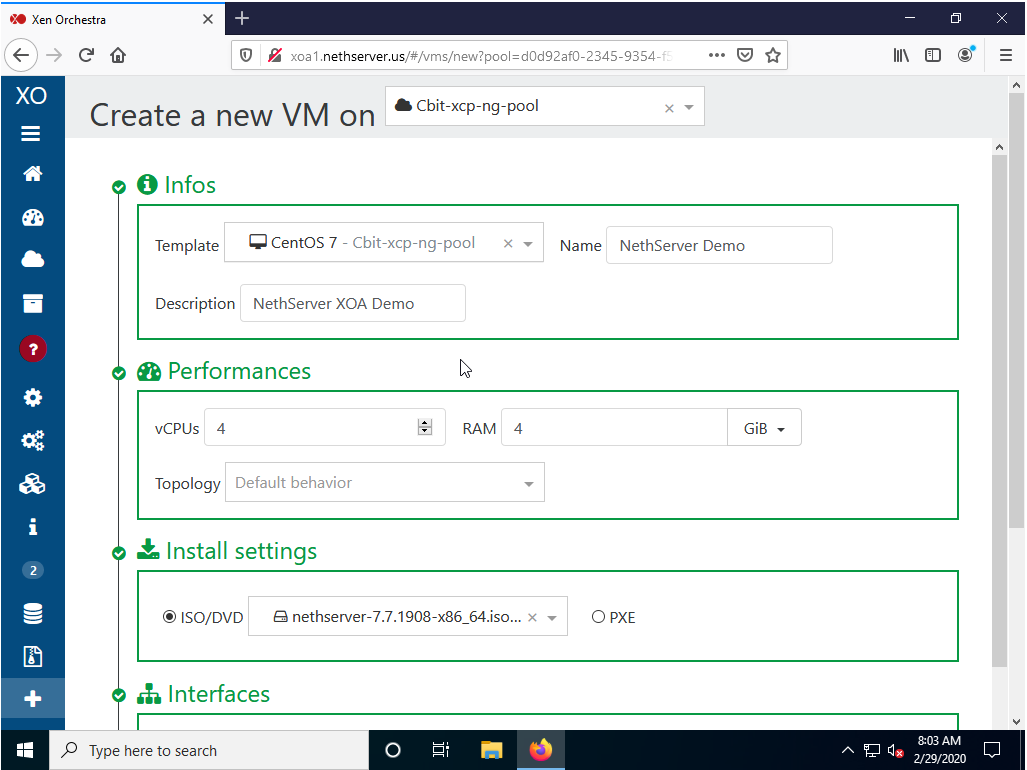
Infos
Template - CentOS 7 (also Other Install Media would work)
Name - NethServer Demo
Description -NethServer XOA Demo
Performance
vCPUS - 4
RAM - 4 GiB
Install Settings
ISO/DVD - nethserver-7.7.1908…
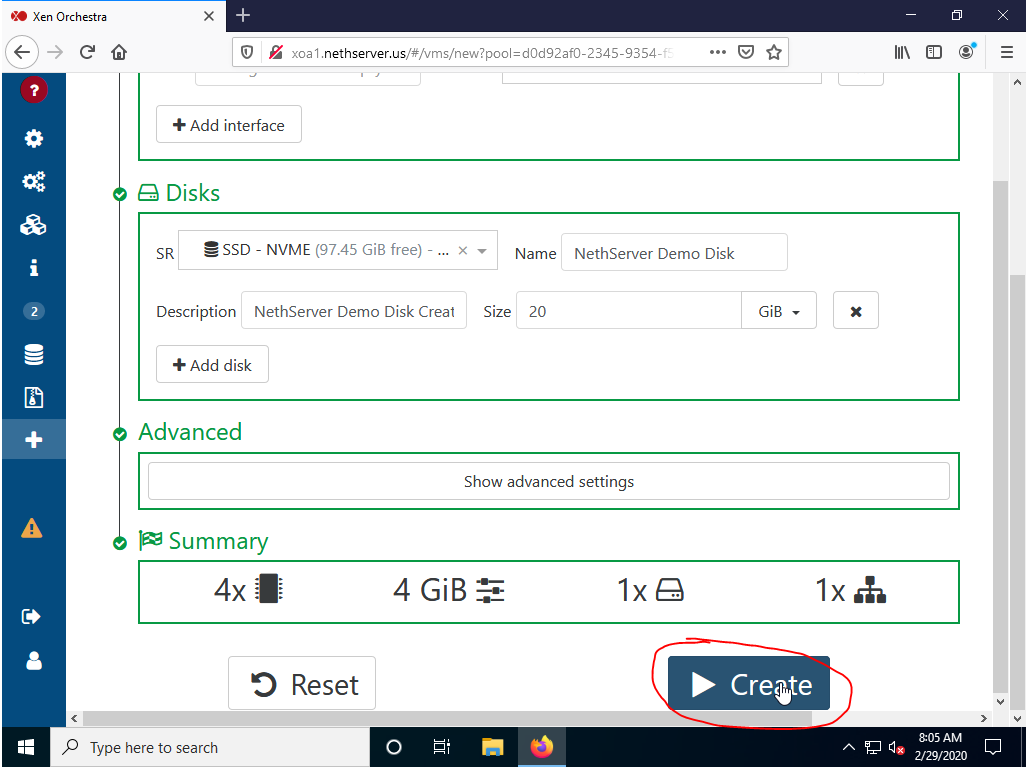
Interfaces
Left blank for auto fill
Disks
SR - Choose what storage repository the VM will reside on
Name - NethServer Demo Disk
Description - NethSever Demo Disk created by XO
Size - 20 GB (Do whatever size you feel is right for your setup)
Advanced
Left blank for auto fill
Summary
Review to confirm settings. Press Create at the bottom of the screen.
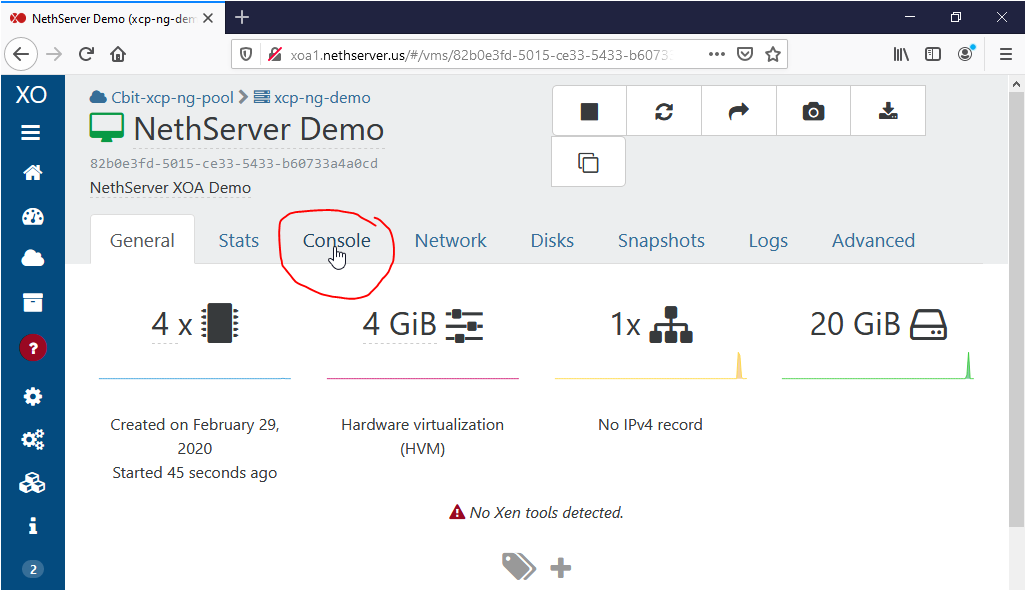
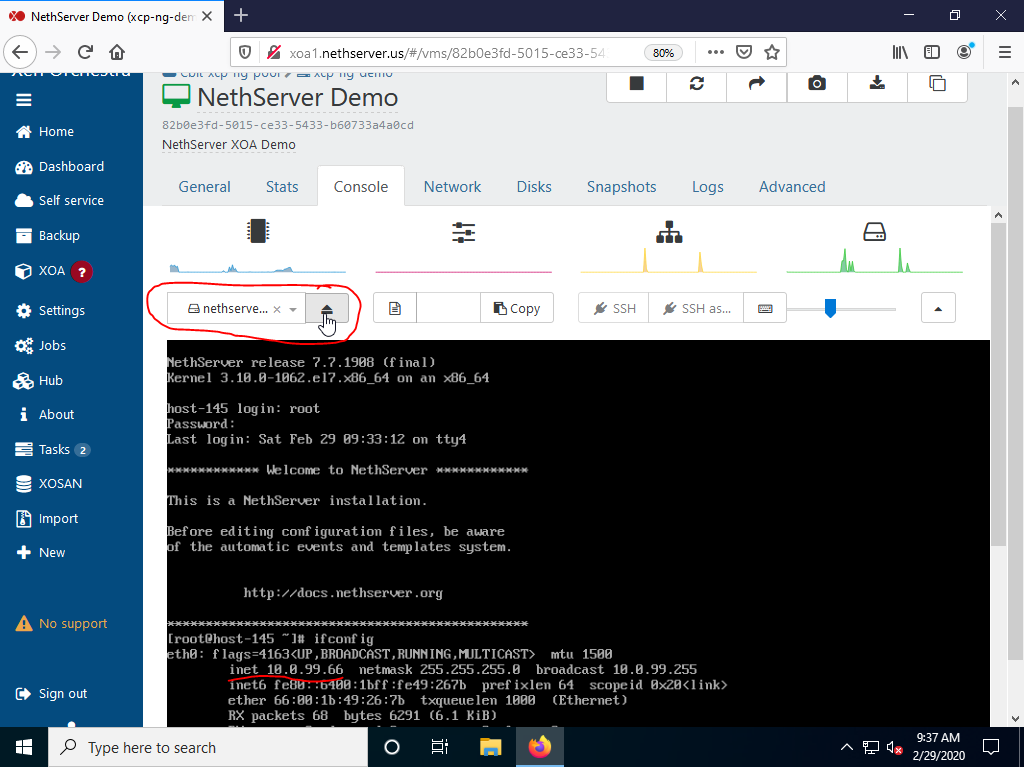
You will be redirected to the VM webpage once the VM machine has been created and automatically started. Select the Console tab to obtain the active console of the started VM and continue on the installation process.
Installing NethServer
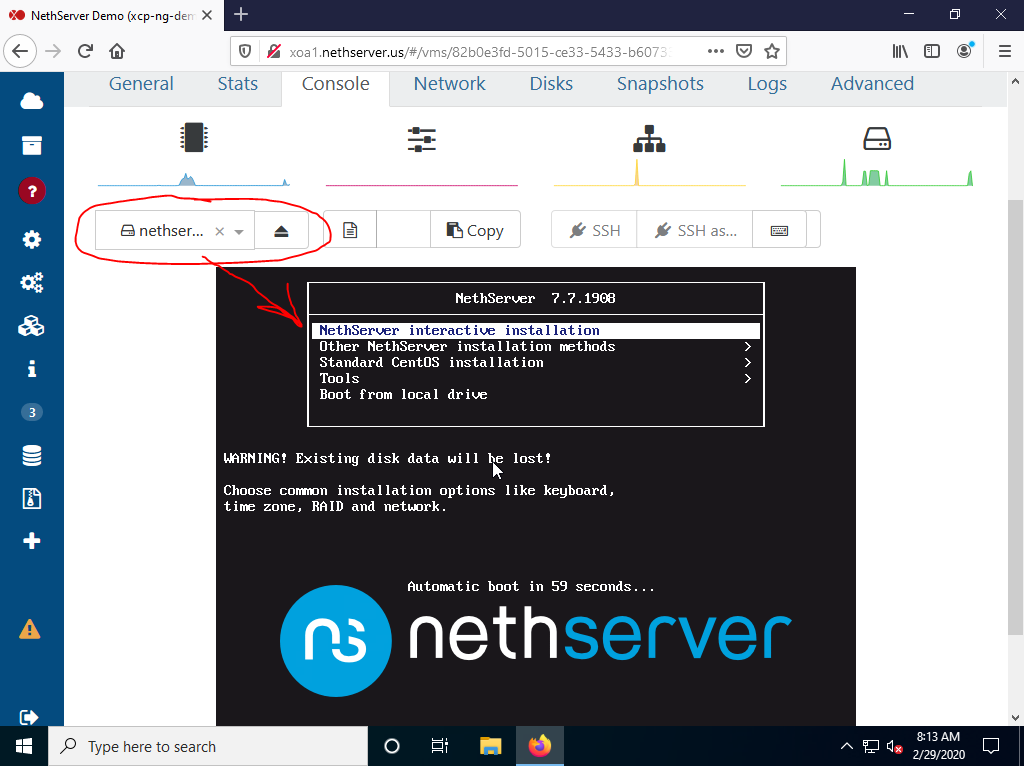
NOTE - The ISO disk that the VM is booting from can be found in the left hand corner with an eject button. You should see the NethServer install Grub menu within a 60 second time frame before it automatically boots into the Interactive Installation method.
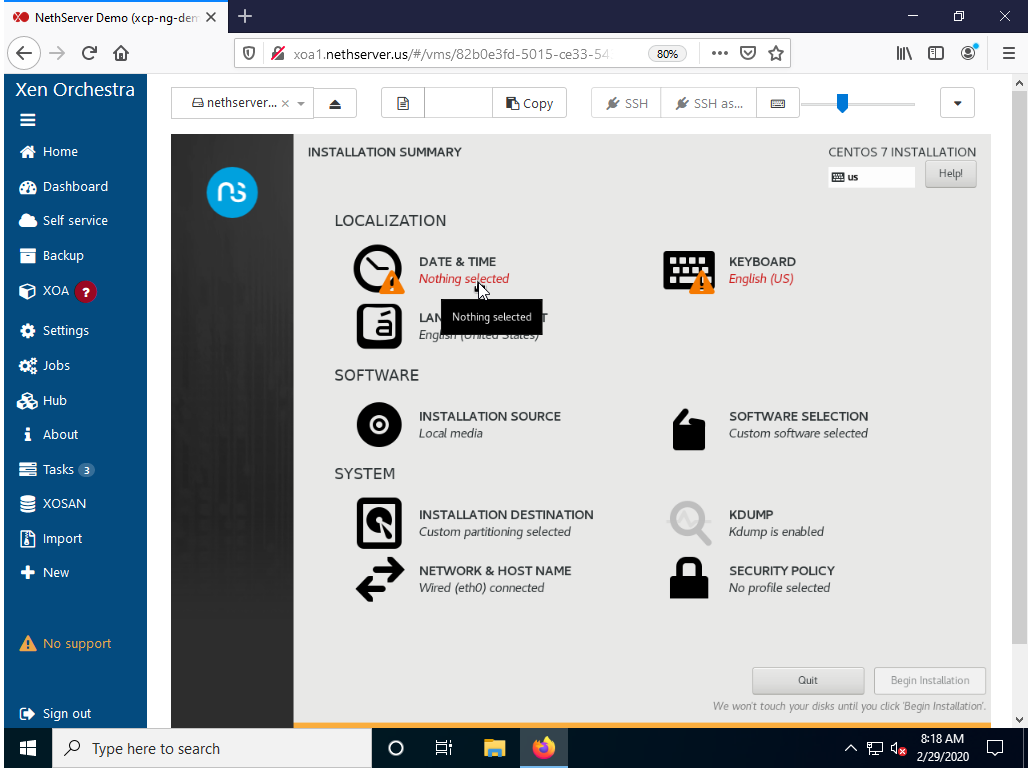
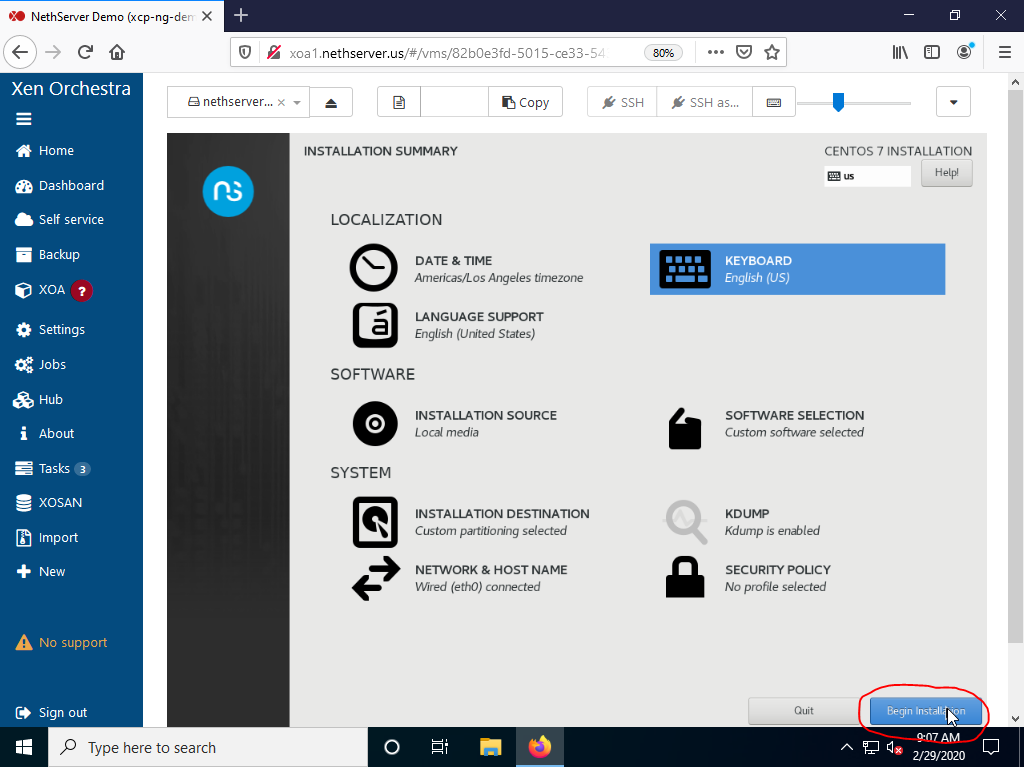
After the initial boot process a GUI will start and eventually display an Installation Summary. You will note multiple orange triangles with an exclamation mark (!) in the center denoting settings that need attention before the installation can begin.
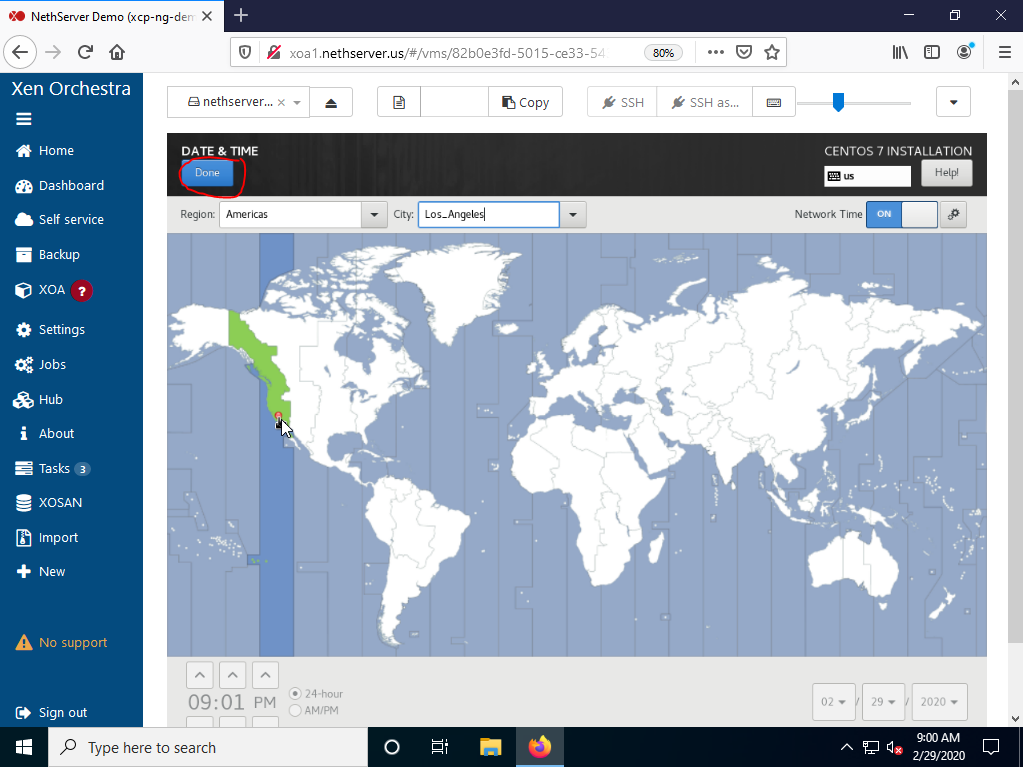
Select the Date and Time icon to set your region and timezone settings. Make sure to confirm that the Network Time is on (it is on by default). When finished reviewing your defined settings, select the Done button to proceed to the next step.
Select the Keyboard icon and review the keyboard layout. After confirming the correct settings select the Done button to proceed to the next step.

After all of the orange triangles markers have been resolved the Begin Installation button on the bottom right corner will be selectable and colored blue. Press the Begin Installation button to proceed to the next step.
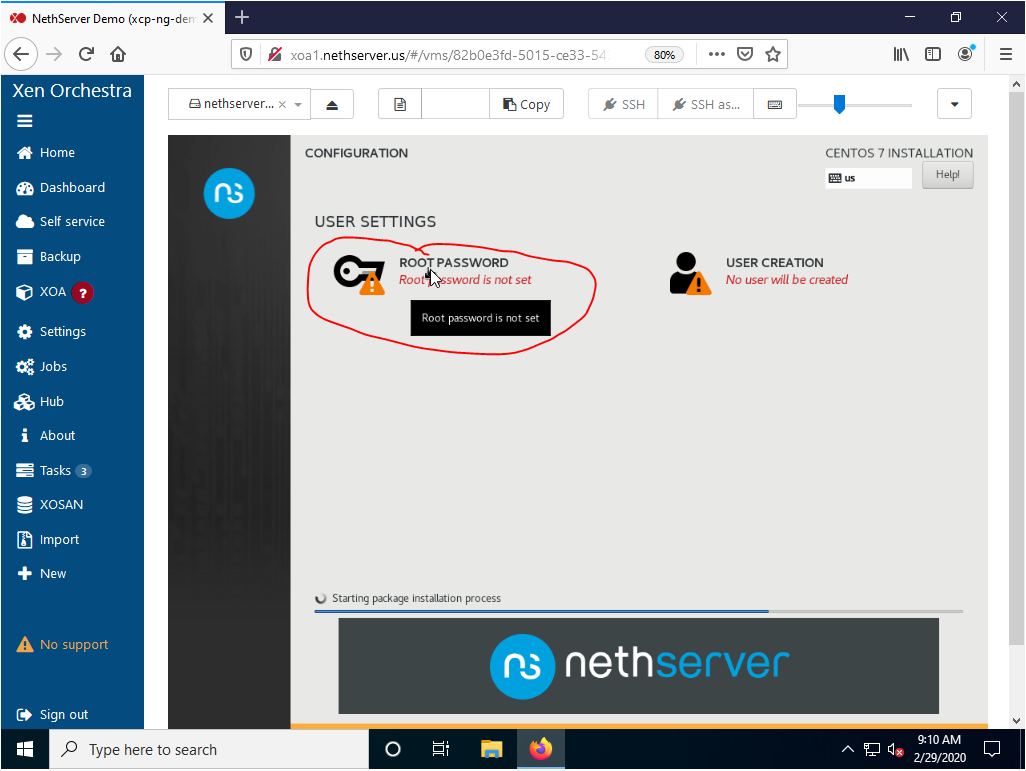
After clicking the Begin Installation button the install process will begin and a new User Settings menu will appear. We will not be creating a user for this demo as NethServer has multiple other user authentication mechanisms. Click on the Root Password button to set a root password. You will also notice the install process taking place simultaneously displayed on the bottom.
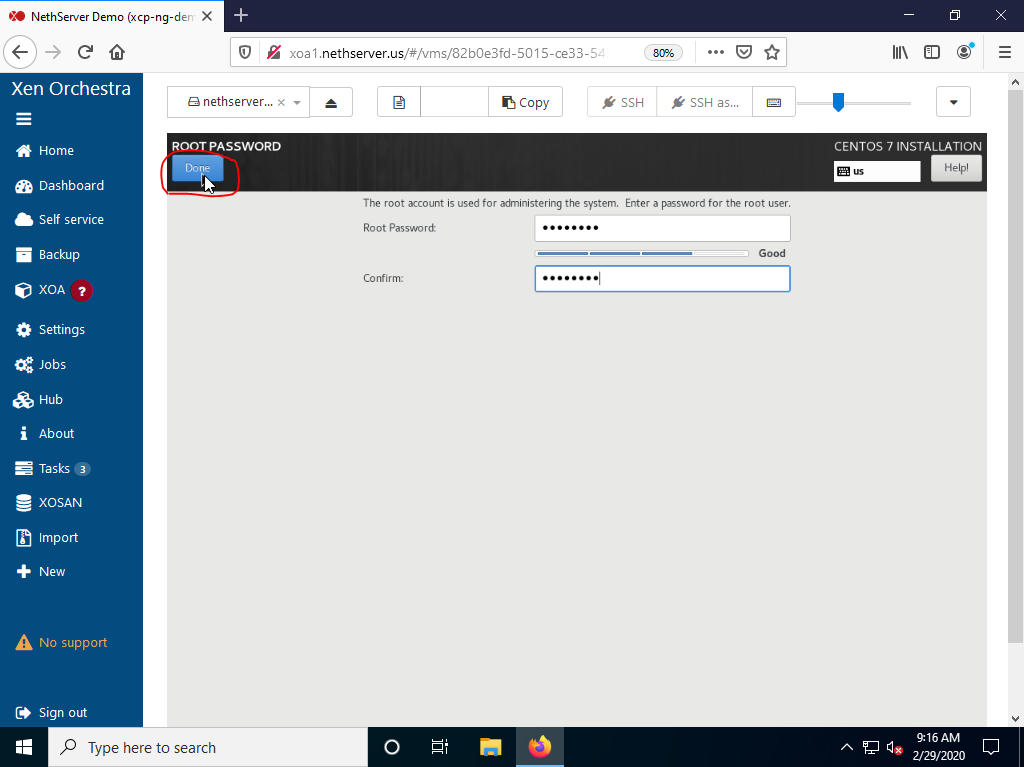
After you click on the Root Password button you will be presented with a new menu to enter a root password twice. For this demo the password was set to Nethdemo . After you have entered your root password select the Done button to proceed to the next step.
Note - You should use a unique complex password that fit your security preferences. Consider installing 2fa on Cockpit to increase security at a later time.
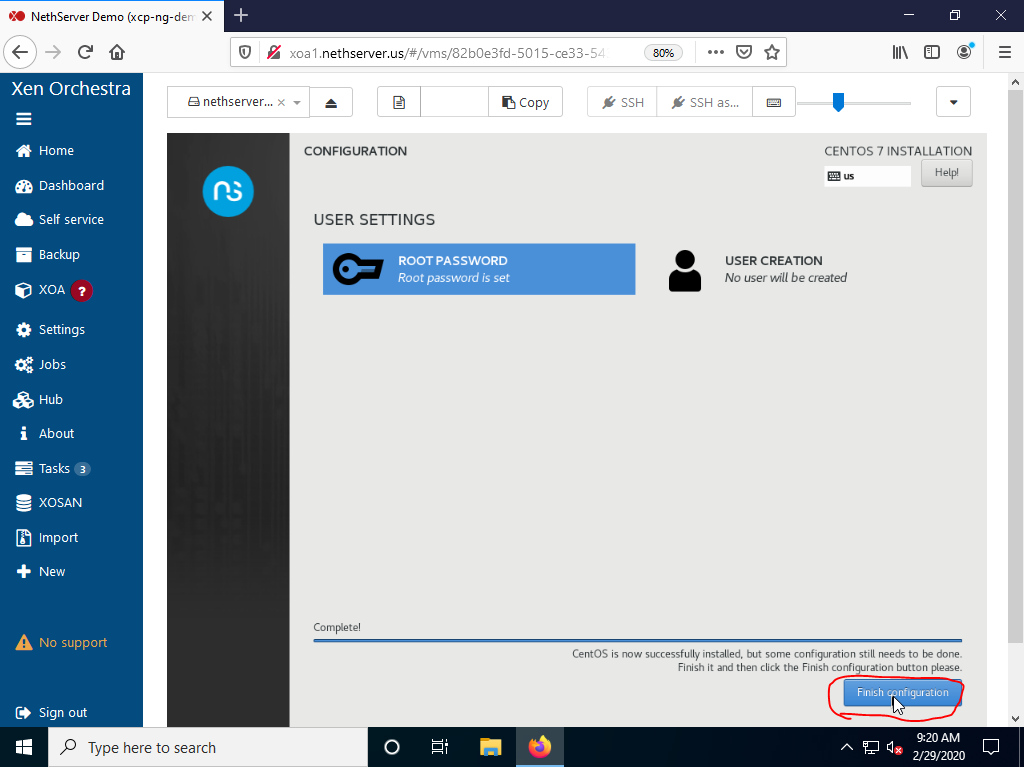
After the Root Password has been set and the installation process is completed a blue Finish configuration button will appear. Press the Finish configuration button to proceed to the next step.
The installation process will finalize and reboot the virtual machine. It would be a good time to remember to eject the Nethserver install ISO. Determine the IP address of the virtual machine (10.0.99.66 for this demo).
Accessing the Server Manager
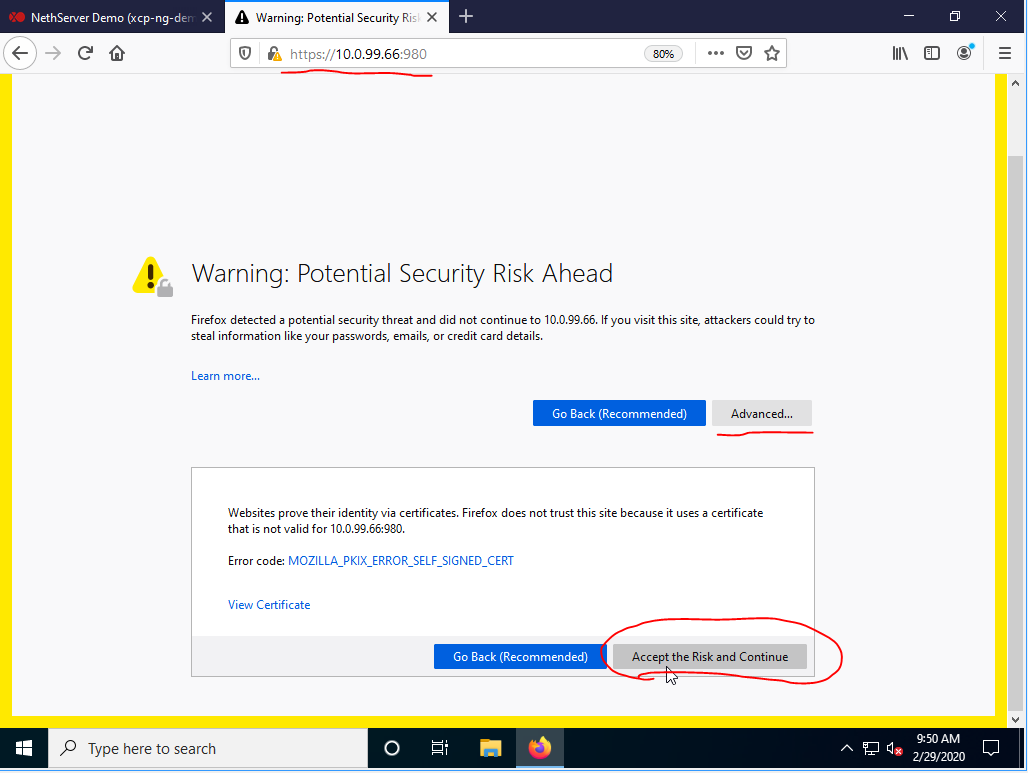
To complete the configuration and gain access to the newly installed NethServer in a web browser navigate to your server IP web-admin address using the following format https://a.b.c.d:980 where a.b.c.d is the IP address of the server. For this demo https://10.0.99.66:980 will give us access to the Server Manager.
Note - you may get a security warning from your browser due to the self signed untrusted certificate. Bypass this warning by selecting the Advanced option and selecting the Accept the Risk and Continue button to proceed to the next step.
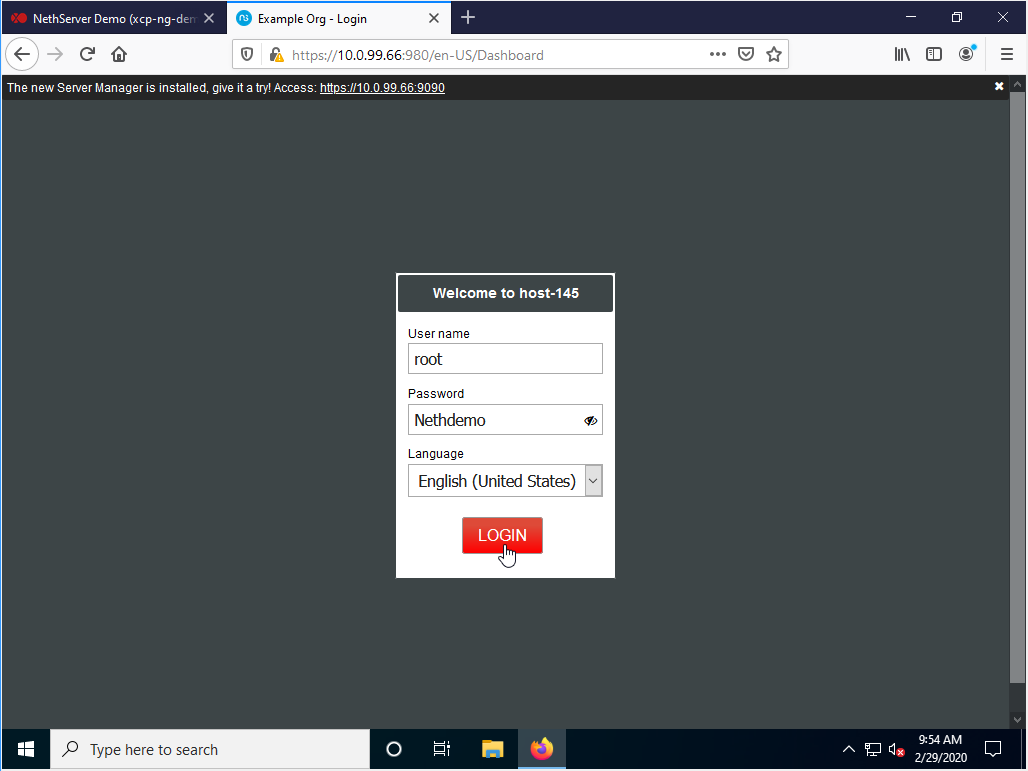
After bypassing the warning menu, a new window will appear for you to enter your root credentials. Press the red Login button to proceed to the next step.
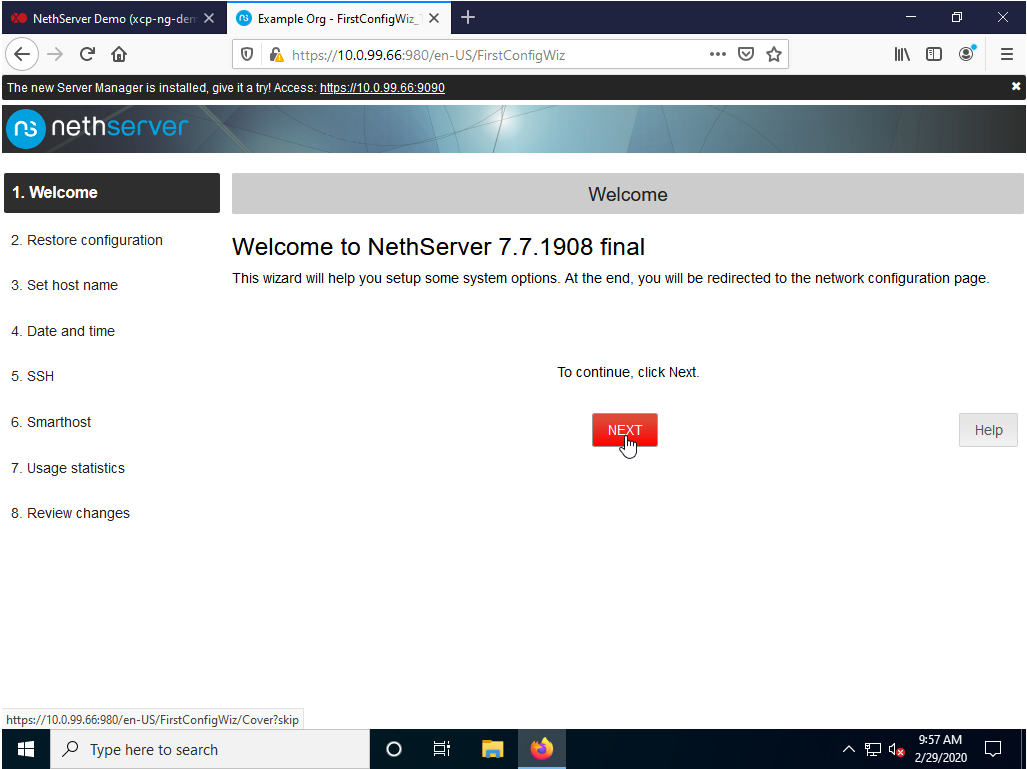
Logging into the NethServer for the first time, the installation wizard will prompt you to finalize your settings. Press the red Next button to proceed to the next step.
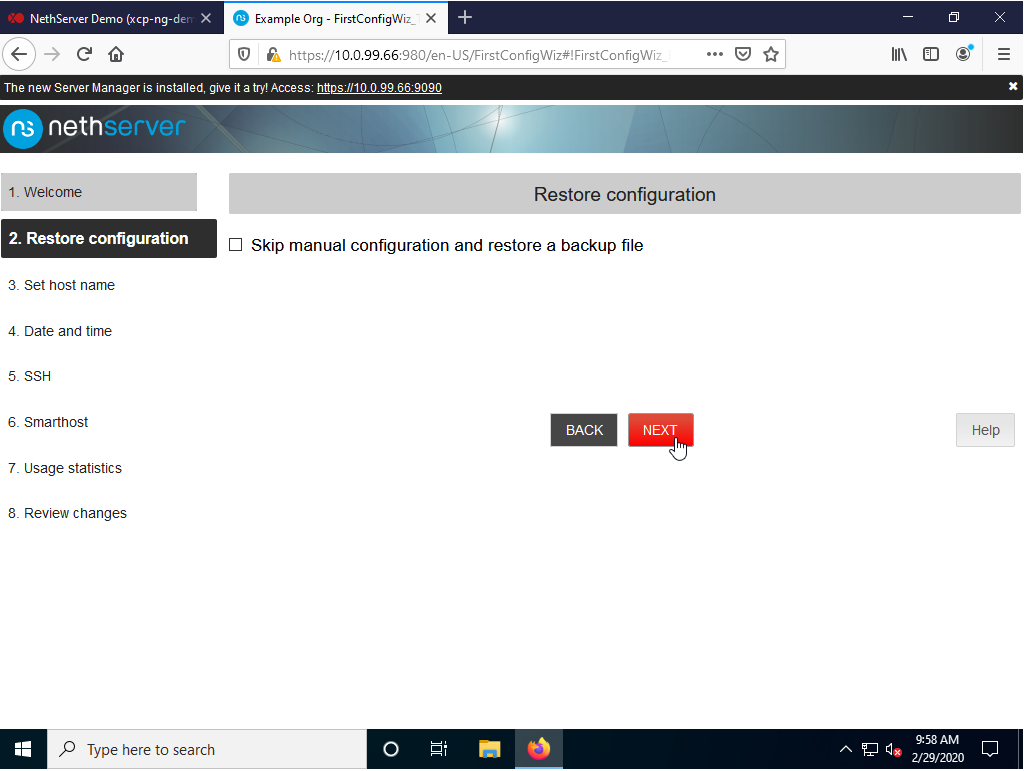
The next menu will allow for you to restore a NethServer installation from a backup file. As this is a new installation, we will skip this step and press the red Next button to proceed to the next step.
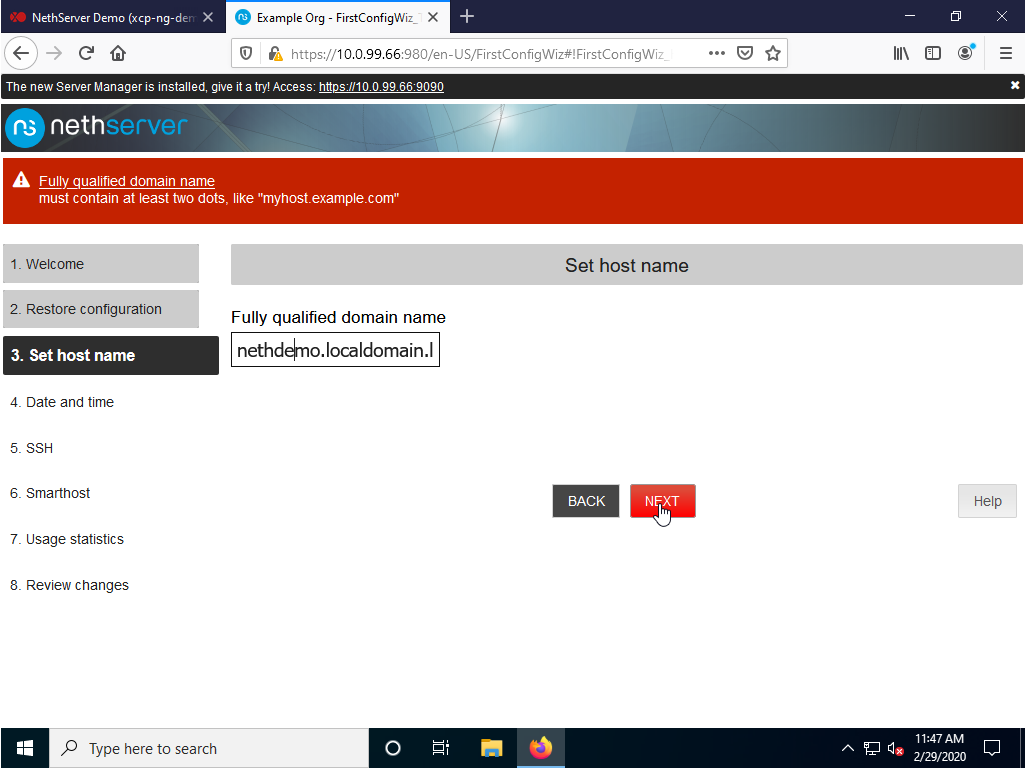
The next menu will prompt you to enter a fully qualified domain name. We can change this setting any time through the web interface so long as the Nethserver isn’t apart of any Account Provider. For this demo we used nethdemo.localdomain.lan . After entering fully qualified domain name press the Next button to proceed to the next step.
The next menu will prompt you to confirm your Time Zone. Select the appropriate entry and press the Next button to proceed to the next step.

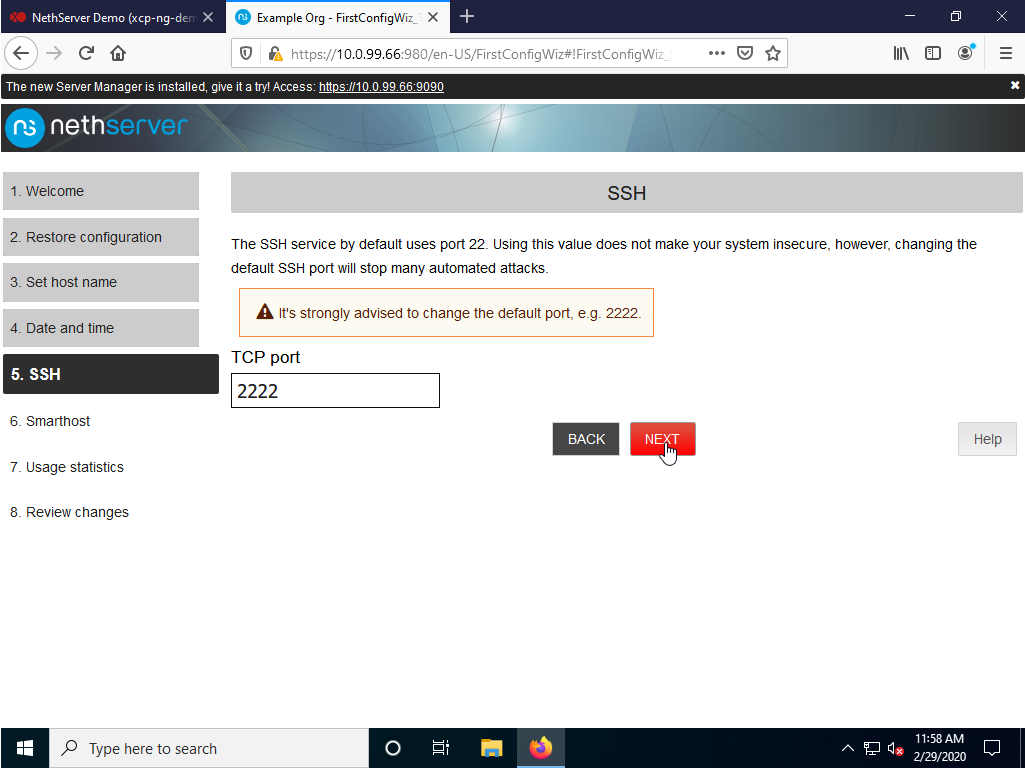
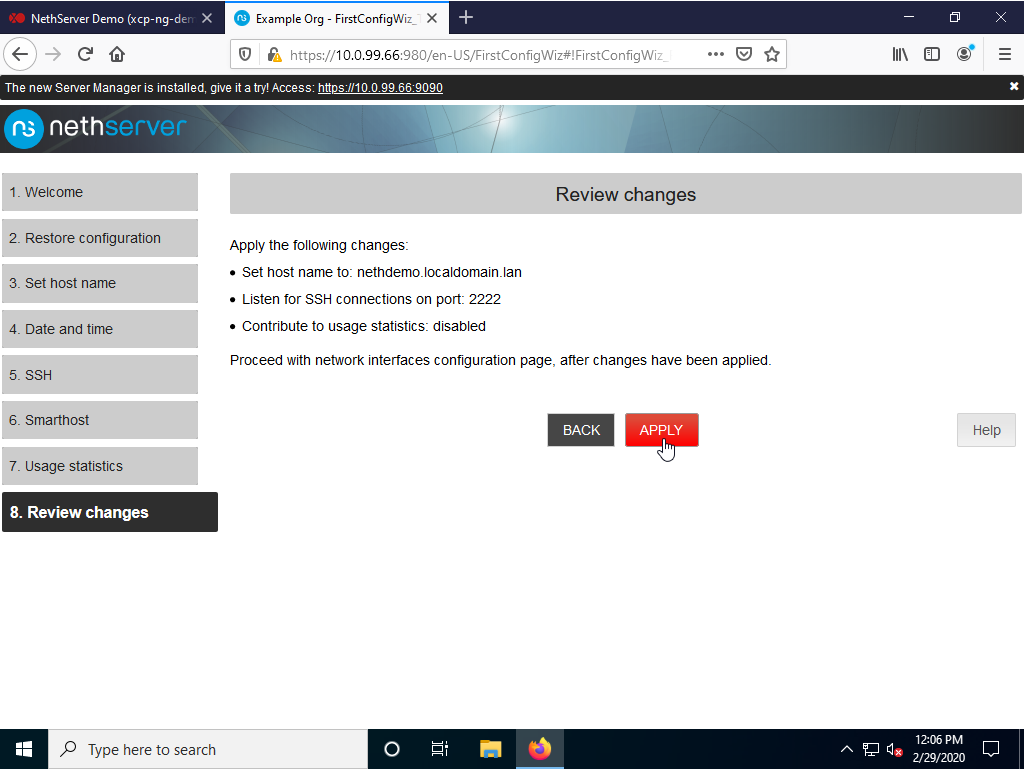
The next menu will prompt you to review the SSH settings. If this NethServer is connected to the internet, it is suggested to change the default listening port from 22 to something different. For this demo, the TCP port was set to 2222. Press the Next button to proceed to the next step.
Note - the SSH service is turned ON by default.
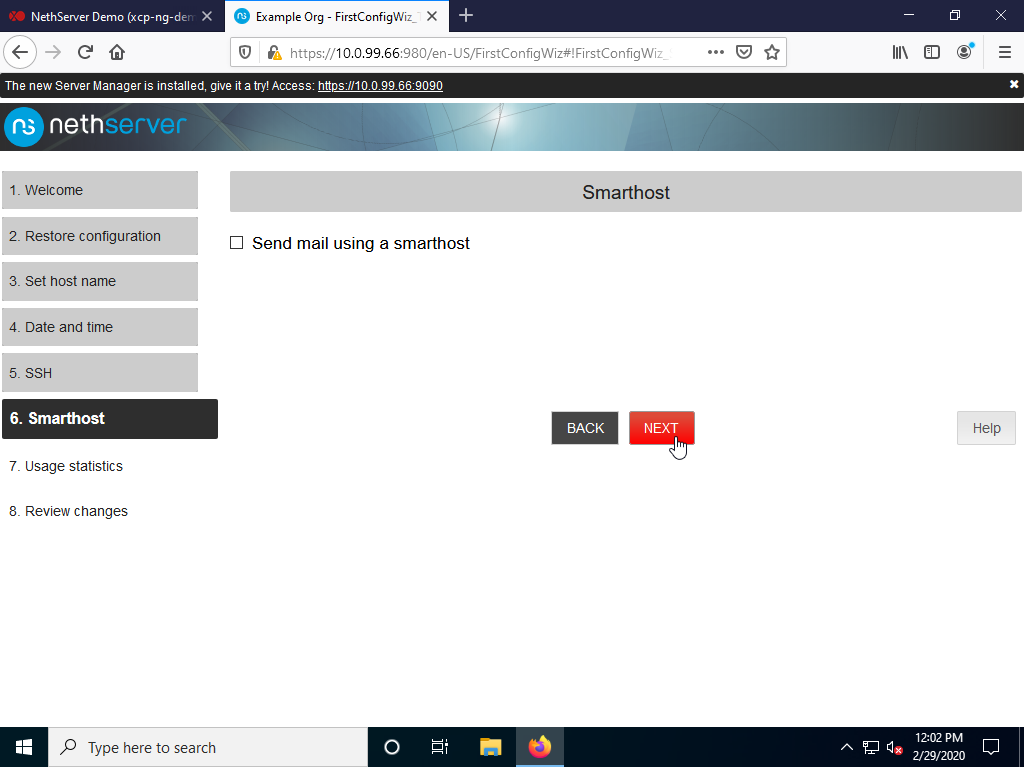
The next menu will allow for any Smarthost settings to be defined. As this is a new NethServer install we will skip this and press the Next button to proceed to the next step.
The next menu will ask if Usage statistics can be voluntarily sent back to nethserver.org for internal use. Select whatever option that is most applicable to your use case. Press the Next button to proceed to the next step.

The last menu will prompt you to review the entered changes from the previous steps. Once everything has been verified to be correct select the Apply button to complete the NethServer configuration. If you need to go back at any point to make changes before the final submission press the Back button at any time.
Congrats, we should now have a fully functional NethServer ready to be configured and deployed depending on our needs. There are optional additional considerations that can be setup but are beyond the scope of this first part.

Optional XCP-NG Guest-Tools Installation
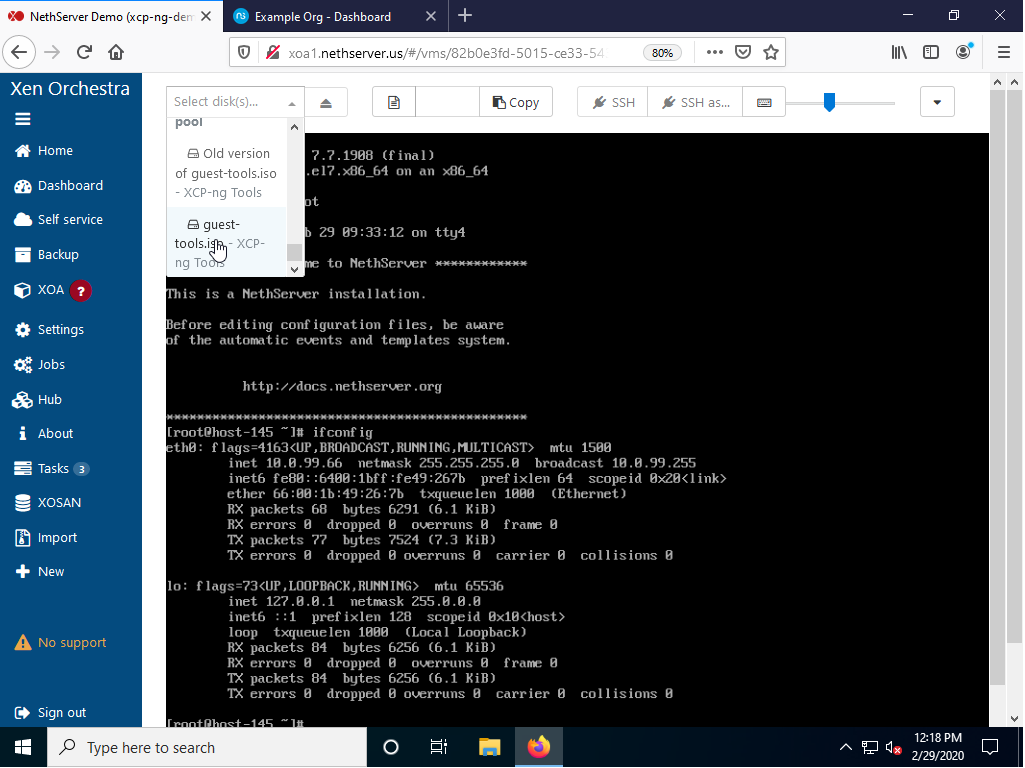
Xen Orchestra has a variety of backup/monitoring/interactive functions that are greatly assisted with the installation of the XCP-NG Guest-Tools and is easy to install. To begin we must first be logged into the NethServer terminal as root. The guest-tools iso must be selected and mounted in the VM.
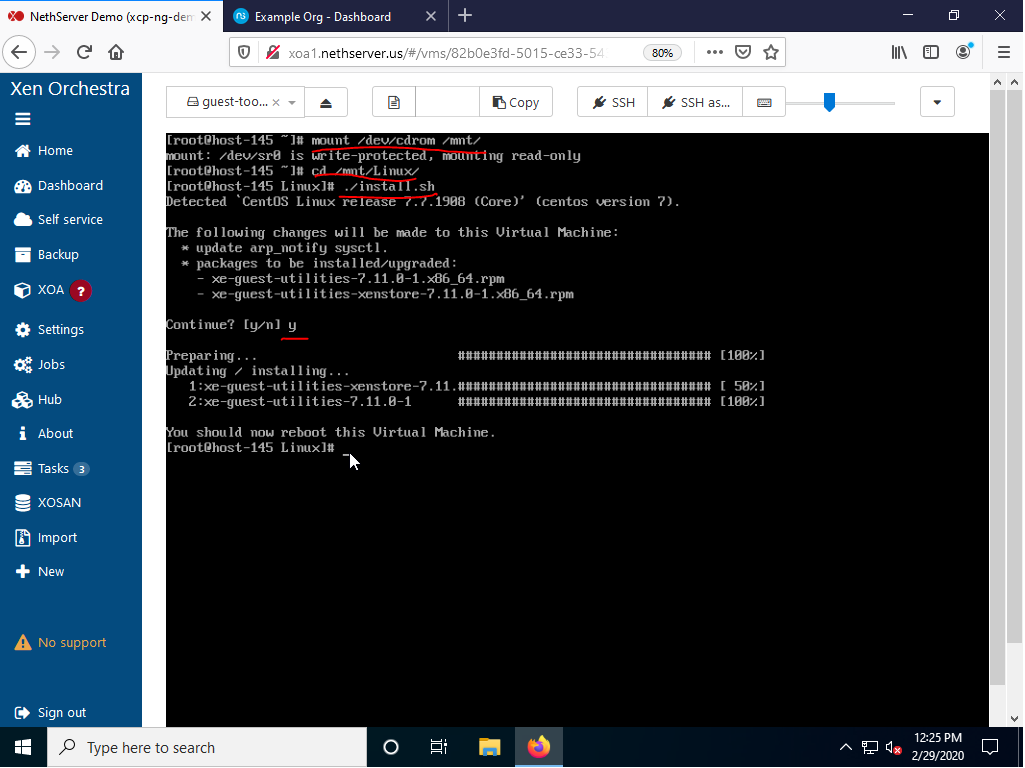
Logged in as root, perform the following commands:
mount /dev/cdrom /mnt/

cd /mnt/Linux/

./install.sh
After you run the install.sh script you will be asked to Continue. Type Y (yes) and press enter. You will be prompted to reboot the virtual machine upon successful installation. Don’t forget to eject the guest-tools iso after reboot.
You can view if/what version of guest tools is installed on the NethServer VM by going to the Advanced tab and viewing the information under Guest OS.

If this style looks familiar it’s because I almost shamelessly plagiarized from the great work on the ProxMox Howto Wiki and wanted to keeps it’s format as close/consistent to what was already available. @robb @stephdl. I would have constructed this in the wiki area but honestly that thing is a beast for me to navigate as a first time user.
