Howto install Zabbix 3.4

Hello everybody,

discussed about monitoring here and got interested in Zabbix:

So I installed it and want to share my installation experience:

EDIT 9.3.2018

EDIT 29.10.2017:

  • added 3.4 source and commands
  • removed “-uroot” from “mysql” as it is obsolete
  • optional PHP configuration
  • added application link

Repository and Packages installation

Download repo and install packages for Zabbix

Version 3.4:

rpm -ivh http://repo.zabbix.com/zabbix/3.4/rhel/7/x86_64/zabbix-release-3.4-2.el7.noarch.rpm

Version 3.2

rpm -ivh http://repo.zabbix.com/zabbix/3.2/rhel/7/x86_64/zabbix-release-3.2-1.el7.noarch.rpm

All versions:

yum install nano nethserver-mysql zabbix-server-mysql zabbix-web-mysql

Database setup

Enter mariadb/mysql:

mysql

Create database zabbix and user zabbix with all privileges on the new database and set a password “SECRET”:

create database zabbix character set utf8 collate utf8_bin;
grant all privileges on zabbix.* to zabbix@localhost identified by 'SECRET';
quit;

Import the DB scheme to the new database, after executing the command you have to enter the password set in mysql one step before:

Version 3.4

zcat /usr/share/doc/zabbix-server-mysql-3.4.3/create.sql.gz | mysql -uzabbix -p zabbix

Version 3.2

zcat /usr/share/doc/zabbix-server-mysql-3.2.7/create.sql.gz | mysql -u zabbix -p zabbix

All versions:

nano /etc/zabbix/zabbix_server.conf and change DBPassword to your SECRET:

DBPassword=SECRET

PHP configuration

You may leave this point to let /etc/httpd/conf.d/zabbix.conf set PHP variables. In this case you may just set timezone and go straight to Zabbix configuration.

Follow the steps if you want Nethserver to control the php settings that are available, don’t forget to set YOUR timezone at the end:

config setprop php MemoryLimit 128 PostMaxSize 16 UploadMaxFilesize 2 MaxExecutionTime 300 DateTimezone Europe/Vienna

Edit /etc/httpd/conf.d/zabbix.conf:

nano /etc/httpd/conf.d/zabbix.conf

and comment/uncomment the php settings until it looks like here:

    <IfModule mod_php5.c>
        #php_value max_execution_time 300
        #php_value memory_limit 128M
        #php_value post_max_size 16M
        #php_value upload_max_filesize 2M
        php_value max_input_time 300
        php_value always_populate_raw_post_data -1
        #php_value date.timezone Europe/Vienna
    </IfModule>

Apply configuration:

signal-event nethserver-php-update
systemctl restart httpd

Zabbix configuration

Enable and start Zabbix service:

systemctl enable zabbix-server
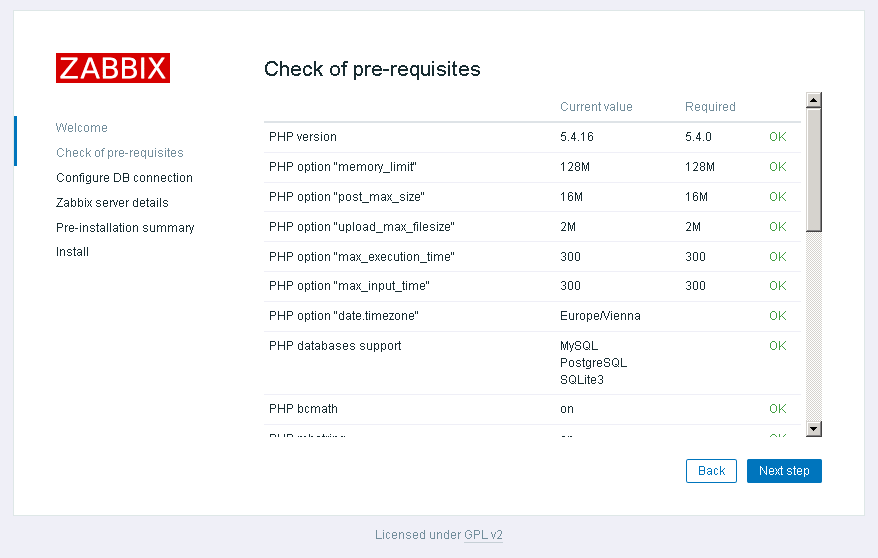
systemctl start zabbix-server

Browse to https://YOURNETHSERVER/zabbix, continue with “Next step”:

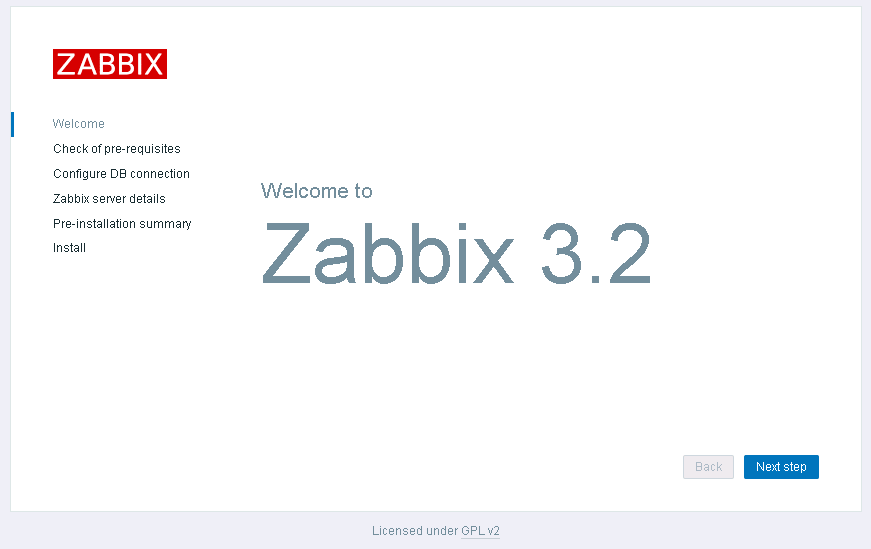
Everything should be OK/green…
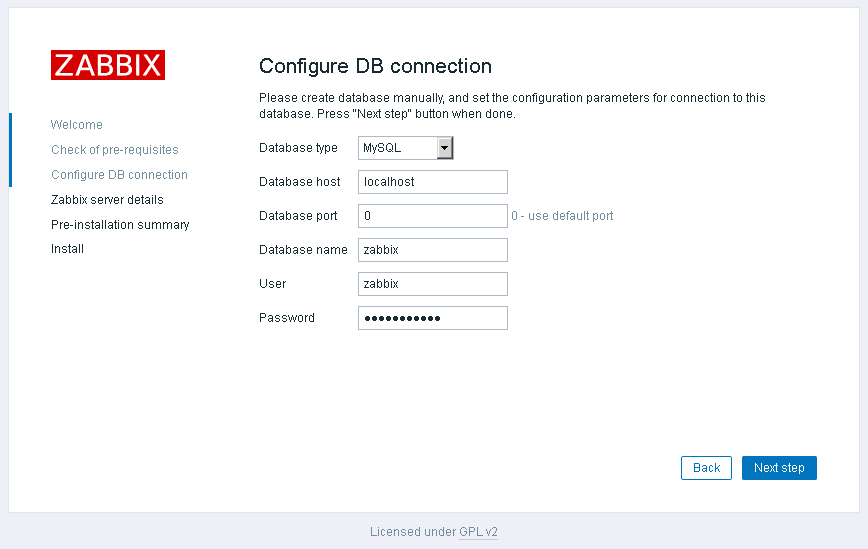
Enter the password:

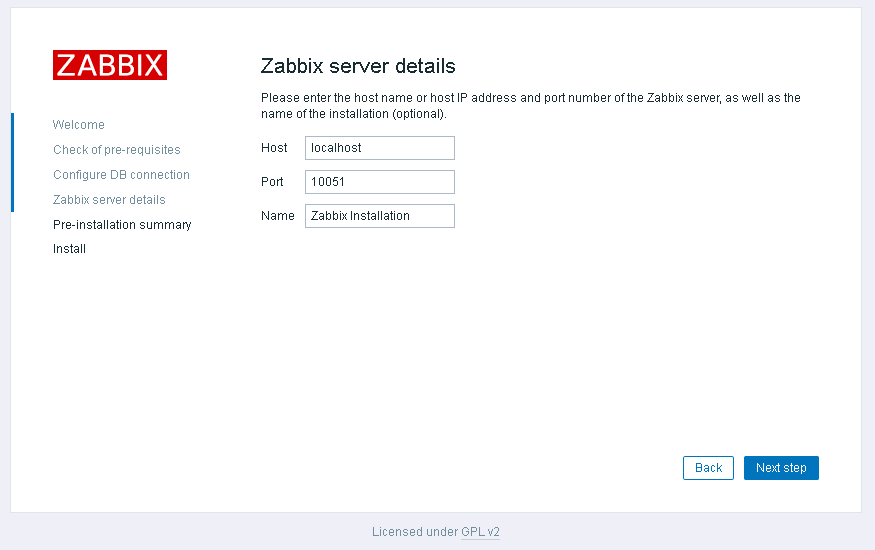
You may enter an optional installation name:

A summary of your settings:
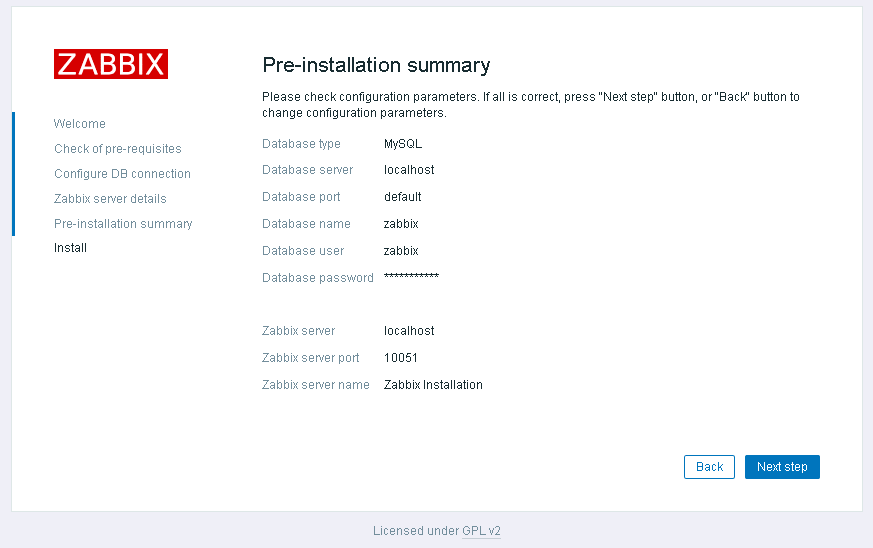
Looks good…

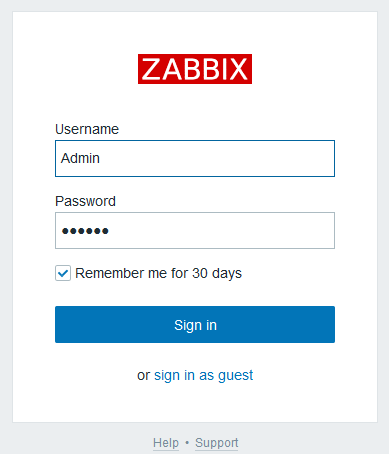
Login with user Admin (case sensitive!) and password zabbix

grafik

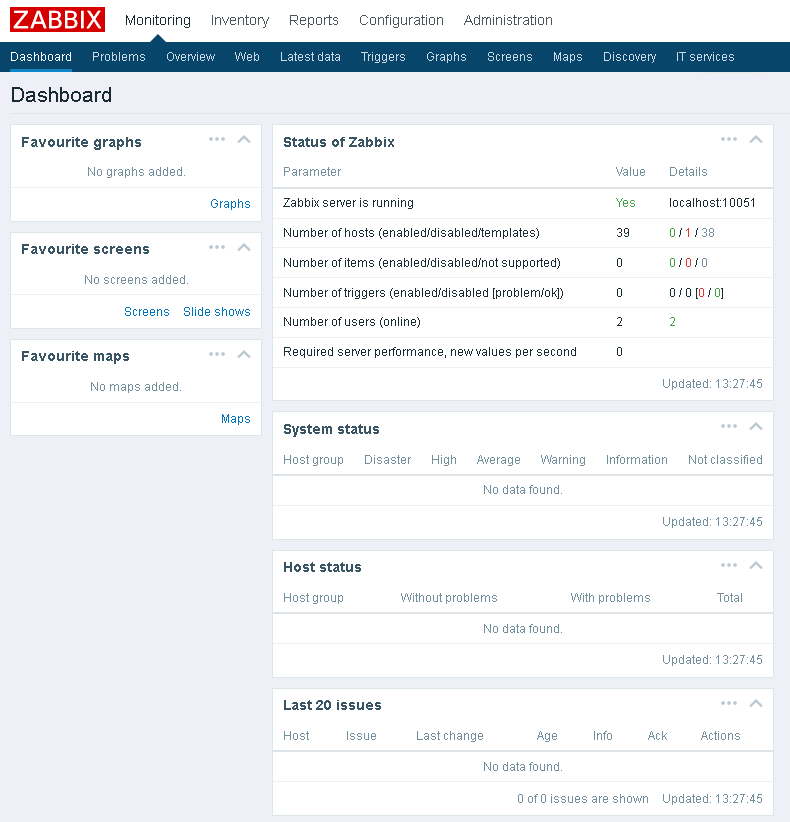
Zabbix Dashboard coming up:

Adding Zabbix to application menu

Create /usr/share/nethesis/NethServer/Module/Dashboard/Applications/Zabbix.php with following content:

<?php
namespace NethServer\Module\Dashboard\Applications;

/*
 * Copyright (C) 2013 Nethesis S.r.l.
 *
 * This script is part of NethServer.
 *
 * NethServer is free software: you can redistribute it and/or modify
 * it under the terms of the GNU General Public License as published by
 * the Free Software Foundation, either version 3 of the License, or
 * (at your option) any later version.
 *
 * NethServer is distributed in the hope that it will be useful,
 * but WITHOUT ANY WARRANTY; without even the implied warranty of
 * MERCHANTABILITY or FITNESS FOR A PARTICULAR PURPOSE.  See the
 * GNU General Public License for more details.
 *
 * You should have received a copy of the GNU General Public License
 * along with NethServer.  If not, see <http://www.gnu.org/licenses/>.
 */

/**
 * Zabbix interface
 */

class Zabbix extends \Nethgui\Module\AbstractModule implements \NethServer\Module\Dashboard\Interfaces\ApplicationInterface
{

    public function getName()
    {
        return "Zabbix";
    }

    public function getInfo()
    {
         $host = explode(':',$_SERVER['HTTP_HOST']);
         return array(
            'url' => "https://".$host[0]."/zabbix/",
         );
    }
}

Sources:
https://www.zabbix.com/documentation/3.4/manual/installation/install_from_packages/rhel_centos
https://www.zabbix.com/documentation/3.2/manual/installation/install_from_packages/server_installation_with_mysql
https://www.zabbix.com/documentation/3.2/manual/installation/install#installing_frontend

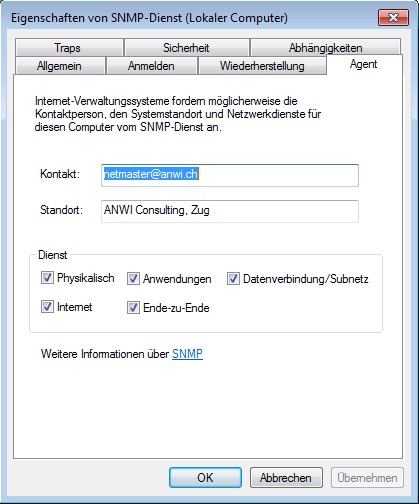
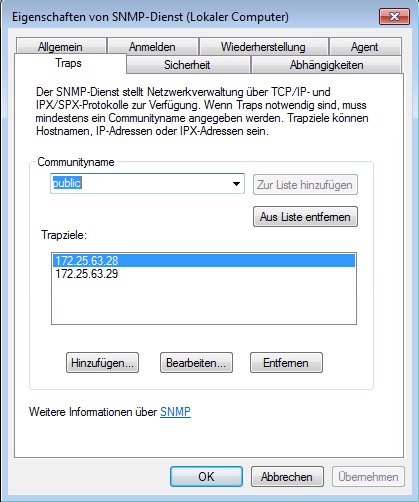
@Andy_Wismer, maybe you could improve this howto with some UI configuration steps to monitor a client…

15 Likes

Thanks for your next great tutorial

1 Like

Now what about for the local and remote monitored clients :slight_smile:

1 Like

Hi All

I’ll provide a nice library of symbols and see what I can improve on this howto…

The Symbol-Library contains all Symbols in the prescribed 5 sizes - it is work in progress, I’ll provide some updates to this…
Grab the zipped file from here: no viruses or funny stuff…
http://www.anwi.ch/downloads/Zabbix_ANWI-Library_2017-09-18.zip

@stephdl
Good to see you here (from SME)!

Remote Clients:
Configure a Host say www.whatever.com


Just set the SNMP Config, remove the Agent config part.
Go to the templates register.

Choose the HTTP (HTTPS) and PING templates, leave ot all the rest.

Put it on your map and choose a fancy symbol, like WordPress Logo or something.

More elaborate HTTP Checks?

See here:
http://lab4.org/wiki/Zabbix_Webseiten_ueberwachen
and here
http://lab4.org/wiki/Zabbix_Webseitenperformance_Realtime-Monitoring

Quite elaborate, way more than just checking for a responce on port 80.
Unfortunately, it’s in german, but I’m sure an english version exists somewhere.

Just for starters…
Have fun!

Andy

5 Likes

@Andy_Wismer your public ip address is readble into one of the screenshot…

@mrmarkuz

So, got a good first impression?

Setting up a Zabbix-monitored Client with SNMP:

I do have a few agent based clients out there, but by far the majority are SNMP based, due to my Nagios legacy…

Then again, regarding a few basic steps, SNMP is fairly easy.

  1. SNMP uses UDP and NO security. So my firewall will not pass Ports 161, 162 forward. SNMP remains in the secured Network. That’s a MAJOR consideration.

  2. SNMP on most Linux (here Debian based, Raspberry, Ubuntu):

sudo apt-get update
sudo apt-get install snmpd snmp

sudo rm /etc/snmp/snmpd.conf

sudo nano /etc/snmp/snmpd.conf

Contents:
rocommunity public
syscontact (Admin, or your eMail)
syslocation Your-Site-Place

CTRL-X Y to save

sudo /etc/init.d/snmpd restart

Finished

Nethserver and yum based would use:
yum install net-snmp net-snmp-libs net-snmp-utils

the rest being the same.

Caution: the snmpd.conf is VERY basic and involves no security or limiting of IPs.
I’d suggest getting to that once you’ve got this reporting to Zabbix.

Windows SNMP Clients:
Windows clients need the snmp from “Windows functions” (SNMP & WMI)

Konfiguration (XP to now looks the same…)


Set SNMP and SNMPtraps to autostart, and restart both…

Mac SNMP Clients:

As Mac is basically UNIX, it’s very similiar to Linux:
Configure the file same as above in the Linux example
This should work on mac:
sudo nano /etc/snmp/snmpd.conf

Save the file with CTRL x and y

Start the snmpd with this:

sudo launchctl load -w /System/Library/LaunchDaemons/org.net-snmp.snmpd.plist

That should cover the most local Clients.

At least on the client itself…

Zabbix follows…

Regards
Andy

PS: The displayed Internal IPs belong to a network not accesible from the Internet.
The knowledge of which would not consist a risk, even though snmp may be accissible from the internal network.
SNMP is not easy, if you take security into consideration. For the purpose of this How-To, i prefer to inform about the security issues, but first get things working, so people have at least a first success!

3 Likes

That’s a hosters well protected external web server!
:wink:
Image corrected

Quite more than a good first impression, thank you, I’ll try it as soon as possible…

looking the zabbix wiki

You may want to use SNMP monitoring on devices such as printers, network switches, routers or UPS that usually are SNMP-enabled and on which it would be impractical to attempt setting up complete operating systems and Zabbix agents.

it seems that the zabbix agent gets more features and probably a better security matter

https://www.zabbix.com/documentation/3.4/manual/config/items/itemtypes/zabbix_agent

This could be tested, but I know also it is a huge software and a lot of scripts need to be created/adjusted if you want a full workable solution.

@mrmarkuz great shot.
Wow! Your doing a great job here. I can’t wait to thank you at the Conference.

http://community.nethserver.org/search?q=user%3Amrmarkuz%20category%3A10

@Andy_Wismer thank you as well

1 Like

Hi

@stephdl

If you have a SNMP enabled UPS, fine, use that by all means!
All my clients have the simpler USB connected UPS.
Since nethserver is a bit “overhardcoded” in NUT, the standard linux component for UPS handling, ie. the Username is hardcoded and can’t be changed in the web UI, I can’t use the same UPS for Nethserver and Synology. Synology also uses NUT, but has a different User and Password hardcoded.

The expensive and best solution would be getting a SNMP capable UPS - or a Network-Box for APC. But that’s a few hundred bucks more expensive.

My Standard and preferred Solution:
A simple Raspberry PI3 handles the UPS for the whole Network.
As the standard NUT stack can be freely configured, I can provide the user “ups” for Nethserver, and the user “monuser” for Synology(s). Proxmox has an open NUT stack and can be configured as needed.

If the UPS is powerful enough (Wattage can be easily calculated…), it can power 1-2 NAS, 1-2 Proxmox Virtual Hosts and Switch / Router et Al.

SNMP is indeed the professional Network Tool for 30 odd years. All large printers support it, managed switches, “real” routers, actually all network components not reduced for Home-Use support SNMP.

Example: Apple’s AirPort Extreme, the “flat” generation.
SNMP can still be enabled using the current Windows Config Tool. Using the Mac Version, you need to go quite a bit back (Snow Leopard)… The newer Version (Tower) doesn’t support SNMP at all. Then again, Apple doesn’t sell any Server hardware any more, it’s all Home use now…

SNMP V1 and SNMP V2 are quite easy to implement, but come without ANY security.
So limiting “write” acces is important, so is limiting “read” (public) access to your monitoring hosts!

SNMP V3 is a different beast, getting it to work can be quite tricky, especially if different OS and implementations of SNMP V3 coexist. I don’t suggest using this until you’re very experienced in SNMP and Security.
It doesn’t help monitoring if your top secured SNMP V3 Server is not reporting it’s full disk to the monitoring station, because that “low down” monitoring station is using an insecure Version of SNMP…
:wink:

Just a bit of background in SNMP…
It’s called Simple Network Management Protokoll, but it’s clear to everyone why we have to dig down past DOD in SNMPwalk? No, in honesty, it’s far from simple, but following a few basic rules will get you far!

And for all of us in those countries using funky symbols (Umlaut, Accent, whatever!):
In SNMP Information:

  • Device
  • Contact (an @ is ok on some devices, but not all!
  • Location
    just leave out ANY such stuff!

Took me two days to find out WHY my SME server wasn’t creating a new SSL certificate. A colleague had changed the Location in the Webinterface from Zurich to Zürich (With Umlaut). That was somehow converted to an ISO-code character and wasn’t SNMP conform neither in length or content! Just use plain english characters, that always works!

Andy

Well, someone anticipated me on throwing another bomb.

We are using NethServer as a Zabbix Proxy since at least one year now, since release 3.0. We are also supporting NS 6 and 7 (on amd64 arch) and Debian 8 and 9 on amd64 and armhf (try to think why) platforms. Nothing too structured (no configuration interfaces within NS WebGUI) but we integrate services within the NS server framework (db defaults and services configuration in e-smith); we deploy the agent, the proxy and also the server (with the frontend) via ansible playbooks. We also integrate Zabbix Dynamic reporting and, manually, Telegram notifications.

We are now testing 3.4.

I really don’t know if I may share playbooks, since they are a big part of my job last year, but maybe I can shed some lights if needed :wink:

2 Likes

Hi

@syntaxerrormmm

This sounds quite interesting. Never played around with ansible, but it looks good.
Any infos, starter tips would be welcome, even if you can’t relase playbooks.

Andy

1 Like

Zabbix Agents for Windows are precompiled from Zabbix website. We created installers using ISTool with some sort of scripting to autoconfigure firewall and hostname (we reuse the scripts from my old job, so I think we may share the scripts). For GNU/Linux, Zabbix Repo is the way to go. SNMP usually is just to enable inside the devices.

The rest is using and configuring templates in the right manner :wink: Basic templates already loaded in Zabbix are a good base to start, here a good repository of Templates, scripts and so on.

1 Like

Would it be possible to use zabbix 3.4 instead of 3.2 ? Has anyone tried it?

http://repo.zabbix.com/zabbix/3.4/rhel/7/x86_64/

Sorry, didnt see it:

:bomb: oh man that’s REALLY interesting. How many installations are you monitoring currently?

We monitor mainly our customers’ networks, so it is not only NS but also hypervisors, Access points, switches etc. going to printers. A quick grasp on the numbers of our main monitoring system:

It’s probably a small deployment, but the numbers start to be interesting.

4 Likes

So I will add some details on NS installation of the Zabbix Server, trying to share some more information just because it’s Christmas time and I feel a good boy :laughing:

@mrmarkuz tutorial at the beginning of the thread is quite fine, still I do think some additions may be interesting.

Zabbix Server daemon inside NethServer WebGUI

Integration inside NS WebGUI (under network services, adding exclusions to the firewall) is quite easy:

mkdir -p /etc/e-smith/db/configuration/defaults/zabbix-server
echo "service" > /etc/e-smith/db/configuration/defaults/zabbix-server/type
echo "enabled" > /etc/e-smith/db/configuration/defaults/zabbix-server/status
echo "10051" > /etc/e-smith/db/configuration/defaults/zabbix-server/TCPPort
echo "public" > /etc/e-smith/db/configuration/defaults/zabbix-server/access

db configuration set zabbix-server service status enabled TCPPort 10051 access public
signal-event runlevel-adjust && signal-event firewall-adjust

Adding SNMP support and MIBs

yum install net-snmp-utils nethserver-net-snmp

This would install common MIBs usually used in some templates. Developing custom templates (e.g. for Zyxel Switches) using MIBs is much more easier (because they describe each OID and assigns to some of them strings as names of the OID). If you use OID names, you need to install a copy of the MIB you used in development in the folder /usr/share/snmp/mibs of the Zabbix Server.

Using Postgres as a backend (instead of MariaDB/MySQL)

useradd -m -d /var/lib/zabbix -s /bin/bash zabbix
passwd zabbix
yum install nethserver-postgresql
echo "alter role postgres password 'secret'" | sudo -u postgres psql 
echo "create role zabbix with CREATEDB LOGIN PASSWORD 'secret'" | sudo -u postgres psql
echo "create database zabbix owner zabbix" | sudo -u postgres psql
echo "local\tall\t\tzabbix\t\t\t\tident" >> /etc/e-smith/templates/var/lib/pgsql/data/pg_hba.conf/20auth
# Previous line permits to the Unix user zabbix to authenticate without passing the password.
signal-event nethserver-postgresql-update
yum install --enablerepo=zabbix zabbix-server-pgsql
zcat $(rpm -ql zabbix-server-pgsql | grep create.sql.gz) | sudo -u zabbix psql zabbix
# Configure /etc/zabbix/zabbix_server.conf according to @mrmarcuz guide above
systemctl restart zabbix-server

# Frontend accordingly installed with:
yum install --enablerepo=zabbix php-pgsql zabbix-web zabbix-web-pgsql

Automatic creation of the frontend configuration

You may customize the file /etc/zabbix/web/zabbix.conf.php to automatically configure the frontend (so to skip the first wizard). For example, here’s a template from our ansible playbook:

<?php
// Zabbix GUI configuration file.
global $DB;

$DB['TYPE']			= 'POSTGRESQL';
$DB['SERVER']			= 'localhost';
$DB['PORT']			= '0';
$DB['DATABASE']			= 'zabbix';
$DB['USER']			= '{{ postgresql_username }}';
$DB['PASSWORD']			= '{{ postgresql_passwd }}';
// Schema name. Used for IBM DB2 and PostgreSQL. 
$DB['SCHEMA']			= '';

$ZBX_SERVER			= 'localhost';
$ZBX_SERVER_PORT		= '10051';
$ZBX_SERVER_NAME		= '';

$IMAGE_FORMAT_DEFAULT		= IMAGE_FORMAT_PNG;

Placeholders should be quite clear to understand :wink:

Zabbix agent

If you use other NethServers in your networks (as we do :wink: ), you may want to use Zabbix Agent to monitor them. Configure it like this:

# Following lines create a unix 'zabbix' user which can run any program as root
useradd -m -d /var/lib/zabbix -s /bin/bash zabbix
passwd zabbix # use strong password!
echo "zabbix ALL=(ALL:ALL) NOPASSWD: ALL" >> /etc/sudoers.d/zabbix
chmod 0440 /etc/sudoers.d/zabbix

yum localinstall http://repo.zabbix.com/zabbix/3.4/rhel/7/x86_64/zabbix-release-3.4-2.el7.noarch.rpm
yum install --enablerepo=zabbix zabbix-agent

# Edit zabbix_agentd.conf file - see below

# Integrating the Agent within NethServer GUI
mkdir -p /etc/e-smith/db/configuration/defaults/zabbix-agent
echo "service" > /etc/e-smith/db/configuration/defaults/zabbix-agent/type
echo "enabled" > /etc/e-smith/db/configuration/defaults/zabbix-agent/status
echo "10050" > /etc/e-smith/db/configuration/defaults/zabbix-agent/TCPPort
echo "public" > /etc/e-smith/db/configuration/defaults/zabbix-agent/access
db configuration set zabbix-agent service status enabled TCPPort 10050 access public
signal-event runlevel-adjust && signal-event firewall-adjust 
systemctl restart zabbix-agent

Agent configuration file (/etc/zabbix/zabbix_agentd.conf) is well commented and documentation online is quite complete, so be careful to correctly configure at least the following variables:

Server={{ your_zabbix_server_IP }}
ServerActive={{ your_zabbix_server_IP }}
User=zabbix

Last one is to drop permissions on zabbix-agent daemon to run as zabbix Unix user. Unfortunately we didn’t develop a NethServer GUI to configure base parameters, this may be a good addition.

Caution Also your Zabbix Server should have its own Agent, so you may follow the same steps! Server and ServerActive in this case can be leaved at 127.0.0.1.

Next round I will share instructions on how to monitor NS backups using the agent, a script, some UserParameters and a custom template, and the configuration for the Zabbix Proxy :slight_smile: Just hope this is not coming next Christmas :wink:

5 Likes

Please follow instructions on the GitHub repository I just created :slight_smile:

First of all, do I need a proxy? What are the main advantages of having a proxy?
A Zabbix Proxy is a machine which acts like a ‘local Zabbix Server’ in a remote network, sampling the remote network and collecting data to be passed to the real Zabbix Server. It is most useful if you have a lot of hosts to monitor and you cannot open up ports on your firewall. Also, it stores locally all the collected values before passing it to the server, assuring that (in case of missing connectivity) it will retain data until it reaches the server again.

Also, you will do a basic configuration on the proxy, just to make it talk to the Server and to be available to the hosts to monitor: any other configuration (like items to check on each host) will be syncronized from the server automatically.

In the remote network with the proxy installed, all the Agents should point to the local proxy in their Server and ServerActive directives. Also, a Proxy should have its own Agent (and the installation was already explained).

On Proxy installation, starting from a bare NethServer:

# Following lines create a unix 'zabbix' user which can run any program as root
useradd -m -d /var/lib/zabbix -s /bin/bash zabbix
passwd zabbix # use strong password!
echo "zabbix ALL=(ALL:ALL) NOPASSWD: ALL" >> /etc/sudoers.d/zabbix
chmod 0440 /etc/sudoers.d/zabbix

# Installing and configuring PostgreSQL as local database for item collection
yum install nethserver-postgresql
echo "alter role postgres password 'secret'" | sudo -u postgres psql
echo "create user zabbix with createdb login password 'secret'" | sudo -u postgres psql
echo "create database zabbix_proxy owner zabbix" | sudo -u postgres psql
# Below line permits access with no password to the unix user 'zabbix'
echo "local\tall\t\tzabbix\t\t\t\tident" >> /etc/e-smith/templates/var/lib/pgsql/data/pg_hba.conf/20auth
signal-event nethserver-postgresql-update

# Installation of the Proxy
yum localinstall http://repo.zabbix.com/zabbix/3.4/rhel/7/x86_64/zabbix-release-3.4-2.el7.noarch.rpm
yum install --enablerepo=zabbix zabbix-proxy-pgsql
zcat $(rpm -ql zabbix-proxy-pgsql | grep schema.sql.gz) | sudo -u zabbix psql zabbix_proxy

# Configure the zabbix_proxy.conf file (see below)
systemctl restart zabbix-proxy

# Adding zabbix-proxy to the services managed by NethServer
mkdir -p /etc/e-smith/db/configuration/defaults/zabbix-proxy
echo "service" > /etc/e-smith/db/configuration/defaults/zabbix-proxy/type
echo "enabled" > /etc/e-smith/db/configuration/defaults/zabbix-proxy/status
echo "10051" > /etc/e-smith/db/configuration/defaults/zabbix-proxy/TCPPort
echo "public" > /etc/e-smith/db/configuration/defaults/zabbix-proxy/access
db configuration set zabbix-proxy service status enabled TCPPort 10051 access public
signal-event runlevel-adjust && signal-event firewall-adjust 
systemctl restart zabbix-proxy

About configuration of the proxy, the file is /etc/zabbix/zabbix_proxy.conf. As for the Agent configuration file, it is well commented and explained. The fundamental settings you should modify are:

Server={{ your_zabbixserver_IP }}
Hostname={{ choose_an_hostname }}
DBName=zabbix_proxy
DBUser=zabbix
DBPassword=secret
User=zabbix

Regarding the Hostname directive, this should be the same string you have to configure inside the Zabbix Server in the Administration > Proxies > Create new proxy wizard, so it is better to have a fixed one.

Hope this helps :slight_smile:

3 Likes

Please feel free to test the nethserver-zabbix module! I didn’t really use Zabbix for a long time, I am more a Nagios user, so please share your suggestions to help improving Zabbix for NethServer. Thanks to @syntaxerrormmm, @Andy_Wismer, @dz00te and anybody I forgot to mention.

Features:

  • postgresql
  • zabbix-server, agent and web UI ready to go
  • should work with any version from zabbix repo
yum -y install https://repo.zabbix.com/zabbix/3.4/rhel/7/x86_64/zabbix-release-3.4-2.el7.noarch.rpm
yum -y install https://smart-ict.services/mirror/mrmarkuz/7/noarch/nethserver-zabbix-0.0.1-4.ns7.noarch.rpm

Now you may login to https://YOURNETHSERVER/zabbix as Admin (case-sensitive) with password zabbix. Go to “Configuration/Hosts” and enable the Zabbix server host.

CAUTION! This is a testing package, don’t use on production systems :smiley:

To have some test problems just add a Windows client :slight_smile:

5 Likes