How-To: Create a NethServer in VirtualBox machine
And how to set up network connection between Host PC and NethServer Virtual Box
Version: V1.0 / R3.
For: Nethserver version 6.7, 6.x
Skill: General audience.
Published: 2015-11-15
Review: 2015-11-16
Author: Bogdan Chirica
Contact: NethServer community forum: CTek
Update 29-11-2015
Added link to video tutorial
Description
This tutorial will help you to install NethServer into a virtual box machine (VBox).
Also, it will cover how to configure networking in virtual box that will allow communication between host PC and virtual box machine.
Video: of the whole tutorial Here: https://youtu.be/3H1eu5bxIEs
Conventions used in this HOW-TO:
[Name] – It means that on the screen, you should see a button with that label and apply the actions to that button.
Name/Label – It means that a window or a field is labeled that way and you should apply your action onto that field or in that specific window
Option x – Means that you have to chose option X from more options or option fields.
“command x y” - Means that you have to type exactly the command within the quotes (without the quotes! just the command).
This will also be used when exact values should be used Ex: like passwords or usernames.
NOTE: - usually more information on that subject will be provided or information related to the step that you are currently reading. It is useful to take into account the information provided.
Pre-requisities:
- Host PC with Windows, Linux, MacOSX
- Virtual box installed on the host machine (for the OS that you use)
If you do not have Virtual box download it for Windows / MacOS from :
https://www.virtualbox.org/wiki/Downloads
For Linux you can install it with:
Redhat/CentOS/Fedora based :
“sudo yum install virtualbox-5.0 virtualbox-nonfree”
OR
Debian/Ubuntu/Linux Mint based :
“sudo apt-get install virtualbox-5.0 virtualbox-nonfree”
- NethServer ISO File – downloaded on the host machine
If you do not already have it download it from:
http://www.nethserver.org/getting-started-with-nethserver
Optional: Internet connection is not mandatory if you plan to work offline (some steps will not apply to your setup if you do not have Internet access)
1. Creating a new VBox machine
Open Virtual Box Manager
Click [New]
In the Name field insert desired name for the new virtual machine
In the Type select field choose option: Linux
In the Version select field choose option: Linux 2.6 / 3.x / 4.x (64-bit)
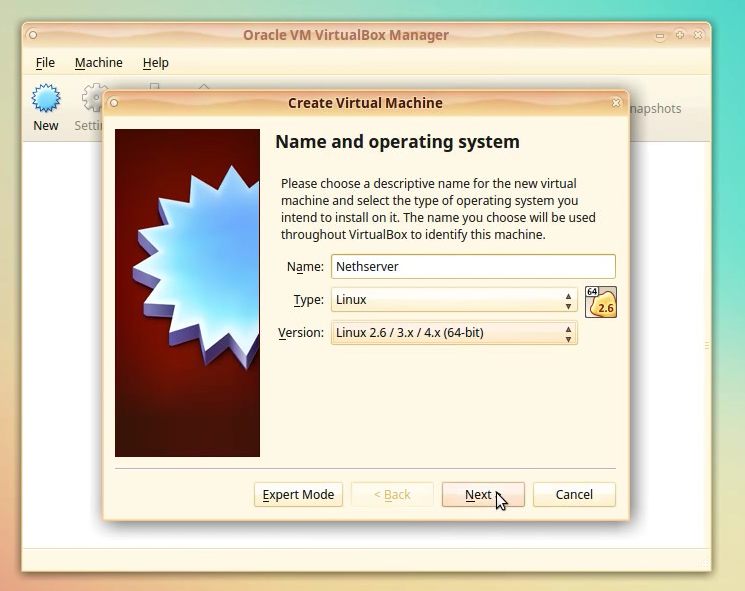
Click [Next]
In the Memory size window modify the amount of memory to your requirements (we allocate 2048 MB as minimum). This value can be modified later from Settings page of the VBox machine.
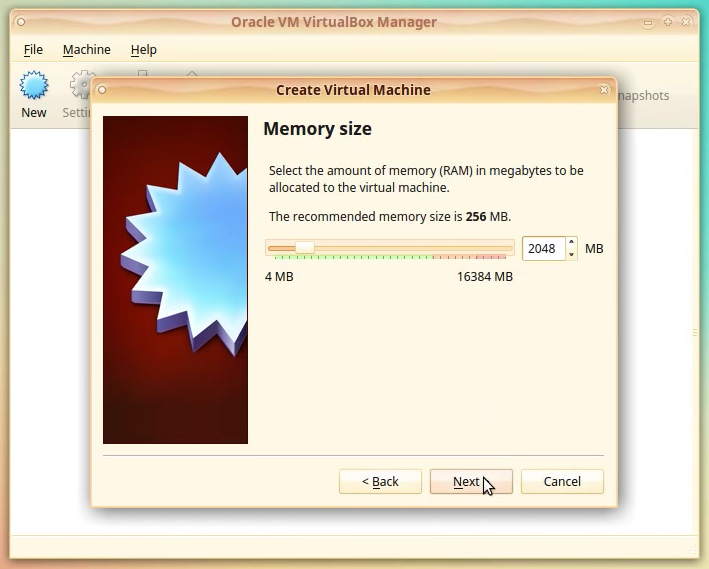
Click [Next]
In the Hard disk window choose option: Create a virtual hard disk now.
NOTE: Since this is the first time we create a virtual machine, we cannot select the option: Use an existing virtual hard disk file.
This option is useful if we already have the hard drive file from another VBox machine or backup.
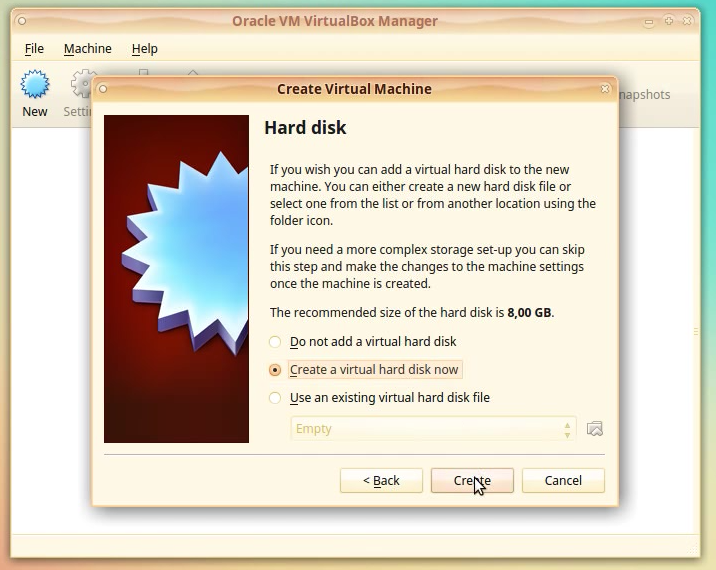
Click [Create]
In the Hard disk file type window leave the default option – VDI (VirtualBox Disk Image).
NOTE: You can choose another option if you are planning to move the hard drive image file to another visualization platform like VmWare or Open Stack.
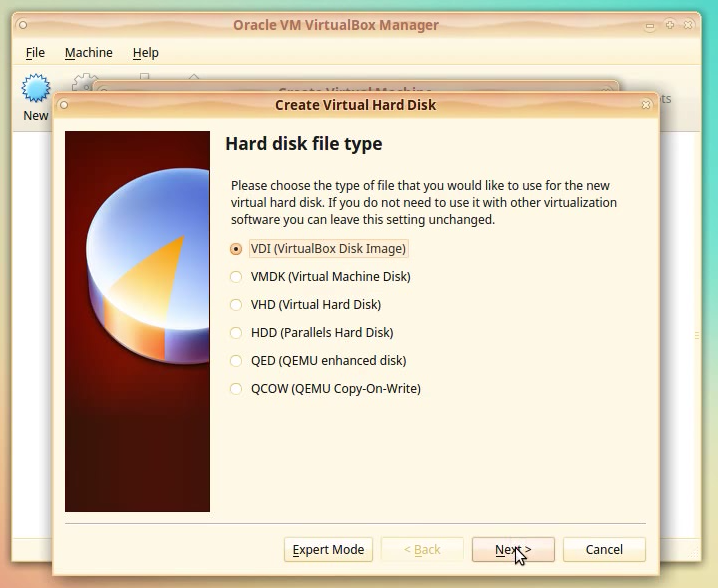
Click [Next]
In the Storage on physical hard disk window choose option: Fixed size.
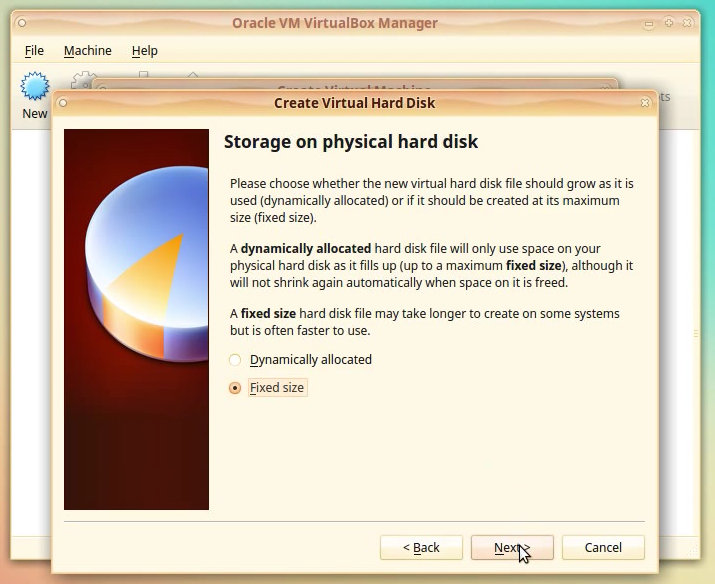
Click [Next]
ALTERNATIVE OPTION
You can select the option Dynamically allocated if you want to save space.
This option will report to the Guest (VBox) OS that it has for example a 20 GB HDD attached to it, but the HDD image file will be less, And will grow only when you add files in that virtual OS.
NOTE: The maximum HDD space that the image can have is the initially declared space. The image can’t grow more than that size.
EX: if you specified 20 GB initially, and your initial occupied space is 3 GB it will grow to maximum 20 GB!
In the File location and size window we have the possibility to specify where our HDD image will be stored on the host computer (it can also be stored on a network drive).
We can modify the name we want the image file to have, if we don’t like the generated name.
Also, we can specify the size of the HDD image file.
NOTE: The amount allocated to the HDD image file depends on the purpose of your VBox machine (we allocate 8 GB; this is more than enough for a standard installation).
Virtual machine can have more than one HDD image file attached.

Click [Create]
Wait for the image file to be generated.
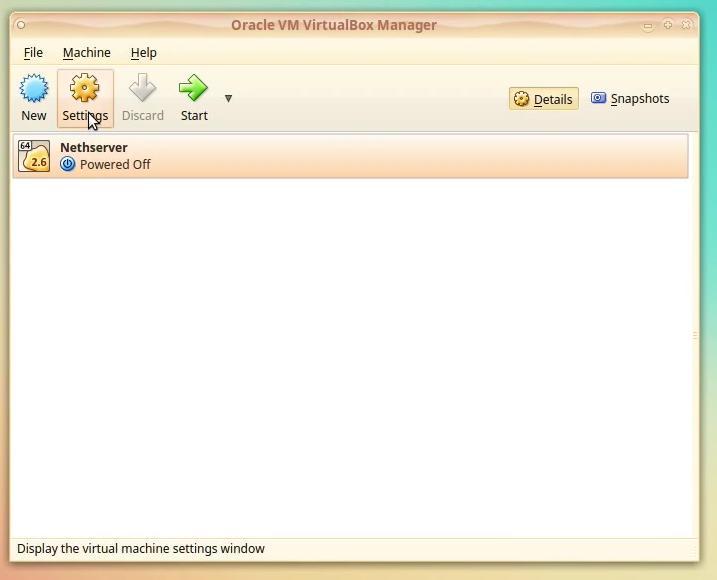
After the process completes you will see your newly created VBox machine in the VBox Manager window.
2. Settings for the VBox machine
Select your VBox machine and then click [Settings]
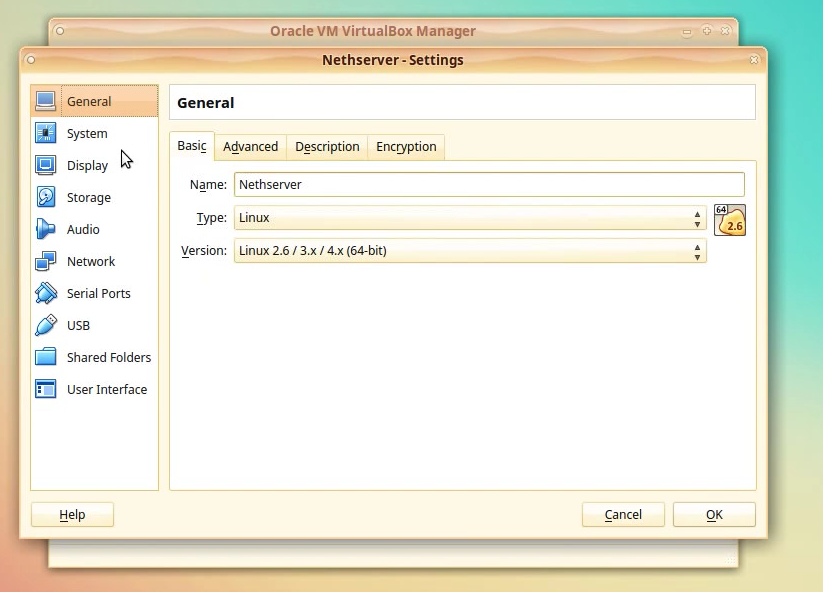
In the General section you can modify the Name, Type and Version of the virtual OS. You can also add a description for this machine that will allow you to differentiate it from the others, if you have more machines.
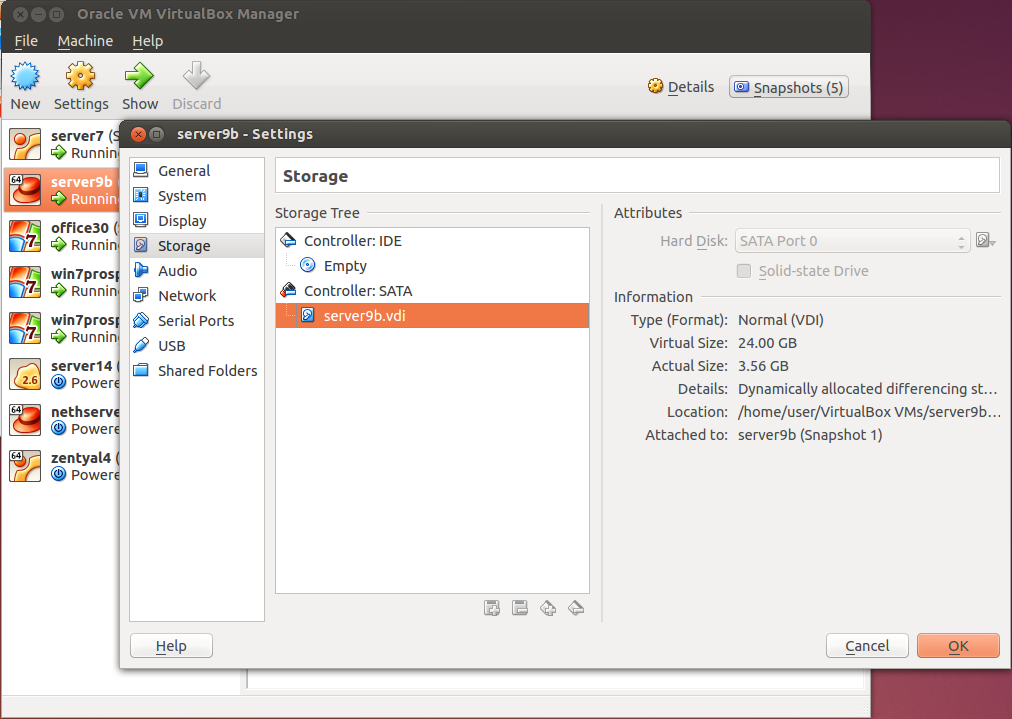
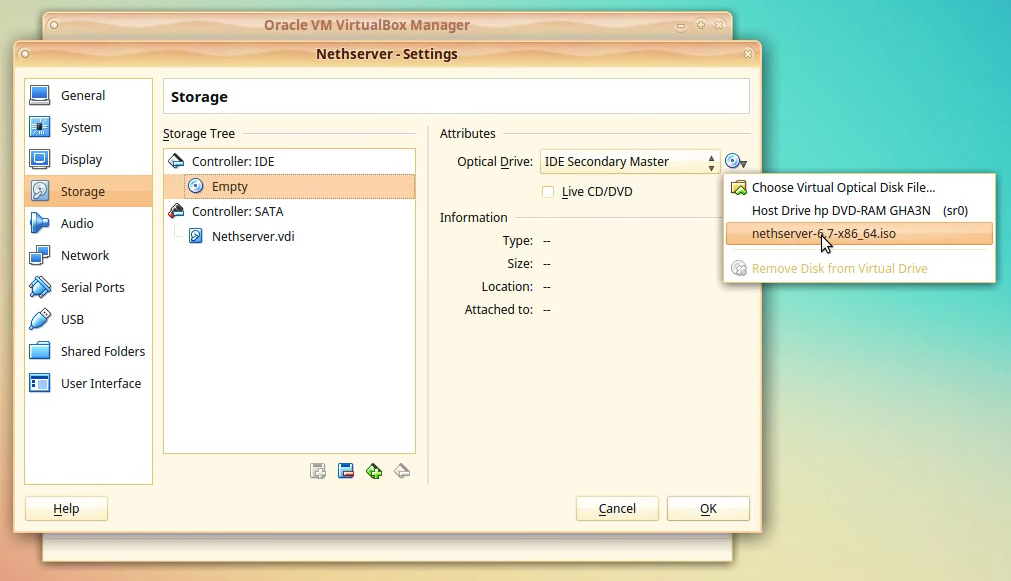
In the Storage section we can modify the settings for storage attached to this machine.
First we setup the virtual CD-Rom drive.
Click on the disk icon labeled Empty, under the IDE controller.
On the right side of the window we can choose how the virtual CD-Rom will behave. We can attach it directly to the Host PC CD-ROM drive, or we can specify it to load an ISO file.
In our case, we will tell the virtual CD-Rom drive to load the NethServer 6.7-x86_64.iso
This will allow our VBox machine to boot from CD.
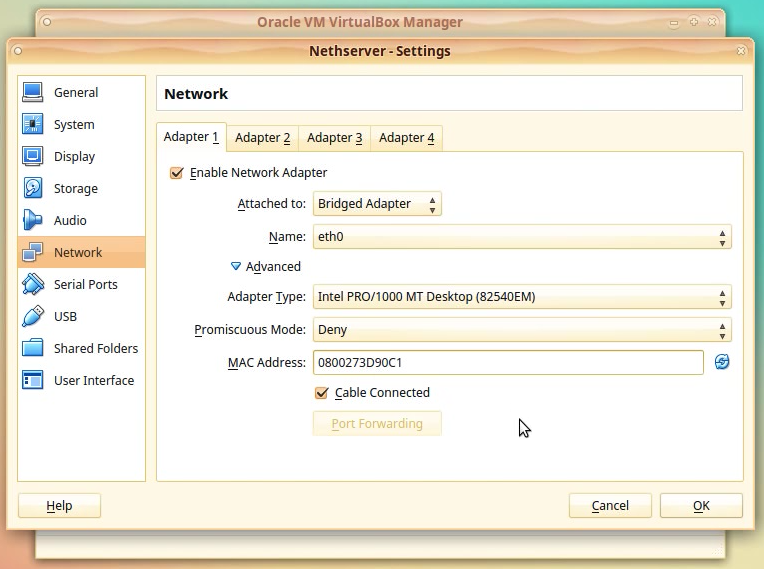
In the Network section we configure the Network Adapters for the VBox machine. In our case we will have two network adapters.
The first one Adapter 1 will be bridged to the host PC.
This interface will behave like it is connected directly to the same switch as our host PC and will be eth0 in NethServer.
The second adapter Adapter 2 will be used in an internal network only that will exist just between host PC and VBox machine.

Configuration for the first adapter:
In the Attached to: choose option: Bridged Adapter.
Click on *Advanced to unhide the extra settings.
Take note of the value in the MAC address field. This will be eth0 in NethServer.
Configuration for the second adapter:
Click [Enable Network Adapter] option.
In the Attached to: choose option: Internal network (we select this option for now and we will change it later).
Click on Advanced to unhide the extra settings.
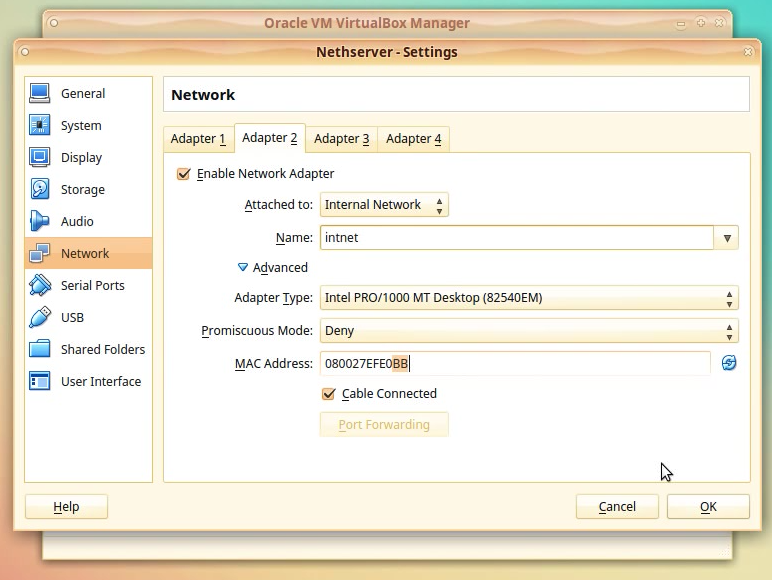
Take note of the value in the MAC address field. This will be eth1 in NethServer.
We will need this value in the next steps to identify the adapter as LAN (green)
Click [OK] to finish.
We have finished the setup of the VBox machine.
3. Installing NethServer into the VBox machine
Select your machine and then click [Start].
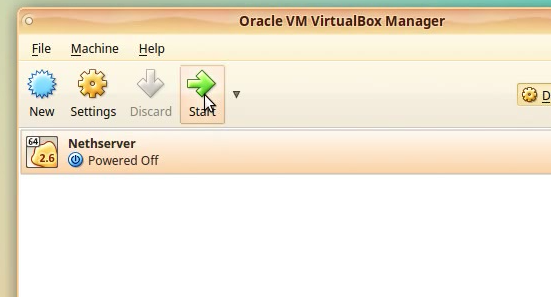
You will see another window where your VBox machine is booting.
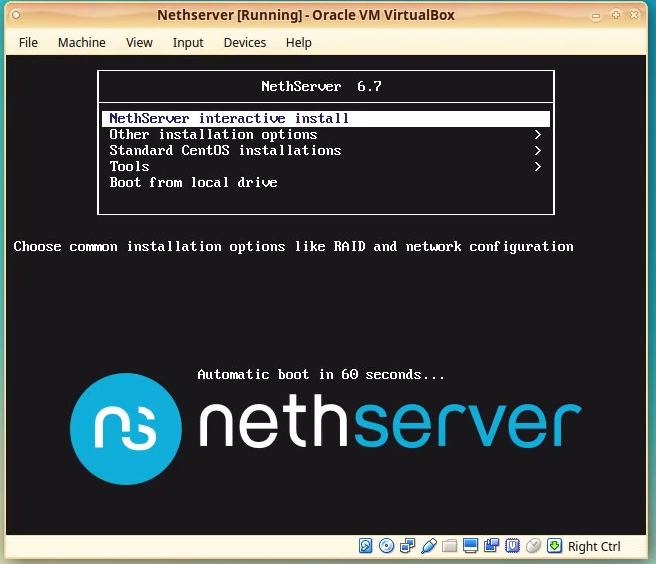
The NethServer boot menu appears. Press [ENTER] or wait for the time out to finish, to start the interactive installation.
After a few moments Anaconda will present you the options to choose the language for the installer.
Navigate through the options with [TAB] key and activate the options with [ENTER] key.

Click [Next]
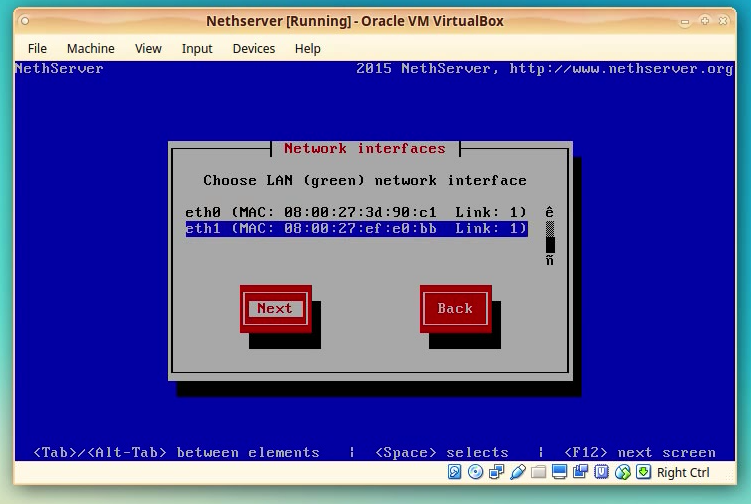
On next the screen you will be asked to choose the network interface for LAN (green).
Select the interface that has the MAC address we have seen in the Vbox Settings as Network Adapter 2. (usually this is eth1).
Use cursor keys to go UP or Down with the selection cursor and then pres [TAB] to go to the [Next] button.
Click [Next]
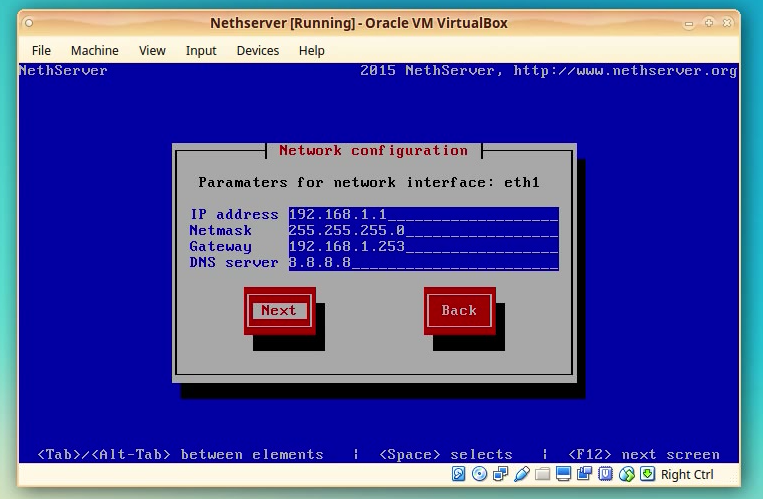
In the next screen you will be presented with network configuration for eth1.
We can accept the default values or you can modify them as needed.
NOTE: If you modify the network address or subnet and other values, please take note of that values since they will be needed in the next steps!
Click [Next]
The next screen is the last configuration screen.
You will see the information regarding the root password
Default is: “Nethesis,1234”.
Also you will be notified that all data on the hdd will be lost if you press [Install].
Since we have an empty HDD we can proceed without any problems.
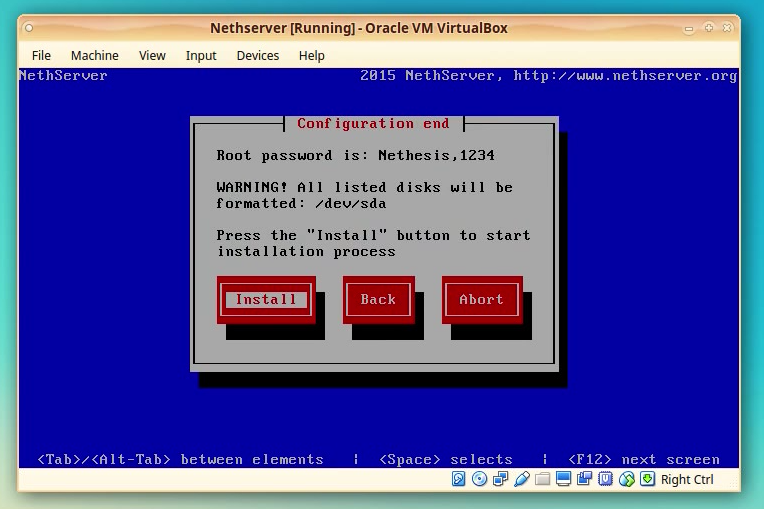
Click [Install]
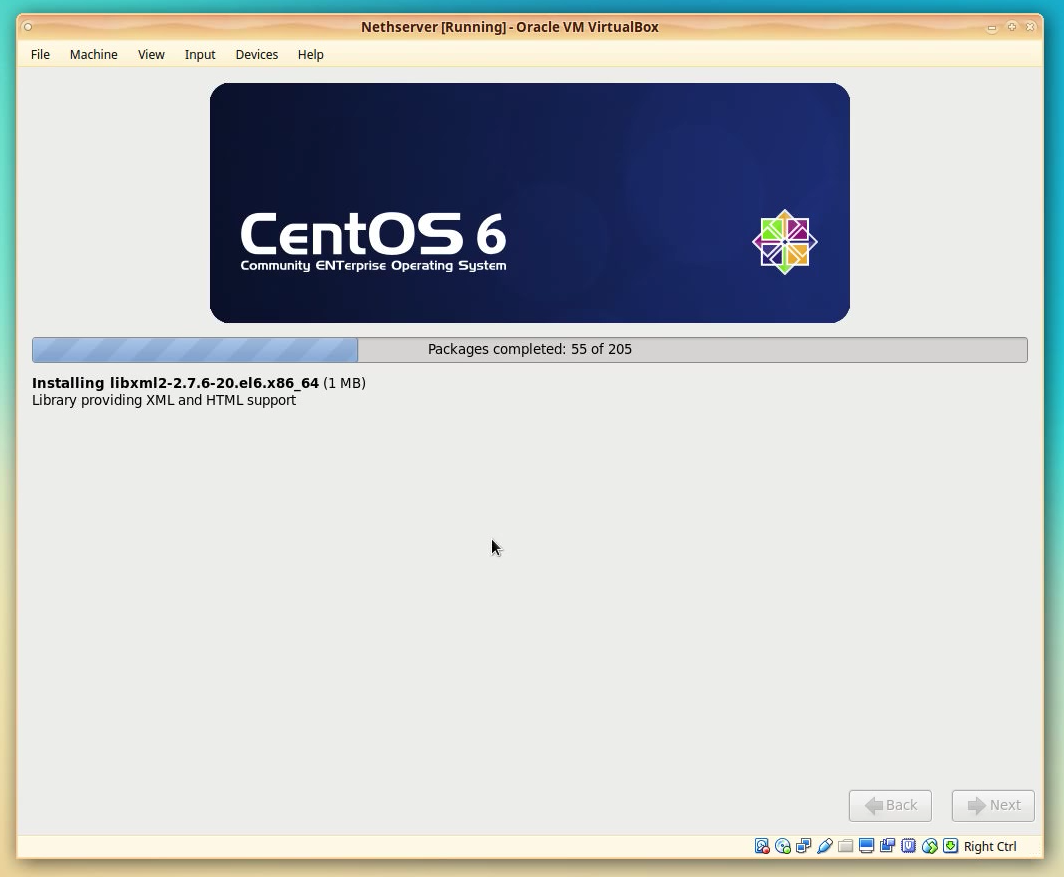
4. The graphical installation progress
After the last setup screen from anaconda, the installer switches to graphical mode to let you see the operations performed, installation of software packages and the settings applied.
There’s not much that you can do here but just watch in case something goes wrong.
After the installer finishes installing the boot-loader, the system will reboot.
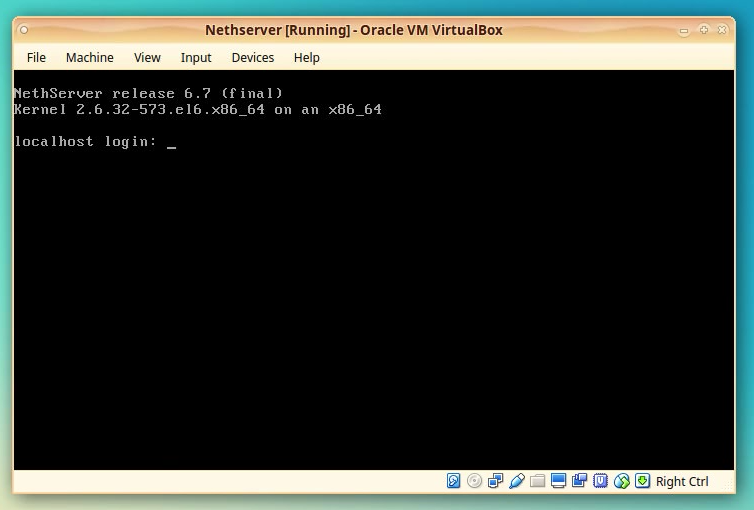
5. First initial configuration
After the machine reboots you will see the message: Running the initial configuration.
At the end of that task you will be presented with the login prompt.
We will login with user “root” and password “Nethesis,1234”.
After you have log in, let’s check the curent VBox network configuration.
Type:
“ifconfig”
and press [ENTER].
For now you will only see eth1 and lo configured.
Check that the eth1 has the correct configuration of IP and Netmask.

Switch back to your desktop and open a terminal / command prompt
Note: If you are on Linux, press [ALT] + [F2] and then type
“mate-terminal” or “xterm”.
If you are on Windows, press [Win] + [R] and then type:
“CMD” .
and press [ENTER]
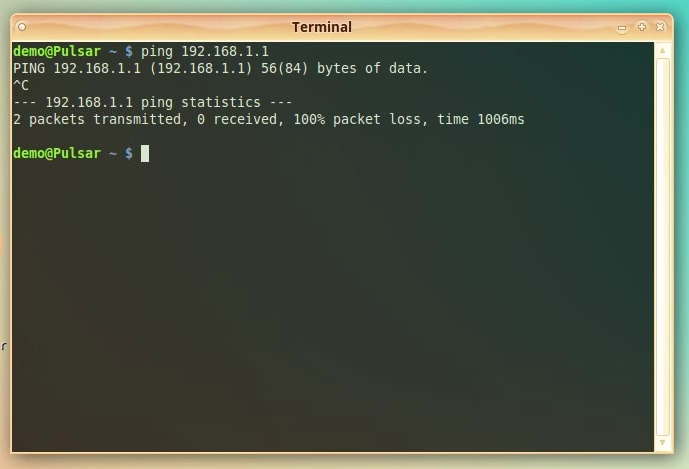
Now, let’s see if we can reach the NethServer VBox machine from our desktop.
In the new terminal/CMD window type:
“ping 192.168.1.1”
press [ENTER]
NOTE: to stop the ping command press [CTRL]+[C].
You will see that the ping command fails. It is not able to reach the NethServer Lan interface.
NOTE: If you have set another IP address for eth1 in the setup stage please replace the 192.168.1.1 in the example, with the address you used.
Example:
“ping custom_IP_address_of_NethServer_lan ”
Let’s check the network configuration on our host machine.
Type:
“ifconfig” or “ipconfig”
depending of your OS platform.
You should see the network configuration details. Notice that there is no adapter that will permit connection between the two machines (Host PC and Vbox).

We will fix this in the next step.
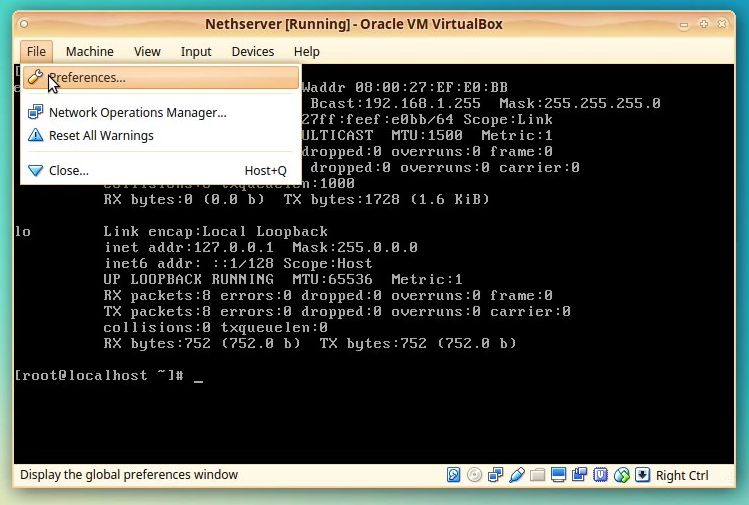
5.1 Configure the Host and Vbox machines to be in the same internal network
Go to your Vbox machine window and click on the File menu, select the Preferences option.
A new window will appear named “VirtualBox – Preferences”.
On the left menu select the Network section.
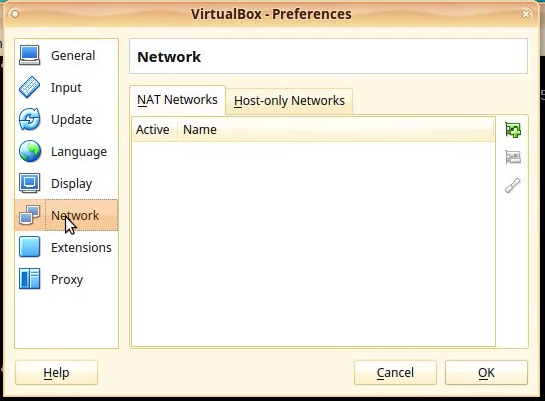
On the right side of the window select the: Host-only Networks tab.
It should be empty since no internal network is defined for now.
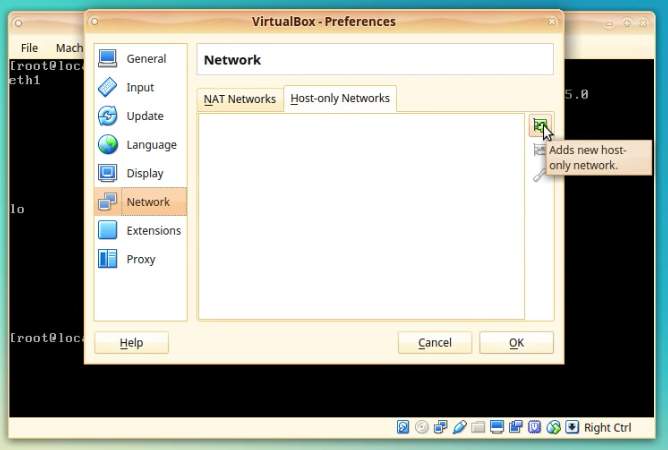
To add a new network, click on the icon with a green plus sign located on the right side of the window.
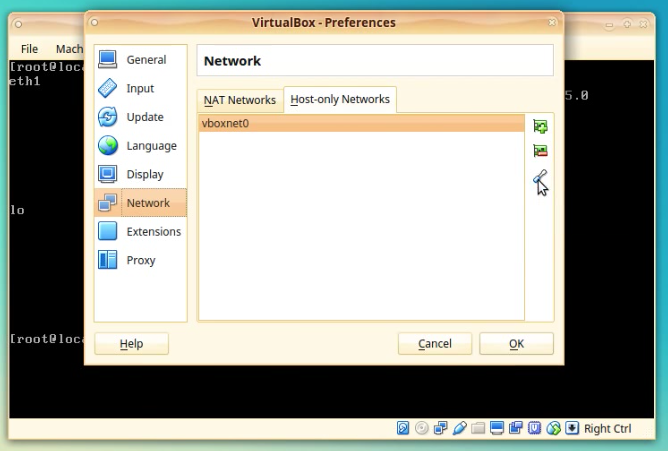
After clicking you will see a new network appears in the list “vboxnet0”.
This internal virtual network exists only between the host PC and the Vbox machine.
TIP: You can later use this vboxnet0 to connect other Vbox machines you will create, to the NethServer Vbox machine and it will act as a virtual LAN.
After the vboxnet0 has been created, we need to set it up.
To alter the settings of the vboxnet0, click on the icon with a light-blue screwdriver, also located on the right side of the screen.
A new window will appear named “Host-only Network Details”.
The first tab is the Adapter tab. In here we alter the settings for the virtual adapter that will be assigned to the Host PC.
In the IPv4 Address field modify the value of the ip address to match the same class/network as the value of the NethServer Lan IP address.
We will assign the IP: 192.168.1.10 for our Host PC.

NOTE: Also if you made changes to the Network Mask in the setup stage, alter that value to match your values.
Leave the IPv6 fields not filled since we will not use IPv6.
Click on the DHCP Server tab.
Verify that the DHCP is turned off. If it is not, then un-check the Enable Server option.
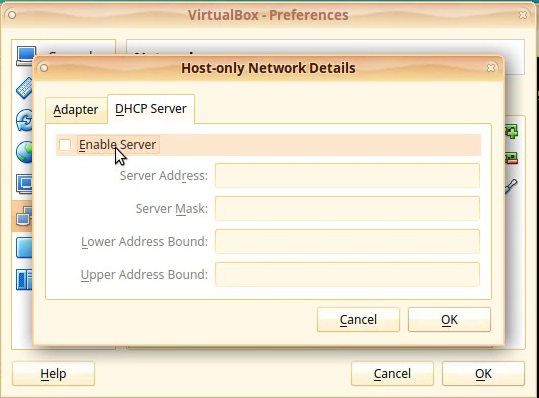
Click [OK] to apply the settings.
You will see a progress window that will confirm that the settings are applied.
Next, we need to alter the NethServer Vbox machine Network settings.
Click on the Devices menu and then select Network option.
In the sub-menu select the Network Settings option.
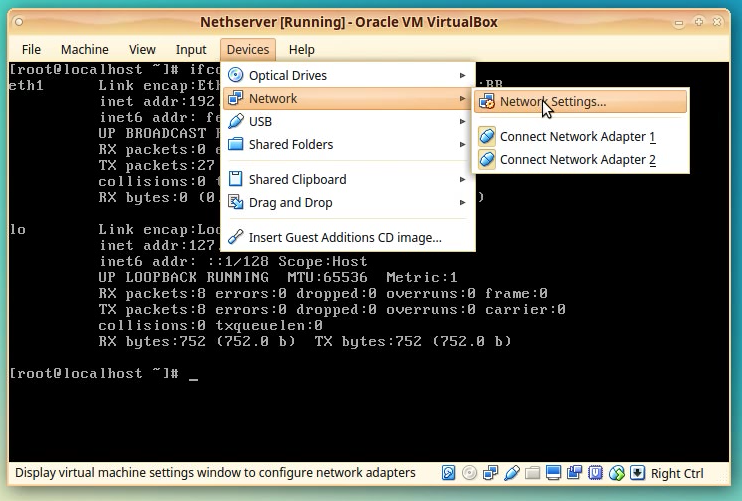
The Settings window for our Vbox machine appears.
We have the first adapter Adapter 1 presented to us.
We just check that the correct settings are applied and in effect.
We need to have eth0 connected directly to the network card of our Host PC.
The Attached to: selection should be “Bridged Adapter”.
The Name should be “eth0”
We confirm that the settings are still the same as before for Adapter 1

Click the Adapter 2 tab.
We will need to modify the settings for the second adapter.
In the Attached to: select Host-only Adapter.
You will see that the Name: field has automatically selected vboxnet0. Since it is the only network available in the system.
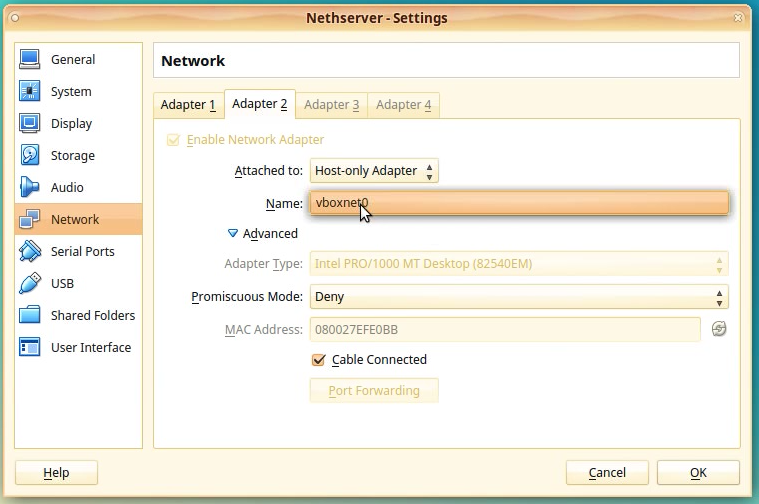
Click [OK] and wait for the settings to be applied.
After the settings are applied we check that everything is as we want.
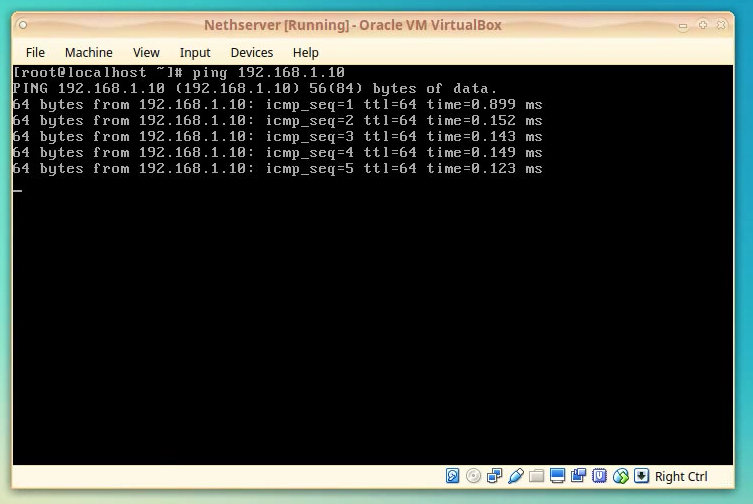
Go to NethServer VBox
Type:
“ping 192.168.1.10”
and press [ENTER] to test that we can reach the Host PC.
You should see reply’s from that ping.
64 bytes from 192.168.1.10: icmp_seq=1 ttl=64 time=0.899 ms

64 bytes from 192.168.1.10: icmp_seq=2 ttl=64 time=0.199 ms

64 bytes from 192.168.1.10: icmp_seq=3 ttl=64 time=0.186 ms

…
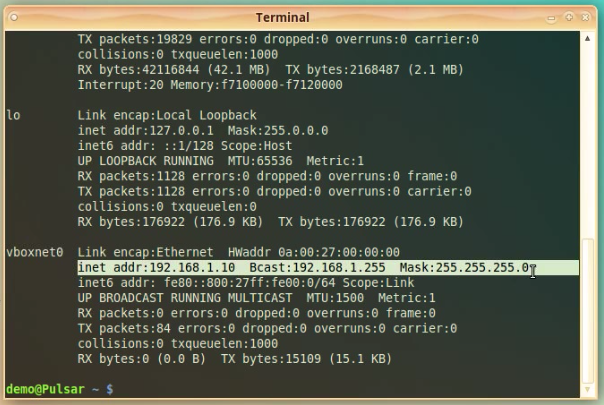
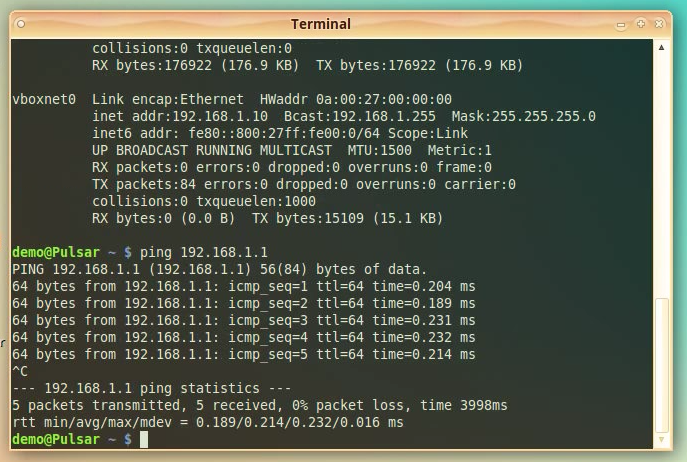
Next go to the terminal / command prompt on your desktop and check that we have the virtual adapter added to the Host PC system.
Type:
“ifconfig”
and press [ENTER]
NOTE: Type:
”ipconfig”
press [ENTER] if you are in windows.
You should see another adapter added.
The new adapter should be named: vboxnet0
The settings for IP and Netmask should match the ones that we have set up in the Virtual Box Preferences window.
Let’s test now that the Host PC can reach the NethServer Vbox machine.
Type:
“ping 192.168.1.1”
and press [ENTER] to test that we can reach the VBox machine.
You should see reply's from that ping.
64 bytes from 192.168.1.1: icmp_seq=1 ttl=64 time=0.209 ms
64 bytes from 192.168.1.1: icmp_seq=2 ttl=64 time=0.189 ms
64 bytes from 192.168.1.1: icmp_seq=3 ttl=64 time=0.286 ms
…
We now have connectivity both ways between Host PC ![]() VBox Machine.
VBox Machine.
6. Accessing the Nethserver VBox machine from the Host PC browser
After we have successfully set up the connection between the two machines we can access the Nethserver web-admin interface.
For this open a browser from your desktop and type:
You should see a warning about the certificate of the webserver. Ignore that warning and continue.
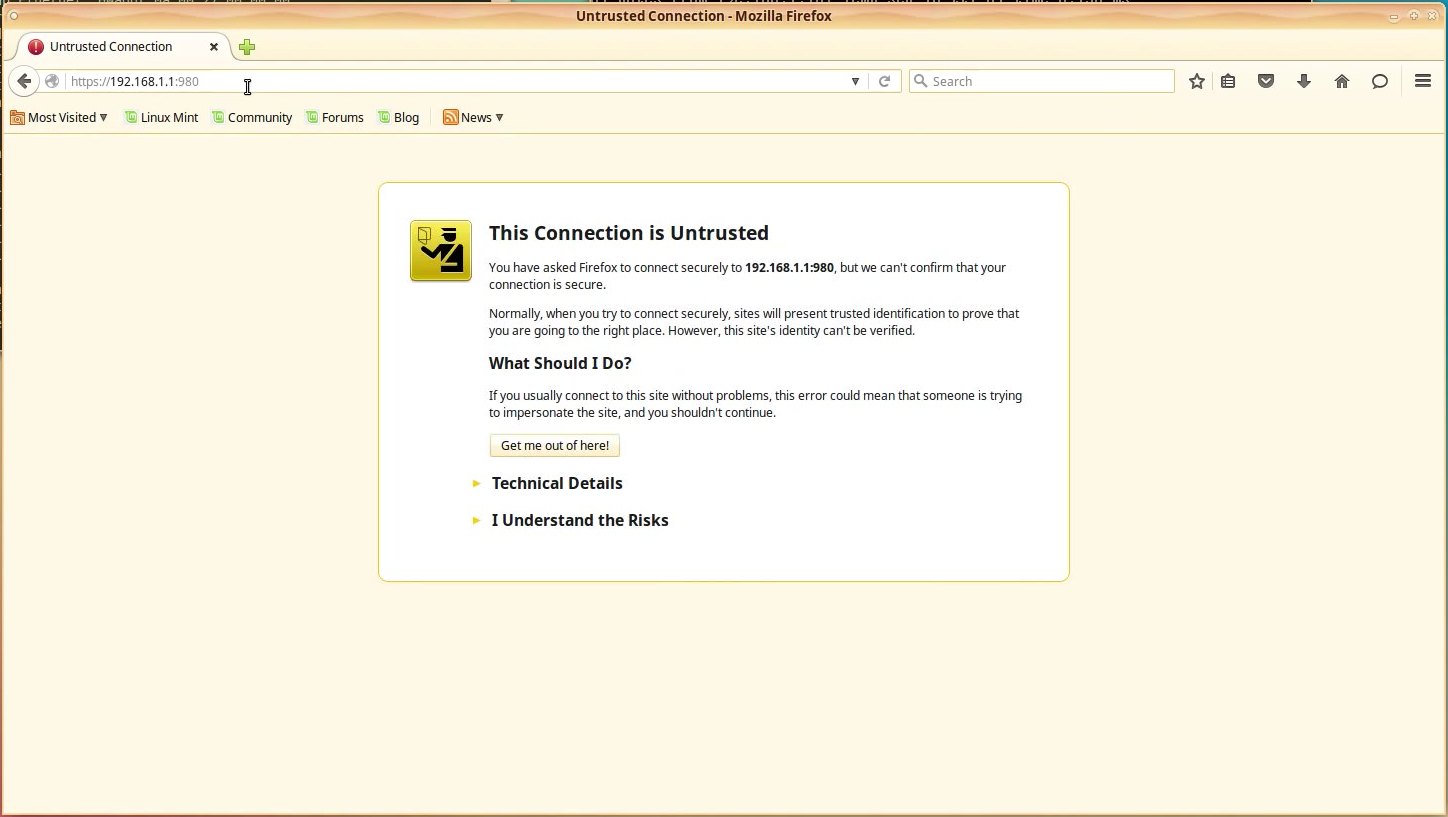
NOTE: It is ok to ignore that warning since it is generated by the certificate presented not having the correct hostname set up in it and does not correspond with the hostname of the server that is presenting the certificate.
If you will use the Nethserver as a production server it is mandatory that you set up the certificate according to your settings!
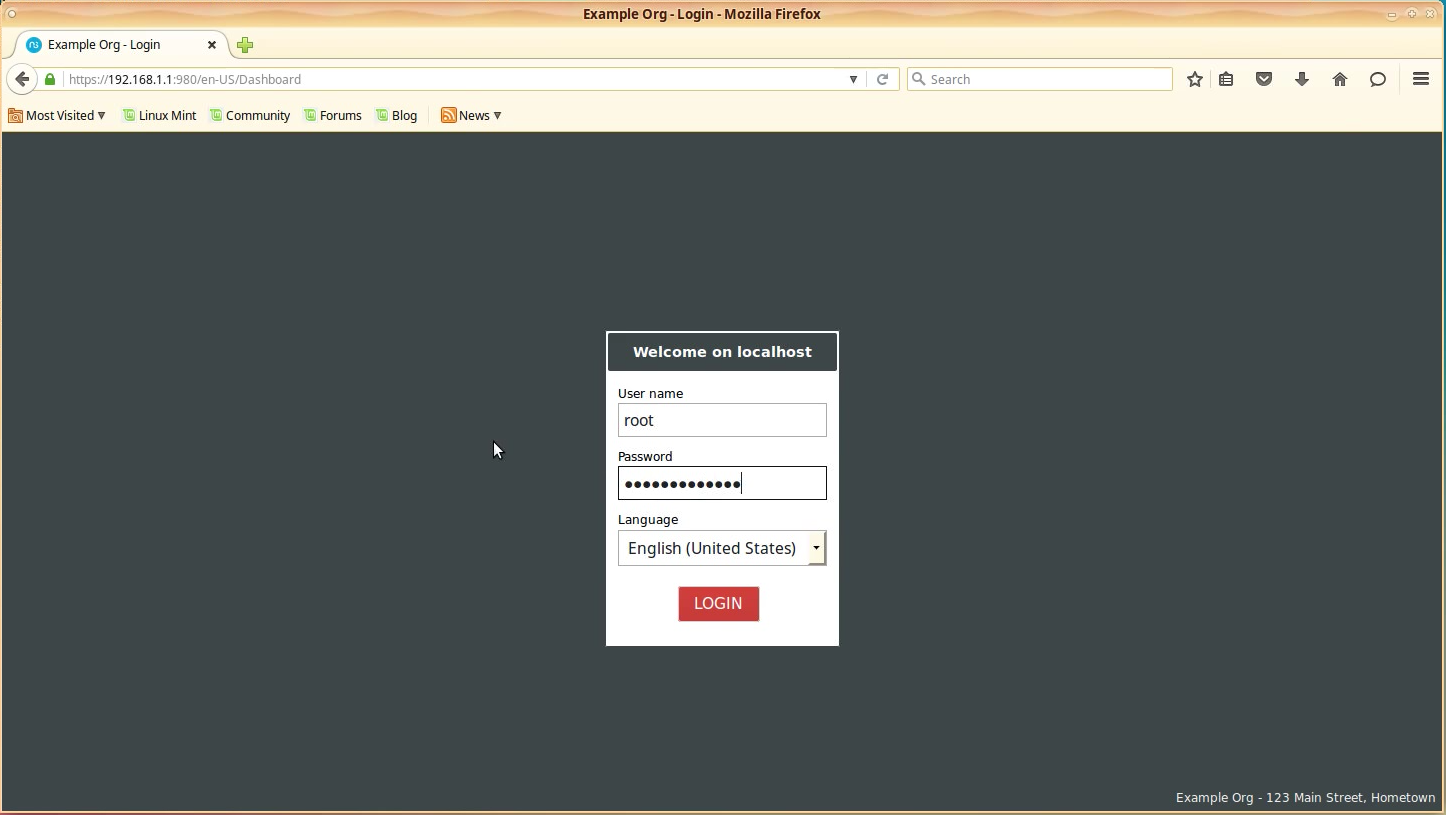
Login to the Nethserver with the user “root” and password “Nethsesis,1234”
The initial configuration will be presented and you will have to enter the settings to be able to continue (New password, hostname, date/time, SSH, Usage statistics).

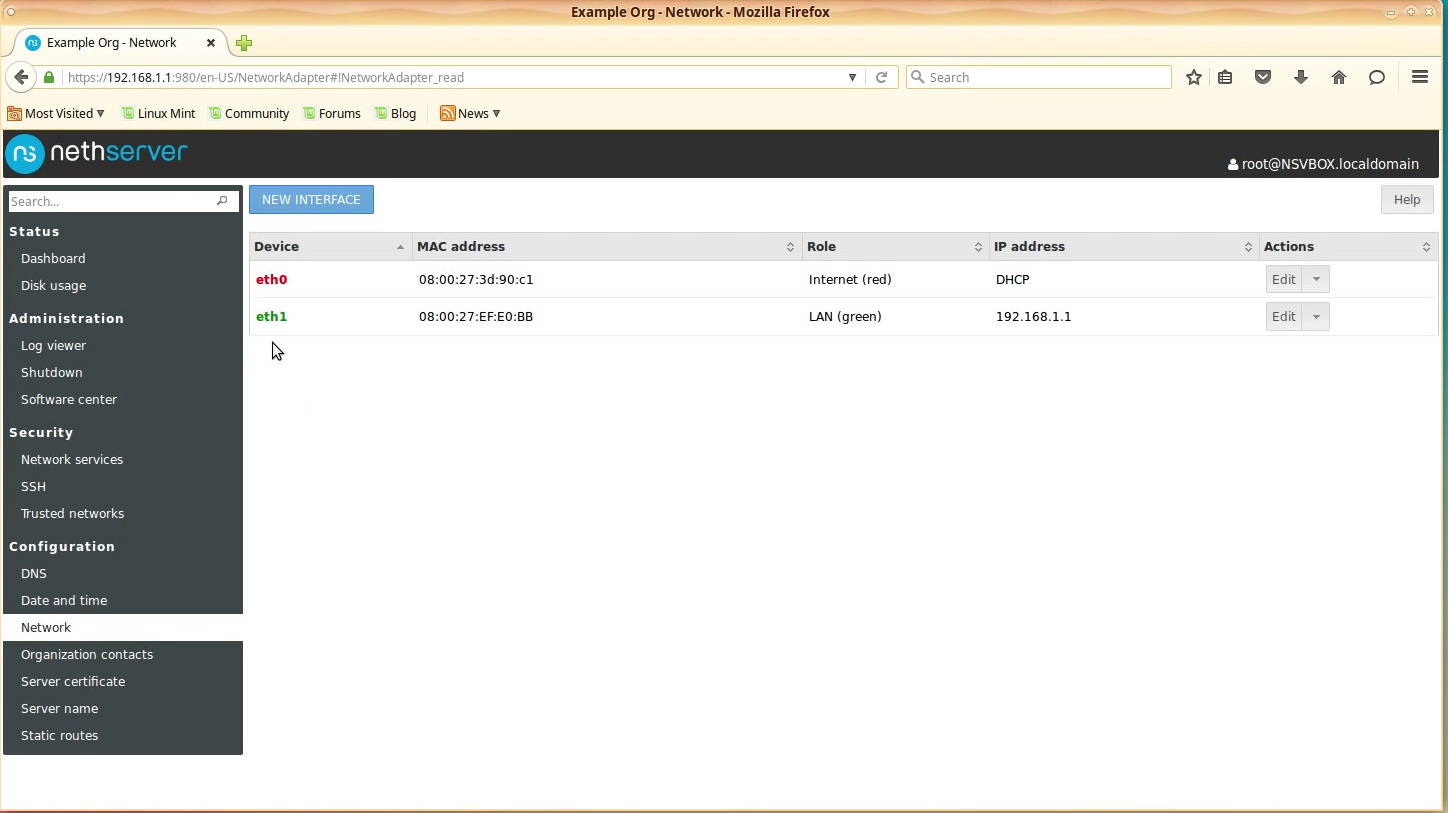
After the initial settings have been applied you will be presented with a screen that has the network connections presented.
Select the Edit option for the eth0 interface (it is in grey for now).
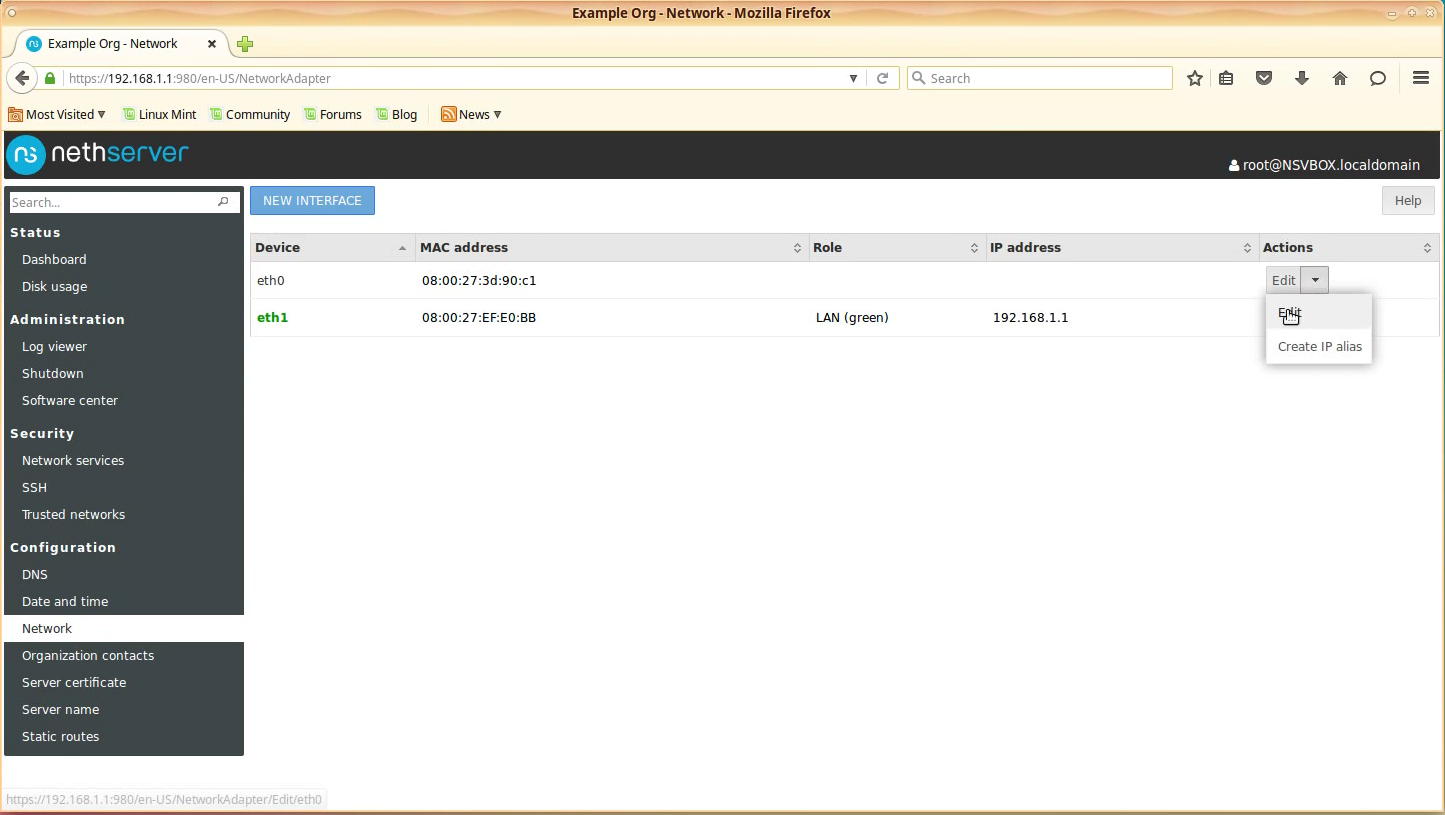
In the next screen you will be presented with the options for that interface.
In the Role field chose option Internet (red).
Select DHCP as option to get IP.
Confirm that the eth0 MAC address is the correct one.
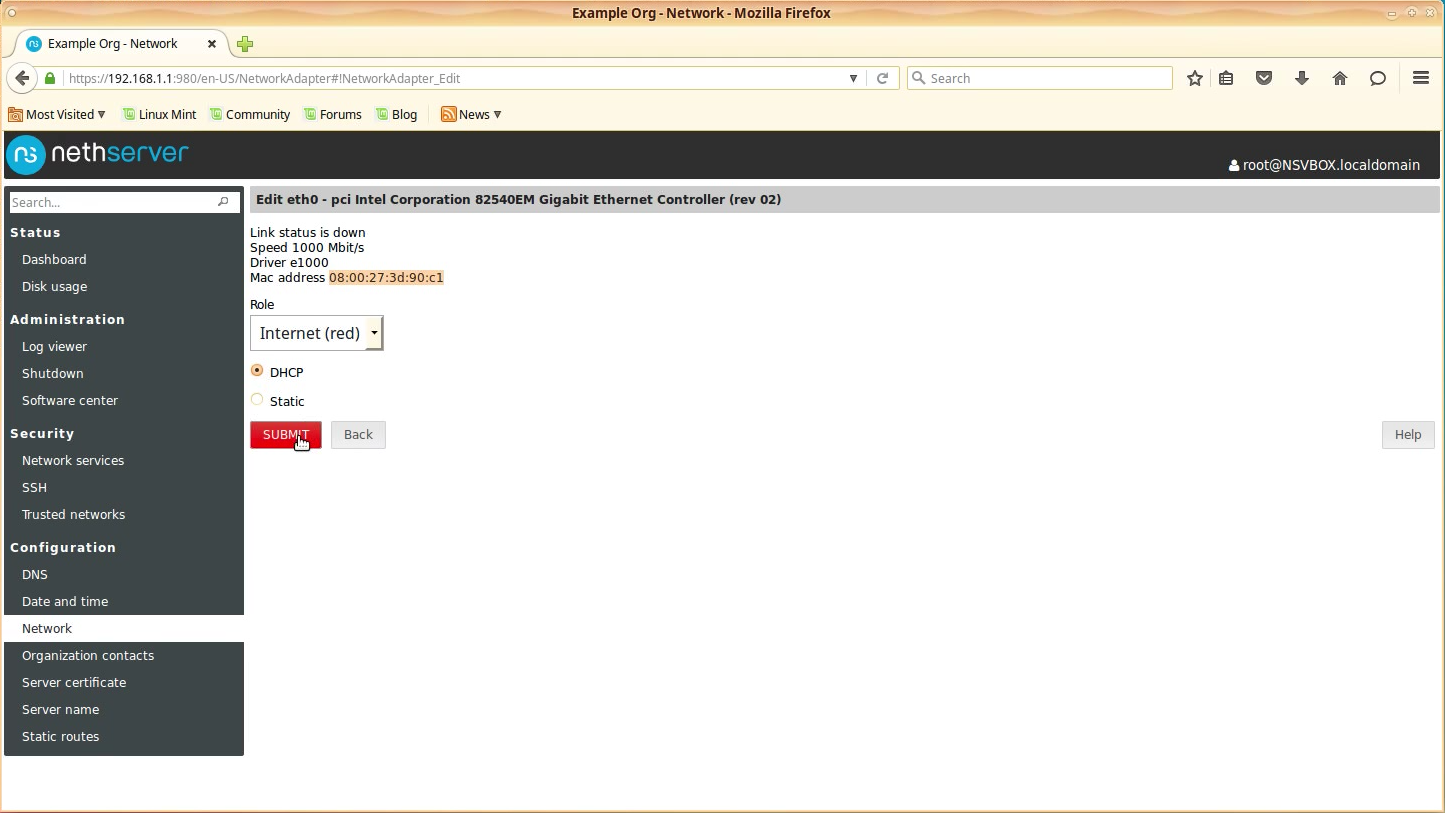
Click [SUBMIT] and wait for the settings to be applied.
You should now see the eth0 adapter in red.
NOTE: This settings depend on your network environment!
If your physical LAN to which the Host PC is connected, gets the IP’s via DHCP, then the Vbox machine eth0 adapter, will also obtain the IP from your DHCP server.
Otherwise, if your physical LAN uses manually specified IP address for your machines, you will have to keep the Static option checked, and enter the values that you want.
Those values should be in the same range as the ones for your Host PC but NOT identical!
7. Check that all the network settings are OK and internet is available
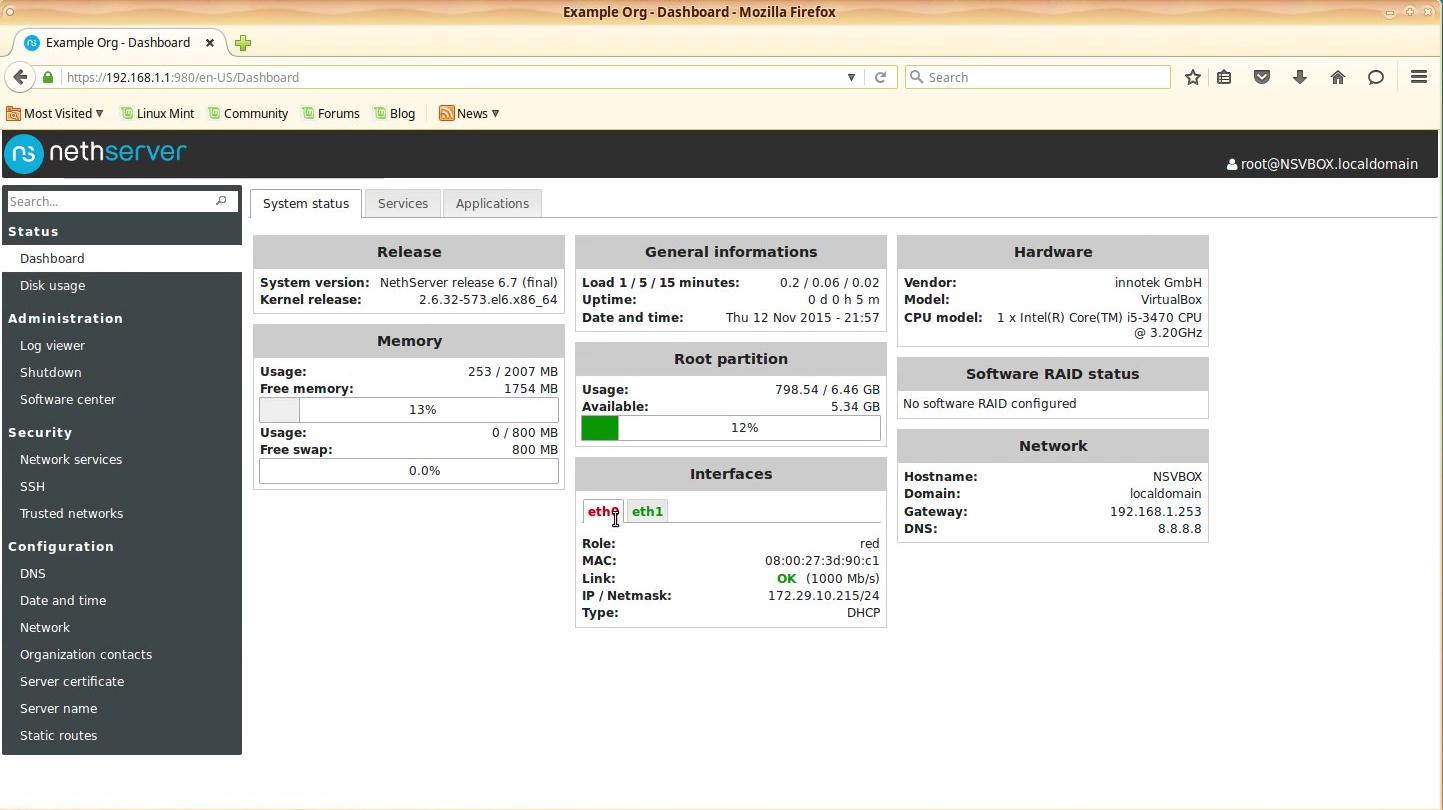
Click the [Dashboard] option on the left menu.
You should now see the NethServer Dasboard and everything should be ok.
In the Interfaces widget you should see the correct settings.
Go to your NethServer VBox window. The shell should still be opened.
Let’s check that the NethServer is able to reach the internet.
Type:
“ping www.yahoo.com”
press [ENTER]
NOTE: You can use Yahoo or some other internet address that you know it’s up).
You should see replies from the server:
64 bytes from ir1.fp.vip.ir2.yahoo.com:  (IP_ADDRES) icmp_seq=1 ttl=56 time=10.209 ms
64 bytes from ir1.fp.vip.ir2.yahoo.com:  (IP_ADDRES) icmp_seq=2 ttl=56 time=6.129 ms
64 bytes from ir1.fp.vip.ir2.yahoo.com:  (IP_ADDRES) icmp_seq=3 ttl=56 time=6.120 ms
…

With this we now have connectivity to internet from our NethServer Virtual Box machine.
8. We have finished our installation
Go to the NethServer web interface and select the [Shutdown] from the left menu and select Reboot option.
Click [SHUDOWN THE SYSTEM]
This will Reboot the server and we will do a final check to see that the settings remain the same and do not change over reboots.
Wait for the system to reboot and then check the NethServer’s Dashboard.
Everything should be ok, as expected.
Congratulations! You now have a fully working NethServer installation.
We are finished with our installation and you should now go on and configure your NethServer or configure it for Development.
For Development please read our Dev Station How-To (available soon).
9. References
For further and more in depth reading follow this links:
Nethserver documentation: http://docs.nethserver.org/en/latest/
Virtual Box documentation: https://www.virtualbox.org/wiki/Documentation
Virtual Box downloads: https://www.virtualbox.org/wiki/Downloads