Arm development setup for NS7 (how to get started)

Preface
The goal of this write-up is to create an development environment for armhfp (arm 32bit) so one can get started with their own special projects.
I’m aware, to some extent, this will follow my personal workflow preferences and apologize for this upfront. (It makes the writ-up a bit easier :grinning: )

Which brings us to the choice of distro the use as development environment. CentOS-el7 starts to show it’s age and that’s not funny when doing development. More over some packages (nodejs in particularly) can not be build on el7 armhfp. (long story about missing back-ports to gcc and missing SCL’s)
Instead of suggesting my personal choice (mageia) going to use Fedora 34 here.
Unfortunately could not find a fedora offical image running armhfp on a Raspberry PI4 so created a custom one with a homebuild kernel

First of all; Why still armhfp (32bit)?
On el7-arm we are between a rock and a hard place.
The rock: RHEL pulled the plug on el7 aarch64 (64bit) in 2019, hence epel-7 for aarch64 is not maintained since then. Centos SIG however maintains aarch64 including SCL’s.
The hard place: armhfp has no official epel-7 but a good maintained (unreleased) rebuild of it, however no SCL’s. :crazy_face:
Lacking an epel-7 makes it unfeasible to fully support aarch64, hence armhfp is the preferred arch for ns7.

Setting up fc34
If you are using a RPI4 download the custom image, otherwise download the official FC34 minimal image, and flash it to a SD-card.
Using the custom RPI4 image: (ssh)login as root (password: fedora), change root password, set hostname and timezone: (as an example)

passwd

hostnamectl set-hostname <FQDN>
timedatectl set-timezone Europe/Amsterdam

grow the rootfs partition:

growpart /dev/mmcblk0 2
resize2fs /dev/mmcblk0p2

create a user

useradd -c "Full Name" -G wheel <user>
passwd <user>

and logout as root and login as <user>

(If using the official image you need to connect a monitor / keyboard and follow the instructions)

Installing minimal requirements

sudo dnf install -y wget which mc git mock rpm-build rpmdevtools
sudo dnf install http://packages.nethserver.org/nethserver/7/arm-base/armhfp/Packages/nethserver-mock-1.6.3-1.ns7.noarch.rpm

mc as an minimal requirement?
yep, you are going to love it inspecting the rpm’s you build

user setup

sudo usermod -a -G mock <user>

git config --global user.name "<user>"
git config --global user.email "email_adress"

If you are a sissy like me:

git config --global core.editor "nano -w"

Now you are pretty much good to go developing :grinning:

First tests/builds

test 1 (check if mock is functional)

mkdir -p ~/development/nethserver
cd ~/development/nethserver
mock -r nethserver-7-armhfp --init

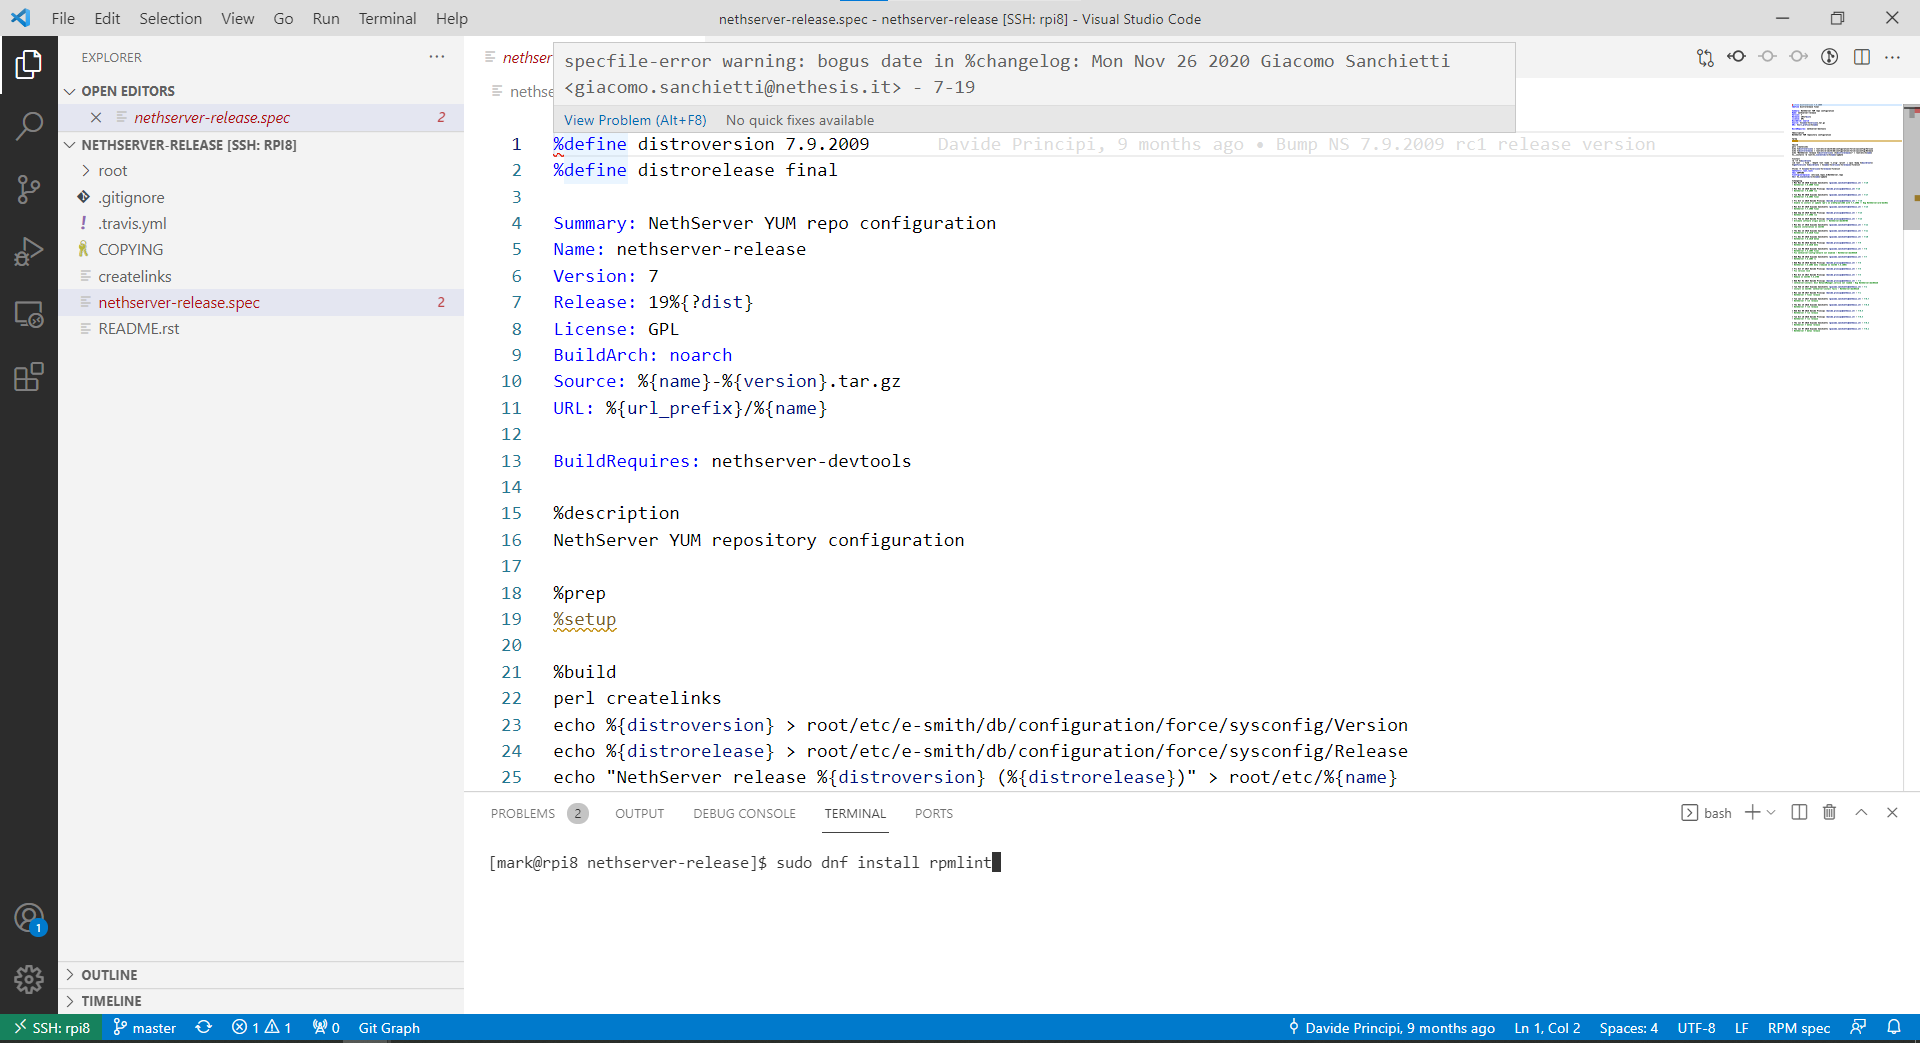
test 2 (rebuild a nethsever module)

cd ~/development/nethserver
git clone https://github.com/NethServer/nethserver-release
cd nethserver-release
make-rpms nethserver-release.spec

test 3 (rebuild a package)

cd ~/development/nethserver
mkdir -p nano/org && cd nano/org
wget http://vault.centos.org/8.4.2105/BaseOS/Source/SPackages/nano-2.9.8-1.el8.src.rpm 
cd ..
mock -r nethserver-7-armhfp --resultdir=. org/nano-2.9.8-1.el8.src.rpm
SPOILER ALERT: the build fails (encourage you to try it to see / learn from the build log)
# it's very trivial, a unpackaged html doc we do not want anyways;
# so let's fix it

rpm -i org/nano-2.9.8-1.el8.src.rpm
nano ~/rpmbuild/SPECS/nano.spec

# On line 50 add ,faq to the html files to be removed
# 49 # remove installed HTML documentation
# 50 rm -f %{buildroot}%{_docdir}/nano/{nano,nano.1,nanorc.5,rnano.1,faq}.html

rpmbuild -bs ~/rpmbuild/SPECS/nano.spec
mv ~/rpmbuild/SRPMS/nano-2.9.8-1.fc34.src.rpm org/

# let's try agian
mock -r nethserver-7-armhfp --resultdir=. org/nano-2.9.8-1.fc34.src.rpm

Happy Hacking
(note this is wikified go improve this! )

5 Likes

Creating a local repository

Install (apache) webserver

sudo dnf install httpd

open http/https ports on the firewall

sudo firewall-cmd --permanent --zone=public --add-port=80/tcp
sudo firewall-cmd --permanent --zone=public --add-port=443/tcp
sudo firewall-cmd --reload

Create a apache configuration for the local repository

sudo nano /etc/httpd/conf.d/repository.conf
With this content
# Local Repository

Alias "/nethserver" "/home/repository/nethserver"

<Directory /home/repository/nethserver>

    Options None
    Options Indexes FollowSymLinks MultiViews
    IndexOptions Namewidth=*
    AllowOverride None

    <RequireAll>
        Require all granted
    </RequireAll>

</Directory>

Load the new configuration

sudo systemctl reload httpd.service

Setup directories with some sticky permissions

export ME="$(whoami)"

sudo mkdir /home/repository/
sudo chown $ME. /home/repository/

Now the “sticky” part so all files in the directory inherent group ownership and permissions

mkdir --mode=u+rwx,g+rs,g-w,o-rwx /home/repository/nethserver

Set the permissions so apache can only read the files

sudo chown $ME:apache /home/repository/nethserver

Almost done, we have SELinux enabled on the Fedora installation so we need to set the right context here:

sudo chcon -Rv --type=httpd_sys_content_t /home/repository/nethserver/

Create the rest of the skeleton:

mkdir -p /home/repository/nethserver/7/local/{Source,armhfp}
mkdir /home/repository/nethserver/7/local/armhfp/Packages

create the repository metadata:

createrepo  /home/repository/nethserver/7/local/armhfp/

by now the (empty) repository is up and running,
in a web-browser go to http://<FQDN or IP>/nethserver

Add the local repo to the mock configuration:

sudo nano /etc/mock/nethserver-7-armhfp.cfg
And add your local repository at the end of is the repo section
#
# NethServer 7 armhfp mock configuration
#

<truncated> 

[epel-pass1]
name=Epel rebuild for armhfp
baseurl=https://armv7.dev.centos.org/repodir/epel-pass-1/
gpgcheck=0
enablegroups=0
enabled=1

[local]
name=Local Nethserver repository for $basearch
baseurl=http://<FQDN OR IP>/nethserver/$releasever/local/$basearch/
enabled=1
gpgcheck=0

""").substitute(releasever=7, basearch='armhfp', infra='stock')

Lets test it ,if you had build nano-2.9.8-1 you may:

cp ~/development/nethserver/nano/*.armv7hl.rpm /home/repository/nethserver/7/local/armhfp/Packages/
cp ~/development/nethserver/nano/*.src.rpm /home/repository/nethserver/7/local/Source/

Update repo metadata

createrepo  /home/repository/nethserver/7/local/armhfp/

and run: (the chroot should be rebuild because we touched nethserver-7-armhfp.cfg)

mock -r nethserver-7-armhfp --install nano

Check if the (newer) nano 2.9.8-1.ns7 is installed from your local repository,
OR check it in the buildchroot:

mock -r nethserver-7-armhfp --shell
nano --version
exit

Remote development with Microsoft VScode

Yep beautiful peace of open-source software (and my favorite tool )
(NOTE: this does not work on a CentOS el7 installation)

Install one missing dependency on the fc34 armhfp development system

sudo dnf install libatomic

And if not do already generate a ssh key pair

ssh-keygen

Install vscode on your regular (linux, mac or windows) desktop
and in vscode install the Remote SSH extension
image

If you are using windows 10 enable openssh and generate a ssh-key pair

On the (windows) desktop create a ssh-configuration file C:\Users\<user>\.ssh\config

Host <hostname>
    Hostname <hostname>
    User <user>
    IdentityFile ~/.ssh/id_ed25519

Copy the public key form the desktop system to .ssh/ in home directory of the (remote) arm development setup an deploy it

scp C:\Users\<user>\.ssh\id_ed25519.pub <user>@<hostname>>:~/.ssh/authorized_keys
ssh <user>@<HOSTNAME or IP> 
chmod 600 ~/.ssh/authorized_keys
exit

In vscode the remote target should show up,
open it in a new windows (and if asked confirm it a linux remote)
image

Everything under your finger tips, even a terminal ( press Ctrl + ` )

Have fun :grinning:

4 Likes

In case your NIC is not configured correctly as there is no ifconfig use the nmcli cmd

to get the device name run

nmcli dev status

To see the current network configuration for your device run

ip addr | grep <device>

run this cmd to find out the uuid and connection name

nmcli con show -a

To change the IP of your NIC to a static IP run

sudo nmcli connection modify <network_uuid< IPv4.address <new_static_IP>/24

If you are feeling uncomfortable with the network UUID, you can also the connection name for example Wired connection 1.

sudo nmcli connection modify 'Wired connection 1' IPv4.address <new_static_IP>/24

then add the rest of the required info like so

sudo nmcli connection modify 'Wired connection 1' IPv4.gateway <gatewayip>

sudo nmcli connection modify 'Wired connection 1' IPv4.dns <dnsip>

to Make this a static IP run

sudo nmcli connection modify 'Wired connection 1' IPv4.method manual

Now turn off and then turn on the connection to apply changes

sudo nmcli connection down 'Wired connection 1'
sudo nmcli connection up 'Wired connection 1'

and done.

I’ve also found raspcontroller for Android works well with nethserver even if it says that it only works with raspian

3 Likes

Yeah, kept the Fedora image close to the default setup of the distro.
This means network is manged by Networkmanager;
(even though I dislike NM quite severely = understatement)

3 Likes