I’d replace apt-get with yum and give it a try.
Yes, it worked. The more interesting part is the path and the content of the flyvemdm.conf ?
Looks like this installation will never end… ![]()
I’d try with following changes:
auth_opt_host server.domain.tld
auth_opt_port 3312
auth_opt_user mosquitto
auth_opt_pass PASSWORD
OK thank you. I am busy the next two days…
OK, next step is: TLS Listener setup
TLS provides security to the communication, through authentication of server and client, besides data encryption.

Use TLS version 1.2, lower versions are no longer considered safe.

Mosquitto does not support SSLv2 or SSLv3 (and they are no longer safe).

- Copy in /etc/mosquitto/certs your certificate, your certificate authority chain and private key.

- Secure your private key

chmod 600 /etc/mosquitto/certs/private-key.key

chown mosquitto:root /etc/mosquitto/certs/private-key.key

- Refresh hash and symlinks to your certificates

c_rehash /etc/mosquitto/certs

Use a certificate signed by a certified authority or you may have trouble with the android devices, using them with custom certification authorities might not work (not tested).

> After sending the certification request, the CA will very likely send back several files.
>
>
>
> One is the certificate, signed by the CA, and the others are intermediate certificates.
>
>
>
> In Mosquitto the certificate must be the concatenation of the certificate delivered + the intermediate certificates.
>
>
>
> The client operating system must contain more certificates to establish a trust chain to the root certificate.

Append the following to /etc/mosquitto/conf.d/flyvemdm.conf.

listener 8883 cafile /etc/mosquitto/certs/cachain.pem certfile /etc/mosquitto/certs/cachain.pem keyfile /etc/mosquitto/certs/private-key.key tls_version tlsv1.2 ciphers ECDHE-RSA-AES128-GCM-SHA256:ECDHE-ECDSA-AES128-GCM-SHA256:ECDHE-RSA-AES256-GCM-SHA384:ECDHE-ECDSA-AES256-GCM-SHA384:DHE-RSA-AES128-GCM-SHA256:DHE-DSS-AES128-GCM-SHA256:kEDH+AESGCM:ECDHE-RSA-AES128-SHA256:ECDHE-ECDSA-AES128-SHA256:ECDHE-RSA-AES128-SHA:ECDHE-ECDSA-AES128-SHA:ECDHE-RSA-AES256-SHA384:ECDHE-ECDSA-AES256-SHA384:ECDHE-RSA-AES256-SHA:ECDHE-ECDSA-AES256-SHA:DHE-RSA-AES128-SHA256:DHE-RSA-AES128-SHA:DHE-DSS-AES128-SHA256:DHE-RSA-AES256-SHA256:DHE-DSS-AES256-SHA:DHE-RSA-AES256-SHA:AES128-GCM-SHA256:AES256-GCM-SHA384:ECDHE-ECDSA-RC4-SHA:AES128:AES256:HIGH:!RC4:!aNULL:!eNULL:!EXPORT:!DES:!3DES:!MD5:!PSK

- Restart Mosquitto

- Test you can successfully connect to Mosquitto

mosquitto_sub -h host_name_of_mosquitto -t "#" -p 8883 -i test-client --cafile /tmp/mycert.pem --capath /etc/ssl/certs/

- Check the ports that Mosquitto listens. You should see only the port 8883.

netstat -taupen | grep mosquitto

You can also use OpenSSL to test the configuration

openssl s_connect -connect fqdn.of.mosquitto:8883

This will launch openssl as a client using the TLS protocol and leave the terminal in a state similar to telnet

Many debug information is displayed during TLS negociation, useful to diagnose TLS problemsUnder /etc/pki are a lot of files:
[root@mdmsrv01 pki]# tree
.
├── CA
│   ├── certs
│   ├── crl
│   ├── newcerts
│   └── private
├── ca-trust
│   ├── ca-legacy.conf
│   ├── extracted
│   │   ├── java
│   │   │   ├── cacerts
│   │   │   └── README
│   │   ├── openssl
│   │   │   ├── ca-bundle.trust.crt
│   │   │   └── README
│   │   ├── pem
│   │   │   ├── email-ca-bundle.pem
│   │   │   ├── objsign-ca-bundle.pem
│   │   │   ├── README
│   │   │   └── tls-ca-bundle.pem
│   │   └── README
│   ├── README
│   └── source
│       ├── anchors
│       ├── blacklist
│       ├── ca-bundle.legacy.crt -> /usr/share/pki/ca-trust-legacy/ca-bundle.legacy.default.crt
│       └── README
├── java
│   └── cacerts -> /etc/pki/ca-trust/extracted/java/cacerts
├── nssdb
│   ├── cert8.db
│   ├── cert9.db
│   ├── key3.db
│   ├── key4.db
│   ├── pkcs11.txt
│   └── secmod.db
├── nss-legacy
│   └── nss-rhel7.config
├── rpm-gpg
│   ├── RPM-GPG-KEY-CentOS-7
│   ├── RPM-GPG-KEY-CentOS-Debug-7
│   ├── RPM-GPG-KEY-CentOS-SIG-SCLo
│   ├── RPM-GPG-KEY-CentOS-Testing-7
│   ├── RPM-GPG-KEY-EPEL-7
│   ├── RPM-GPG-KEY-NethForge-7
│   ├── RPM-GPG-KEY-NethServer-7
│   └── RPM-GPG-KEY-stephdl
├── rsyslog
└── tls
    ├── cert.pem -> /etc/pki/ca-trust/extracted/pem/tls-ca-bundle.pem
    ├── certs
    │   ├── ca-bundle.crt -> /etc/pki/ca-trust/extracted/pem/tls-ca-bundle.pem
    │   ├── ca-bundle.trust.crt -> /etc/pki/ca-trust/extracted/openssl/ca-bundle.trust.crt
    │   ├── httpd-admin.crt
    │   ├── localhost.crt
    │   ├── make-dummy-cert
    │   ├── Makefile
    │   ├── NSRV.crt
    │   └── renew-dummy-cert
    ├── misc
    │   ├── CA
    │   ├── c_hash
    │   ├── c_info
    │   ├── c_issuer
    │   └── c_name
    ├── openssl.cnf
    └── private
        ├── httpd-admin.key
        ├── localhost.key
        └── NSRV.key
Which one should I choose/copy for:
cafile /etc/mosquitto/certs/cachain.pem
certfile /etc/mosquitto/certs/cachain.pem
keyfile /etc/mosquitto/certs/private-key.key/etc/pki/tls/certs/localhost.crt. This is created by template from whatever system certificate is selected. Better yet, the result of config get pki ChainFile and config get pki CrtFile, respectively.
/etc/pki/tls/private/localhost.key, or better, config get pki KeyFile.
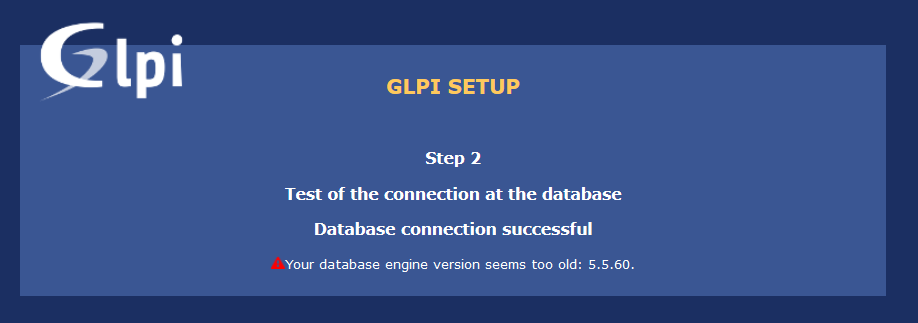
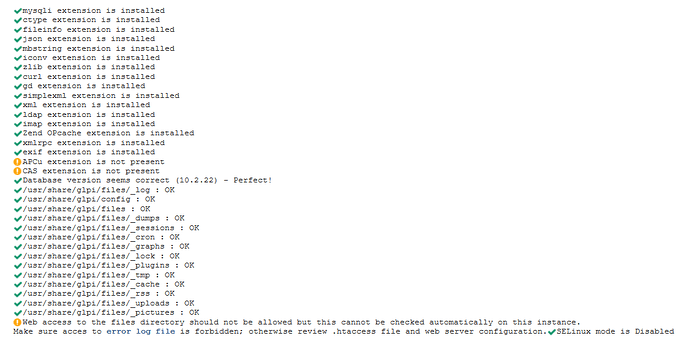
MySQL 5.6 or MariaDB 10.0 are minimum supported DB versions
https://glpi-install.readthedocs.io/en/latest/prerequisites.html#database
@fausp are you using MySQL for any service in your setup?
Sorry I used the wrong steps… It should work with this one:
wget https://github.com/glpi-project/glpi/releases/download/9.4.0/glpi-9.4.0.tgz
tar -xzf glpi-9.4.0.tgz
mv glpi /usr/share/

# Set owner to apache
chown -R apache:apache /usr/share/glpi

# Create httpd conf for glpi
cat << EOF > /etc/httpd/conf.d/glpi.conf
Alias /glpi /usr/share/glpi
<Directory /usr/share/glpi>
  Require all granted
  <FilesMatch \.php$>
     SetHandler "proxy:fcgi://127.0.0.1:9001"
  </FilesMatch>
</Directory>
<Directory /usr/share/glpi/files>
  Order Deny,Allow
  Deny from all
  Allow from 127.0.0.1
  Allow from ::1
  Allow from localhost
</Directory>
EOF

# Install Nethserver rh-php71 and extensions and mariadb 10.2 from stephdl repo
yum install http://mirror.de-labrusse.fr/NethServer/7/x86_64/nethserver-stephdl-1.0.7-1.ns7.sdl.noarch.rpm

yum -y install nethserver-rh-php71-php-fpm rh-php71-php-mysqlnd rh-php71-php-mbstring rh-php71-php-gd rh-php71-php-ldap \
rh-php71-php-imap rh-php71-php-opcache rh-php71-php-xmlrpc nethserver-rh-mariadb102

# Create database and user
mysql102
create database glpi;
grant all privileges on glpi.* to glpi@mdm01.mydomain.lan identified by 'Password';
exit;

# Restart services
systemctl restart httpd
systemctl restart rh-php71-php-fpm

# Install Wizzard
Browse to https://mdm01.inet.local/glpi install.
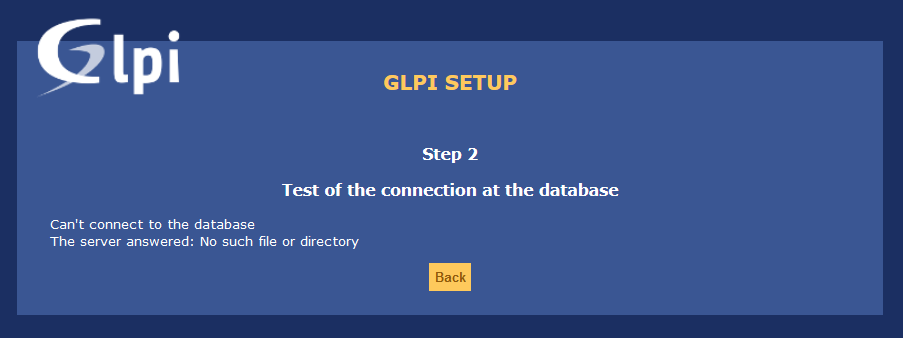
But I got another error:
Were asked to you the database connection setup?
https://glpi-install.readthedocs.io/en/latest/install/wizard.html#database-connection
Also: mariaDB and MySQL are sharing the same port or is customized?
Is it the wrong port? Did you try 3312?
Yes, thank you. It works now with Version 9.4.3 …
what was wrong?
I used localhost instead of hostname.domain.ltd:3312
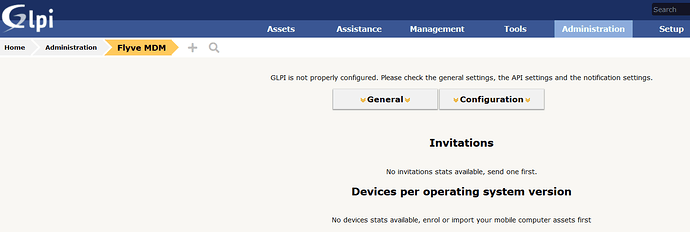
Cannot configure Flyve MDM with the Wizard because there are some points missing…
... Please check the general settings, the API settings and the notification settings. ...
Let me recommend you Headwind MDM - an open source Mobile Device Management system. The software is easily installed on Ubuntu Linux and Android devices. Its primary purpose is remote installation and update of mobile apps, as well as management of mobile devices.
Headwind MDM is an extensible platform which could be adapted to fit every company’s needs.
The software is used and highly rated by the users in such industries as retail, wholesale, logistics, and more.
Let me ask to @h-mdm: is the project going to officially support CentOS?
The project is cross-platform, and we have users who’s using the software on CentOS. As far as I know, the only thing they must do is to adjust the Tomcat directory in the installer script. So I may definitely say that Headwind MDM supports CentOS (we’ll add a question and answer about CentOS soon!)
It is better to have a product which supports Android and iPhone/iPad.


