I am using Bruteforce, honeydrive on this one, the code is messed up as the install went sidewise on me a bit, they were missing lines where there should have been and didnt pull files to proper areas and i had to compile a few lines to get it to flow correctly, i am still working on it.
This is on standby till morning here, AbsyntH mentioned some things to me I do appreciate his input, I will work on this with him if he likes to, for right now, I have nothing to show him as I am having issues with accessing the machine itself, and it needs to be worked out, he has brought OSSIM to my attention as well, so that is a possibility in the future as well. I am at 90% done, working out quirks I do need sleep its now 4:43am here CST USA … see you later today 
Leave your questions as you see fit, thanks
Still being ironed out, and working around a few issues … Will have this ready soon, facing some exhaustion issues… lately, I hope to have this worked out in the next few days
Phil
*THIS IS IN CAPS SO YOU SEE IT!
strong text NOTE: USE AT YOUR OWN RISK, IF YOU KNOW LINUX YOU SHOULD BE FINE, YOU MUST KNOW COMMAND LINE AND SCRIPTING, I AM NOT RESPONSIBLE SHOULD YOU BREAK THE DISTRO, THIS IS STILL ACTIVELY BEING WORKED ON AND MAY NOT BE COMPLETE. THIS IS JUST THE GENERALIZED INSTALL. I AM TRANSLATING FROM MY NOTES INTO A PROPER INSTALL THAT IS STABLE.
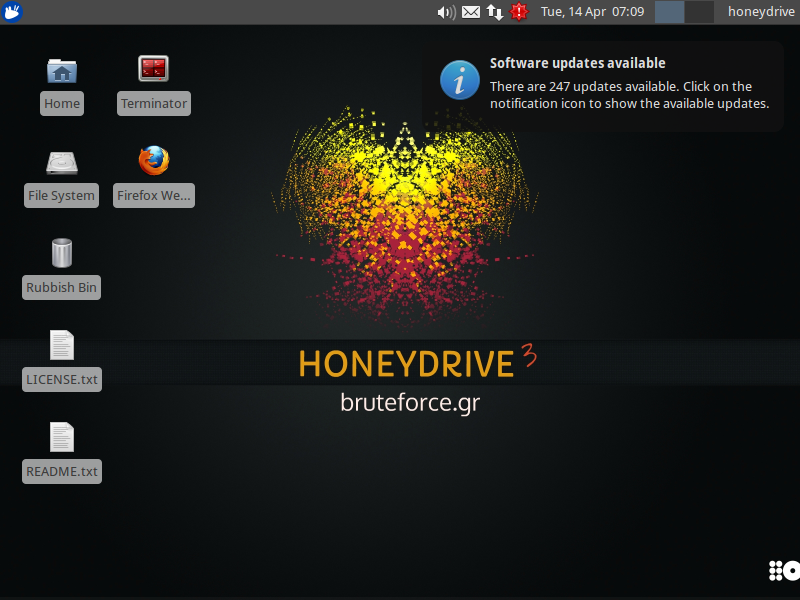
Finally Got it to work: So its running Honeydrive 3 Royal Jelly.ova
go here for the readme file: you need this to run it:
http://sourceforge.net/projects/honeydrive/files/HoneyDrive%203%20Royal%20Jelly%20edition/
[Specs]
OS: Xubuntu Desktop 12.04.4 LTS i386
HDD: 80GB VMDK (dynamically allocated)
Localization: English (United States)
Keyboard layout: English (United States)
Timezone: UTC (Coordinated Universal Time)
[System]
Connectivity: DHCP
Hostname: honeydrive
User: HoneyDrive
Username/password: honeydrive/honeydrive
Sudo password: honeydrive
Log in automatically: enabled
[Virtualization]
VBox Guest additions: installed
Shared Clipboard: bidirectional
Drag’n’Drop: disabled
[LAMP]
Apache 2 support: PHP, Perl, Python, Ruby/Rails
Document root: /var/www/
Apache 2 changes: AllowOverride All (/var/www/), ServerTokens Minimal, ServerSignature Off
Apache php.ini changes: max_execution_time = 300
max_input_time = 180
memory_limit = 256M
post_max_size = 256M
upload_max_filesize = 256M
max_file_uploads = 40
MySQL root password: honeydrive
[Kippo]
Location: /honeydrive/kippo/
Start script: /honeydrive/kippo/start.sh
Stop script: /honeydrive/kippo/stop.sh
Downloads: /honeydrive/kippo/dl/
TTY logs: /honeydrive/kippo/log/tty/
Credentials: /honeydrive/kippo/data/userdb.txt
MySQL database: kippo
MySQL user/password: root/honeydrive
[Kippo-Graph]
Location: /var/www/kippo-graph/
Configuration: /var/www/kippo-graph/config.php
URL: http://local-or-remote-address/kippo-graph/
MySQL database: kippo
MySQL user/password: root/honeydrive
[Kippo-Malware]
Location: /honeydrive/kippo-malware/
[Kippo2MySQL]
Location: /honeydrive/kippo2mysql/
MySQL database: kippo2mysql
MySQL user/password: root/honeydrive
[Kippo2ElasticSearch]
Location: /honeydrive/kippo2elasticsearch/
MySQL database: kippo
MySQL user/password: root/honeydrive
ElasticSearch index: kippo
ElasticSearch type: auth
Kibana dashboard: http://localhost/kibana/#/dashboard/elasticsearch/Kippo2ElasticSearch
[Kippo-Scripts]
Location: /honeydrive/kippo-scripts/
Scripts: + kippo-sessions
+ kippo-stats
+ kippo2wordlist
[Dionaea]
Location: /opt/dionaea/
Start script: /honeydrive/dionaea-vagrant/runDionaea.sh
Binary: /opt/dionaea/bin/dionaea
Configuration: /opt/dionaea/etc/dionaea/dionaea.conf
Logs: /opt/dionaea/var/log/
SQLite database: /opt/dionaea/var/dionaea/logsql.sqlite
Malware samples: /opt/dionaea/var/dionaea/binaries/
Log rotation: enabled
phpLiteAdmin: /var/www/phpliteadmin/
[DionaeaFR]
Location: /honeydrive/DionaeaFR/
Script: /honeydrive/DionaeaFR/manage.py
[Dionaea-Scripts]
Location: /honeydrive/dionaea-scripts/
Scripts: + mimic-nepstats
+ dionaea-sqlquery
[Honeyd]
Binaries: + /usr/bin/honeyd
+ /usr/bin/honeydstats
Init file: /etc/default/honeyd
Configuration: /etc/honeypot/honeyd.conf
Scripts: /usr/share/honeyd/scripts/
Logs: /var/log/honeypot/honeyd.log
[Honeyd2MySQL]
Location: /honeydrive/honeyd2mysql/
MySQL database: honeyd2mysql
MySQL user/password: root/honeydrive
[Honeyd-Viz]
Location: /var/www/honeyd-viz/
Configuration: /var/www/honeyd-viz/config.php
URL: http://local-or-remote-address/honeyd-viz/
MySQL database: honeyd2mysql
MySQL user/password: root/honeydrive
[Honeyd-Scripts]
Location: /honeydrive/honeyd-scripts/
Scripts: + honeyd-geoip
+ honeyd-geoip-cymru
[Amun]
Location: /honeydrive/amun/
Start script: /honeydrive/amun/amun_server.py
Configuration: /honeydrive/amun/conf/amun.conf
Malware samples: /honeydrive/amun/malware/
Logs: /honeydrive/amun/logs/
MySQL database: amun_db
MySQL root/password: root/honeydrive
[Amun-Scripts]
Location: /honeydrive/amun-scripts/
+ amun_statistics
[Glastopf]
Location: /honeydrive/glastopf/
Honeypot location: /honeydrive/glastopf-honeypot/
Configuration: /honeydrive/glastopf-honeypot/glastopf.cfg
Start script: /usr/local/bin/glastopf-runner
Logs: /honeydrive/glastopf-honeypot/log/glastopf.log
SQLite database: /honeydrive/glastopf-honeypot/db/glastopf.db
phpLiteAdmin: /var/www/phpliteadmin/
[Conpot]
Location: /honeydrive/conpot/
Configuration: /honeydrive/conpot/conpot/conpot.cfg
Start script: /honeydrive/conpot/bin/conpot
Logs: /honeydrive/conpot/conpot.log
SQLite database: /honeydrive/conpot/logs/conpot.db
phpLiteAdmin: /var/www/phpliteadmin/
[Wordpot]
Location: /honeydrive/wordpot/
Configuration: /honeydrive/wordpot/wordpot.conf
Start script: /honeydrive/wordpot/wordpot.py
Logs: /honeydrive/wordpot/logs/
[Thug]
Location: /honeydrive/thug/
Start script: /honeydrive/thug/src/thug.py
Logs: /honeydrive/thug/logs/
Malware samples: /honeydrive/thug/samples/
[PhoneyC]
Location: /honeydrive/phoneyc
Start script: /honeydrive/phoneyc/phoneyc.py
Logs: /honeydrive/phoneyc/log/
Downloads: /honeydrive/phoneyc/log/downloads/
Malware samples: /honeydrive/phoneyc/samples/
[LaBrea]
Binary: /usr/sbin/labrea
Configuration: /etc/labrea/labrea.conf
[Tiny Honeypot]
Location: /usr/share/thpot/
Binary: /usr/sbin/thpot
Configuration: /etc/thpot/thp.conf
Examples: /usr/share/doc/tinyhoneypot/examples/
Logs: /var/log/thpot/
[IIS Emulator]
Location: /usr/share/iisemulator/
Honeyd example: /usr/share/doc/iisemulator/examples/honeyd.conf
[INetSim]
Location: /usr/share/inetsim/
Binary: /usr/bin/inetsim
Configuration: /etc/inetsim/inetsim.conf
Logs: /var/log/inetsim/
[Maltrieve]
Location: /opt/maltrieve/
Script: /opt/maltrieve/maltrieve.py
Configuration: /opt/maltrieve/maltrieve.cfg
Logs: /opt/maltrieve/maltrieve.log
Malware samples: /opt/maltrieve/archive/
Malware categorizer: /opt/maltrieve/maltrievecategorizer.sh
[ELK::ElasticSearch]
Location: /usr/share/elasticsearch/
Start script: /etc/init.d/elasticsearch
Configuration: + /etc/elasticsearch/
+ /etc/defaults/elasticsearch
Logs: /var/log/elasticsearch/
[ELK::Logstash]
Location: /opt/logstash/
Start script: /opt/logstash/bin/logstash
Configuration: /etc/logstash/conf.d/
Patterns: /opt/logstash/patterns/
Logs: /var/log/logstash/
Logstash contrib: installed
[ELK::Kibana]
Location: /var/www/kibana/
Configuration: /var/www/config.js
Allow only localhost: enabled
URL: http://localhost/kibana/
[Security/Forensics/Malware Tools]
EtherApe
nmap + Zenmap + Umit Network Scanner
Wireshark + tshark
dnstop
MINI DNS Server
dnschef
ClamAV + ClamTk
ettercap (graphical)
The Sleuth Kit + Autopsy
htop
ntop (admin credentials: admin/honeydrive)
ngrep
p0f
Flawfinder
Automater
TekCollect
hashMonitor
corkscrew
cryptcat
netcat
socat
hsim
VBinDiff
hexdiff
UPX
ssdeep
md5deep
pdftk
Flasm
dex2jar
DFF (Digital Forensics Framework)
pdf-parser
pdfid
disitool
NASM
Dissy
HT Editor
exiftool
shellcode2exe
Radare2 + Bokken
Pyew + Bokken
Pipal
John the Ripper
Origami
chaosreader
dsniff
hping3
Scapy
netexpect
Tcpreplay
tcptrace
tcpslice
sslstrip
mitmproxy
mitmdump
libemu
Yara
Recon-ng
SET (Social-Engineer Toolkit)
MASTIFF + MASTIFF2HTML
Viper
Minibis
Nebula
Burp Suite
xxxswf
extract_swf
Java Decompiler (JD-GUI)
JSDetox
extractscripts
AnalyzePDF
peepdf
officeparser
DensityScout
YaraGenerator
IOCExtractor
sysdig
Bytehist
PackerID
RATDecoders
androwarn
passivedns
BPF Tools
SpiderFoot
hashdata
LORG
[Firefox Add-ons]
Firebug
NoScript
Adblock Plus
Disconnect
JavaScript Deobfuscator
Undo Closed Tabs Button
PassiveRecon
[Extra Software]
phpMyAdmin
phpLiteAdmin
Adminer
PuTTY SSH Client
7zip
Furius ISO Mount
GParted
gedit
Terminator
VYM - View Your Mind
WebHTTrack Website Copier
UNetbootin
RecordMyDesktop
Shutter
gURLChecker
Xpdf
Sagasu
[Removed]
Kojoney
mwcrawler
Vidalia
ircd-hybrid
DNS Query Tool
DNSpenTest
VLC
Parcellite
Open Penetration Testing Bookmarks Collection (Firefox)
This tutorial was not easy in the least bit, lots of difficulties: Follow slow, you are going to need to know some modifications and code to get it to run and may need to tinker with script lines:
This is the closest tutorial i could find to what i did, even tho i did not use it, i completely debugged and compiled all code and scripts on my own.
its not even close, i had to debug a lot of the code which didnt work…
We are going after phpvirtualbox to do this install:
Dependencies are the following:
Binutils gt gcc make patch libgomp glibc-headore glibc-devel kernel-headers kernel-devel dkms php php-devel httpd httpd-devel unzip php-soap
If that does not work one at a time:
yum install gcc
yum install php-devel
till you get them all you may be missing a few, this might work as well:
yum -y groupinstall “Development Tools”
This is basically the Development tools for CentOS
Some of these might be installed already for you, I only needed to install some of the modules, most were there already. I had most of the development tools installed all i needed was php and the php-soap extension.
Steps are:
Step 1 : Install Dependency software packages.
Step 2 : Download, install and configure VirtualBox.
Step 3 : Install and configure phpvirtualbox.
Step 4 : Access phpvirtualbox web based console.
pay attention to the virtualbox version, its best to download the newest and install that, you can add the virtualbox repo to your repolist
Run this:
wget -O /etc/yum.repos.d/virtualbox.repo http://download.virtualbox.org/virtualbox/rpm/rhel/virtualbox.repo
after you added that:
you can now run yum -y install VirtualBox-4.3 to install the latest version of Virtualbox.
next you need to execute:
cd /tmp/ && wget http://download.virtualbox.org/virtualbox/4.3.12/Oracle_VM_VirtualBox_Extension_Pack-4.3.12-93733.vbox-extpack
Pay attention to the version, so that it is the latest, but this one should work:
Next, run the commands below to install the extension pack.
VBoxManage extpack install Oracle_VM_VirtualBox_Extension_Pack-4.3.12-93733.vbox-extpack
check install by running:
/etc/init.d/vboxdrv setup
it should recompile the install for you, wait for it … do not interrupt it
once that is installed
you need to create a user for vbox:
and password:
useradd:vbox
passwd vbox
should prompt you for a pass
vbox is fine
this is temporary just until you get it running then change it after to something more complex or limit vbox user to local only.
cd /tmp directory
Download and unzip the latest version of the phpVirtualBox:
wget ‘http://sourceforge.net/projects/phpvirtualbox/files/latest/download’ -O phpvirtualbox-latest.zip
unzip phpvirtualbox-*.zip
Check your version make sure its the latest:
Then, copy the phpVirtualBox files to the phpvirtuallbox in /var/www/html/
verify all your files are in the /var/www/html/phpvirtualbox directory
Edit /etc/default/virtualbox
using nano or Vi
Your settings should look similar to this:
VBOXWEB_USER=‘root’
VBOXWEB_HOST=127.0.0.1
VBOXWEB_PORT=18083
cd /var/www/html/phpvirtualbox
edit config.php
using nano or vi
Pay attention to these lines:
var username:vbox
var password:vbox
Soap URL vboxwebserv(not phpvirtualboxe’s URL)
var location = http://127.0.0.1:18083/;
var servers =array (
array (
‘name’ = ‘London’
‘username’ = ‘vbox’
‘password’ = ‘vbox’
location => http://192.168.x.x (location of server):18083/;
“authmaster” > true, // use this server for authentication/’
//host /ip to use for console connections
var$ console host = 192.168.X.X (location of server) ';
cd to tmp /
or use a download folder where you want to put the distro
Then
wget http://sourceforge.net/projects/honeydrive/files/HoneyDrive%203%20Royal%20Jelly%20edition/HoneyDrive_3_Royal_Jelly.ova/download
Open up another terminal session:
type vboxwebsrv
This should show up:
Oracle VM VirtualBox web service Version 4.3.26
© 2007-2015 Oracle Corporation
All rights reserved.
VirtualBox web service 4.3.26 r98988 linux.amd64 (Mar 16 2015 19:14:48) release log
00:00:00.000198 main Log opened 2015-04-14T06:02:32.667841000Z
00:00:00.000201 main Build Type: release
00:00:00.000211 main OS Product: Linux
00:00:00.000214 main OS Release: 2.6.32-504.12.2.el6.x86_64
00:00:00.000215 main OS Version: #1 SMP Wed Mar 11 22:03:14 UTC 2015
00:00:00.000252 main DMI Product Name: PowerEdge 2850
00:00:00.000267 main DMI Product Version:
00:00:00.000385 main Host RAM: 15950MB total, 14553MB available
00:00:00.000393 main Executable: /usr/lib/virtualbox/vboxwebsrv
00:00:00.000395 main Process ID: 14558
00:00:00.000396 main Package type: LINUX_64BITS_EL_6
00:00:00.223615 SQPmp Socket connection successful: host = default (localhost), port = 18083, master socket = 8
hit ctrl-c to stop
next:
edit your iptables:
cd /etc/sysconfig/
nano or vi iptables
add:
-A loc2fw -p tcp -m tcp --dport 5000 -m comment --comment “vboxvirt” -j ACCEPT
(Your line may differ slightly)
Restart vboxwebsrv
If you dont see anything recheck your settings: you should see it start up:
If it does as shown above:
Then
go to http://192.168.x.x/phpvirtualbox/ (your machine ip)
when it starts set up the virtual machine as the following:
import the Honeynet3RoyalJelly File,it should set everything for you.
go to display set under video or display to port 3389 to port 5000
on the Remote Desktop Server Port
Push your video ram to 64mb
On Remote Display
Server Port:5000
Authentication:None
Authentication Timeout:5000
Right click to start up the virtual session
When you start up hit console in the right corner …you should see a small display an then it should bring you to a login screen leave it empty watch the screen in a few mins it should all come up and boot into HoneyDrive
Final Screen: