My little experience on how upgrade an old LS-WXL too small to be useful (1TB RAID1, WD green) to a better size (2tb RAID1, WD Red, used).
- Look for an used QNAP or Synology
- have some polite and respectful negotiation
- dont let the offerer deflect you, ask for the correct model for being sure of state of support and version of firmware supported by the producer
- wait for delivery
- enjoy and setup the new box
- remove old hard drives
- smash your old Buffalo for waste recycle or fill it with old 300gb drives and use it as a gift for your worst enemy


Still there? Still want to know?

Really? (did I at least make laugh a bit?)
Well… it’s not “that fun”.
At least for LS-WXL and some other product of the same age, there are no options for:
- expand in-place the storage (with different disks)
- backup and/or restore configuration
so any change to the storage become a “back to /”, unless the size of the replacing disk is slightly bigger than the dead one. Another option is to backup the NAS content on a USB-Connected Hard Drive, but currently i have no capable size for USB drive or it’s occupied with other stuff/use case.
I am a linux noob. I use *ubuntu for lots of my tests (today I take a run on Regolith as alternative to Plasma), and i get along with some patience with bash/terminal… but i don’t easily give up and i am no expert.
So… let’s take a ride…
You need:
- Windows to run the tools provided by Buffalo (NasNavigator and firmware updater are necessary/useful) and a “one more thing”…
- a DHCP server
- a decent 1GBe switch
- a linux installation on a desktop computer, with at least 1GBe network card (PCI/PCIe, at least for keeping the long transfer low on CPU consumption. Don’t waste a good Intel card for that); next points are related to the linux installation
- SMBv1 support
- a partitioning tool (gparted or gnome-disks are nice enough)
- enough knowledge of your distro for installing XFS support (if not available as default)
- an easy tool for mounting SMB shares (AFAIK no NFS support, but don’t quote me on that, please) if your skills lacks (i go for Gigolo)
mdadm- something nice to do, drink, eat while waiting… not on your PC!..
- a lot of time and patience
I am assuming that Windows, Linux desktop and NAS are lying on the same network segment/lan.
- Take note of all the “meaningful” settings of your NAS (users, shares, network, alerts, energy save). Screenshot, a text file, the things that you like most. But it has to be handy to get on. I strongly suggest to not use cell photos. Then shut down the NAS.
- While waiting the shutdown, connect both “new” disks to the linux computer via SATA, get sure that both disks are empty (no partitions at all). If not already install, now it’s time to install
mdadm. - Remove both old disks from the NAS; install only one “new” disk into the NAS, bay 1. Time to mark it if not already marked. This is necessary if you don’t want RAID0.
If you want RAID0, plug both drives now, firmware install will format both disks and create a stripe setting. - Connect one of the old disks to your linux installation, two if you have a RAID0 source disk, boot both devices.
- NAS currently is in EM (emergency) mode, led will flash accordingly. Take a read on your manual for being sure about that.
- Time to credit source… http://www.herzig-net.de/?page=unbrick_ls-wxl
On Windows, into the folder of the firmware update tool, there’s a file called LSUpdater.ini edit with your favourite text editor, change the flags section like this
[Flags]
VersionCheck = 0
NoFormatting = 0
then add
[SpecialFlags]
Debug=1
then start the updater.
I personally did not followed all the steps indicated into the page, simply allowed reformatting for the first disk, then the NAS was in DHCP mode and the updater were able to install firmware, reboot the device, and give this… “not that nice” login
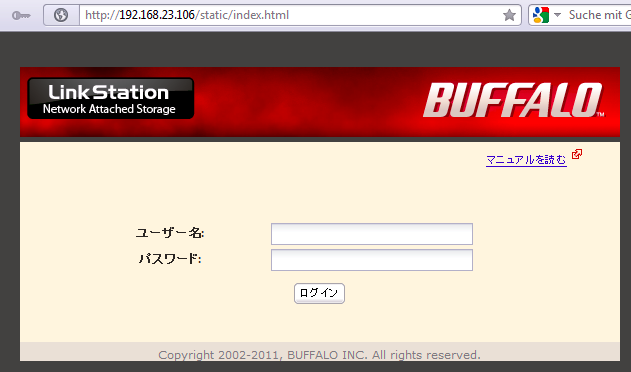
(username and password are currently the default ones)
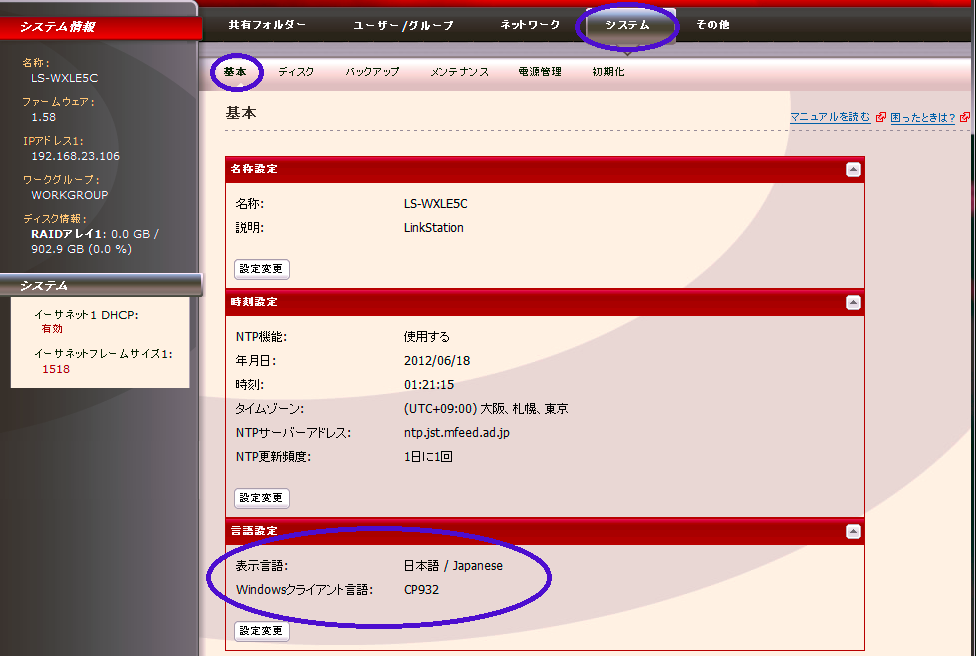
I do not know japanese, so… this might come handy
But i did not choose this Codepage, into settings are available also Western European ISOs codes (ISO8859_1)
Also… this sequence of things (boot, firmware install, editing of the language) will take… more time that you should like. So… Switch to the Linux install.
(edit and note time… NAS Navigator and the firmware updater are not that “polished” but at least NAS Navigator tells you quite reliably the IP address and the status of the NAS even without decoding led blinks. Also, if the IP address is in “APIPA Mode” AKA 169.254.x.y/255.255.0.0; in this case, configure a dual stack ip one matching with DHCP and one with APIPA address and no gateway might help to solve issues) - Boot up your favourite distro, if already not done, enable SMBv1, install XFS support and please… be careful. You still have a backup into the other “old” drive, but dont be reckless and remember than copy is far more safer than move
The drive you connected have… .a lot of wasted spaces at the end (something like 8GB, i don’t know if this is a way for give a bit more… room for different disk size), and at least six partitions, the last one is the bigger.
Filesystem is XFS, and it contain all the data of your shares. Mount it wisely, don’t mess around, mount only that parition (if the drive is/dev/sdc, partition will be/dev/sdc6) but wait…not directly. Partition is part of anmdadmvolume, and my distro mounted it quite automatically when i had the package installed, but assuming that that not happened, this might be helfpul
mdadm -A -R /dev/md9 /dev/sdc6
assuming that the “old drive” disk 1 of the NAS issdcfor the system. Add a sudo if your user is notroot
Ifmdadmand XFS support are already available, you will see the/dev/md9available for mount, in every place you like.
I also really don’t know how to handle a “old” RAID0 setup, mostly because i did not had to face it. Assuming that the partition structure would be the same on both disks, and the “old” Disk 2 is mapped/dev/sddinto the system, maybe the correct instruction should bemdadm -A -R /dev/md9 /dev/sdd6, but look formdadmdocumentation about RAID0 for checking if the instruction is right and the striping volume is working as intended. - Back on NAS. Did you already switched to your favourite language? Wonderful. Time to shut it down again, and plug in the “new” Disk2 into the NAS after shutdown. Then power on again the NAS
- Time for decisions… RAID1, RAID0, two disks? IMHO, RAID1 is the only option, but feel free to follow the flow. Part of the decision was taken to step 1, if you plugged only 1 disk.
- Format “New” Disk2 from the NAS Management.
If you want RAID1, pair Disk1 to Disk2 via EDB settings. It’s really counter-intuitive to use but Disk2 had to be formatted for allow pairing. Disk2 will be formatted again after pairing, and after that the NAS will sync the two filesystems, but it will also allow you to write data into.
If you want dual disk, keep it like that
- Back to Linux time!
If like me you’re starting from RAID1, it’s only matter of… browsing the mounted XFS partition, you’ll find a directory for any share created into previous NAS life. Create matching shares (with the correct options and permissions/restrictions), if you need par-user access be smart and create users first, than the shares with the restrictions. Then mount the shares. - It’s copy time. Yeah. It is. Your brewed infusion, your nicest book, your preferred potion. Launch the copy from mounted mdadm volume to the SMB shares mounted. Than go away… if you choose the dual disk setup, the same thing had to be done for “old” Disk2 for copying data into the share of the “new” Disk2. And keep brewing, drinking, reading, enjoying… Maybe a little tour on AnyDesk as “remote checkup tool” (available also for Linux and Smartphone) could ease the stress to get back to the screen. Or…
- Or you look for the SMBv2 hack. YES!
Buffalo updated until few months ago the firmware to my device for a vulnerability, but did not ever allowed “plainly” to use SMBv2 on this device. But SAMBA into this box is already SMBv2 capable!
Windows… still there dude? Go for ACP-Commander and please… unlock the power of Buffalo! - Wait the end of the copy, Enable SSH via ACP-Commander on NAS, create a root password and time for SCP!. Some are brave and use a console emulator, i go with portable WinSCP, than could allow you to edit “in place” the files.
- Create a copy of
/etc/init.d/smb.shon the NAS, then if you’re a pro of the console, you can edit via SSH, but i played safe, and copied on my computer.
Look for row/usr/local/sbin/nas_configgen -c samba
added the rowsed -i '2 i\ max protocol = SMB2' /etc/samba/smb.confimmediately after
Copy backsmb.shon the NAS, overwriting the existing one
Then reboot NAS. And wait. - After a lot of time (at least 15-20 minutes) when i was convinced that i screwed my crappy NAS, SMB shares were visible and … browsable by Windows 10 without tips and tricks about enabling SMBv1 (which is bad and I strongly suggest you to not use)
… ok… all ladies and dudes are sleeping… curtain calls… Don’t forget to be patient. NAS is slow on booting, copying, shutting down, syncing… If you’re into a rush… do something else while waiting.
A “way” to save a humongous amount of time is format the “new” Disk 1 on the NAS, create the shares, then shut down the NAS and use linux installation for copy from “partition 6” on old Disk 1 to “partition 6” on “new” Disk 1. But i wasn’t able to mount/run both mdadm volumes at the same time, because after starting the first or the second mdadm device, the other one was marked as busy. Stopping the first one also won’t allow me to get to the second one, and viceversa. A reboot everytime (thanks crappy 60g SSD with the portable linux toolbox inside… at least you were snappy at reboot)

