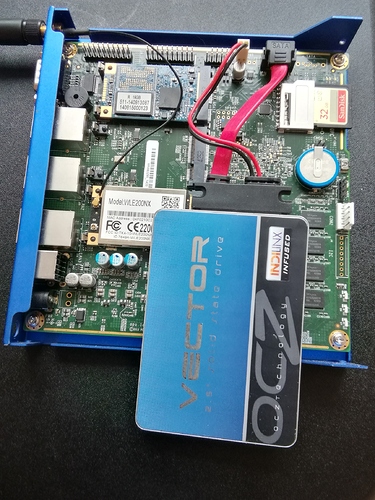
#Installing NethServer into a [PC Engines APU][1]
- Create and Configure the PXEServer
- Boot the the PC Engine
- Install NethServer over CentOS
##Install CentOS on APU
This guide will help you install a CentOS 6.6 PXE server, to install CentOS 6.6 on a APU PC Engine’s, after that you will be able to follow docs.nethserver.org/en/latest/installation.html#install-on-centos.
###Install a minimal CentOS 6.6 than Install the needed for the PXEServer
yum install tftp-server syslinux httpd dhcp
###Configure the xinetd TFTP service
vi /etc/xinetd.d/tftp.
\# default: off
\# description: The tftp server serves files using the trivial file transfer \
\#	protocol.  The tftp protocol is often used to boot diskless \
\#	workstations, download configuration files to network-aware printers, \
\#	and to start the installation process for some operating systems.
service tftp
{
	socket_type		= dgram
	protocol		= udp
	wait			= yes
	user			= root
	server			= /usr/sbin/in.tftpd
	**server_args		= -s /tftpboot**
	**disable			= no**
	per_source		= 11
	cps			= 100 2
	flags			= IPv4
}
###Setup TFTP directory and files
mkdir -p /tftpboot/pxelinux.cfg
mkdir -p /var/www/html/CentOS/6.6
cp /usr/share/syslinux/pxelinux.0 /tftpboot/
cp /usr/share/syslinux/menu.c32 /tftpboot/
cp /usr/share/syslinux/memdisk /tftpboot/
cp /usr/share/syslinux/mboot.c32 /tftpboot/
cp /usr/share/syslinux/chain.c32 /tftpboot/
###Edit PXE default
vi /tftpboot/pxelinux.cfg/default
serial 0 115200
default centos-serial
prompt 0
timeout 0

label centos-serial
  kernel http://192.168.1.5/CentOS/6.6/images/pxeboot/vmlinuz console=ttyS0,115200n8
  append initrd=http://192.168.1.5/CentOS/6.6/images/pxeboot/initrd.img method=http://192.168.1.5/CentOS/6.6 devfs=nomount console=ttyS0,115200n8
###Download and mount the CentOS minimal iso and mount this file.
cd /var/tmp
wget http://archive.kernel.org/centos-vault/6.6/isos/x86_64/CentOS-6.6-x86_64-minimal.iso
mount -o loop /var/tmp/CentOS-6.6-x86_64-minimal.iso /var/www/html/CentOS/6.6/
###Configure DHCPd
vi /etc/dhcp/dhcpd.conf. Change your domain, nameservers and ip-adresses.
\# dhcpd.conf
\#
\# option definitions common to all supported networks...
option domain-name "yourdomain.com";
option domain-name-servers ns1-ip-address, ns2-ip-address;
default-lease-time 600;
max-lease-time 7200;
ddns-update-style none;
authoritative;
log-facility local7;
subnet 192.168.1.0 netmask 255.255.255.0 {
  range 192.168.1.100 192.168.1.110;
  **option routers 192.168.1.1;**
  allow booting;
  allow bootp;
  **next-server 192.168.1.5;**
  filename "pxelinux.0";
}
option option-128 code 128 = string;
option option-129 code 129 = text;
###Configure SE Linux read/write rights to the tftpboot directory.
yum -y install policycoreutils-python
semanage fcontext -a -t tftpdir_rw_t '/tftpboot(/.*)?'
restorecon -R -v /tftpboot
###Allow http, tftp and dhcp traffic
vi /etc/sysconfig/iptables
-A INPUT -m state --state NEW -m tcp -p tcp --dport 80 -j ACCEPT
-A INPUT -m state --state NEW -p udp --dport 69 -j ACCEPT
-A INPUT -i eth0 -p udp --dport 67:68 --sport 67:68 -j ACCEPT
###Add tftp conntrack module
vi /etc/sysconfig/iptables-config
IPTABLES_MODULES="ip_conntrack_tftp"
###Configure services to start at boot, and start services.
chkconfig xinetd on
chkconfig httpd on
chkconfig dhcpd on
service iptables restart
service xinetd start
service httpd start
service dhcpd start
##Install CentOS on the APU
- Plug the Serial Cable, i’m my case screen : /dev/ttyUSB0 115200
- Fire the PC Engine
- Press F12 and activate the Netboot
- AHCI/0: SuperSSpeed S328 16GB ATA-7 Hard-Disk (15258 MiByte
** 2. iPXE (PCI 00:00.0)** - Payload [setup]
- Payload [memtest]
####Select iPXE
net0: 00:0d:b9:33:CA:FE using rtl8168 on PCI01:00.0 (open)
[Link:down, TX:0 TXE:0 RX:0 RXE:0]
[Link status: Down (http://ipxe.org/38086101)]
Waiting for link-up on net0… ok
Configuring (net0 00:0d:b9:33:CA:FE)… ok
net0: 192.168.1.100/255.255.255.0 gw 192.168.1.1
Next server: 192.168.1.5
Filename: pxelinux.0
tftp://192.168.1.5/pxelinux.0… ok
PXELINUX 4.02 0x534d43b1 Copyright © 1994-2010 H. Peter Anvin et al
Loading http://192.168.1.5/CentOS/6.6/images/pxeboot/vmlinuz…
Loading http://192.168.1.5/CentOS/6.6/images/pxeboot/initrd.img…
…
The system will now boot the CentOS text installer.
Select “English” using tab/spacebar.
Select “eth0”.
Select ipv4 (and ipv6 if needed).
Network manager will configure eth0 (dhcp).
Choose VNC installer or text based… lets try VNC.
┌──────────┤ Would you like to use VNC? ├──────────┐
│ Text mode provides a limited set of installation │
│ options. It does not allow you to specify your │
│ own partitioning layout or package selections. │
│ Would you like to use VNC mode instead? │
│ ┌───────────┐ ┌──────────────┐ │
│ │ Start VNC │ │ Use text mode │ │
│ └───────────┘ └──────────────┘ │
└───────────────────────────────────┘
Choose a VNC password… or none…
19:36:19 Please manually connect your vnc client to 192.168.1.101:1 to begin the install.
Press for a shell
19:36:20 Starting graphical installation.
Connect with a VNC viewer to 192.168.1.100:1
And here it is… the graphical installer! Have fun with CentOS on APU 
##After the reboot
you’ll be able to install NethServer by following : docs.nethserver.org/en/latest/installation.html#install-on-centos.
[1]: http://www.pcengines.ch/apu.htm


