I’m willing to learn, but i have to admit that i do not understand what to do ![]()
What i can do is providing a VPS for testing if needed and of course share what i have. I do own a domain so it would be possible to play around with DNS etc.
What i did so far:
- firewall-cmd --permanent --add-port=51822/udp
- Create Folder: mkdir -p /root/.wg-easy
- modprobe ip_tables
- modprobe iptable_filter
- modprobe iptable_nat
- modprobe wireguard
I’m not sure that all from 3 - 5 are needed. This has to be checked.
- run podman with:
podman run -d \
  --name=wg-easy \
  -e WG_HOST=*ip_or_FQDN* \
  -e PASSWORD=*a_strong_password_for_login_to_admin_interface* \
  -e WG_PORT=51822 \
  -e UI_TRAFFIC_STATS=true \
  -e WG_PERSISTENT_KEEPALIVE=25 \
  -v ~/.wg-easy:/etc/wireguard \
  -p 51822:51820/udp \
  -p 51821:51821/tcp \
  --cap-add=NET_ADMIN \
  --cap-add=SYS_MODULE \
  --cap-add=NET_RAW \
  --sysctl="net.ipv4.conf.all.src_valid_mark=1" \
  --sysctl="net.ipv4.ip_forward=1" \
  --restart unless-stopped \
  ghcr.io/wg-easy/wg-easy
Replace the values marked with **.
-
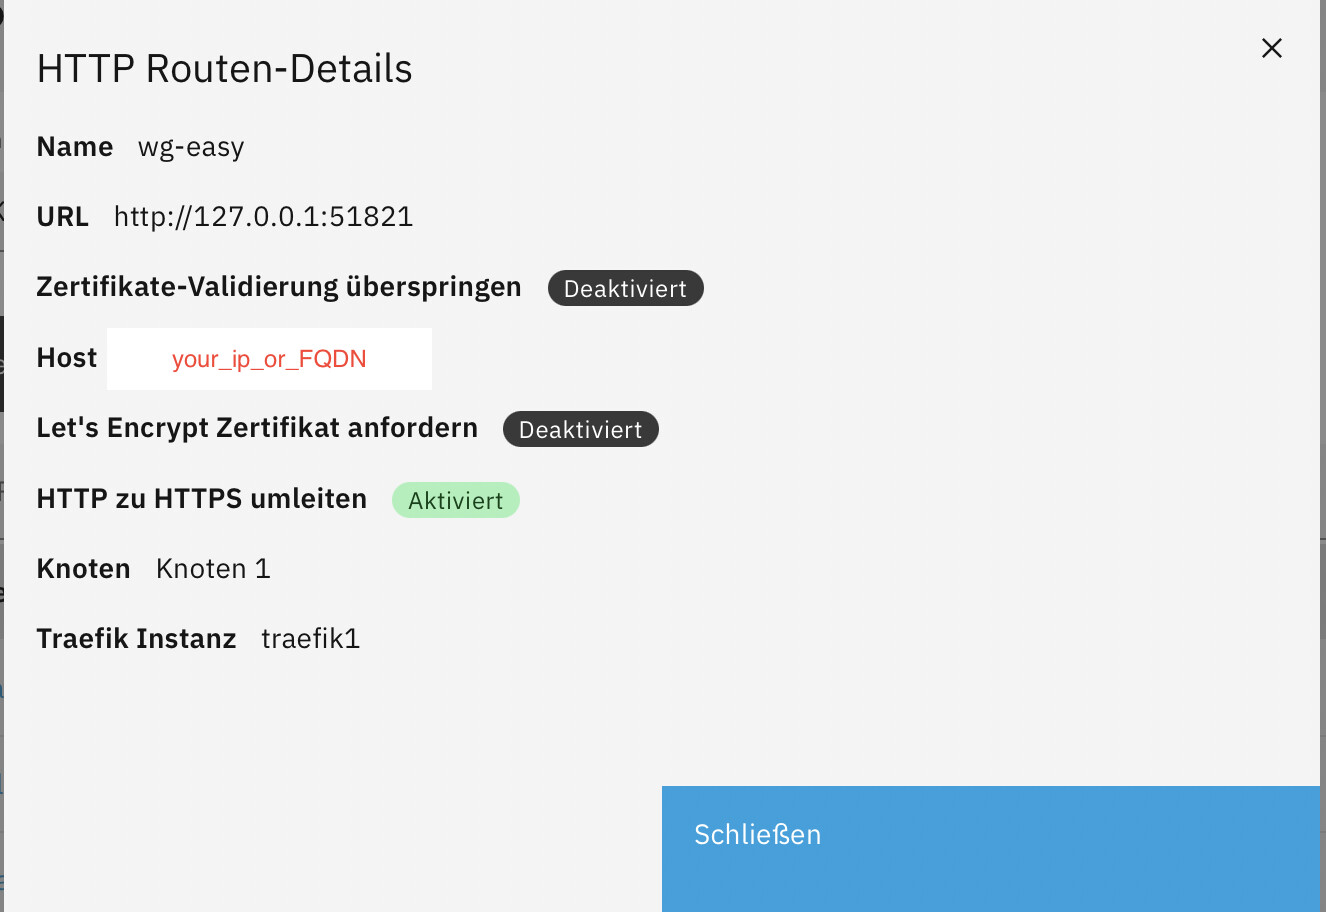
create a HTTP route with (sorry in german)
-
open https://your_ip_or_FQDN and login with the “PASSWORD” from point 7.
Further can be found here WG-Easy Github
and here WG-Easy with Podman